


Launching your own decentralized IDO (Initial DEX Offering) App Like BSCpad can be a game-changer in the crypto space. With the rise of DeFi, startups and agencies are exploring ways to replicate the success of platforms like BSCpad—offering fair, transparent token launches on Binance Smart Chain (BSC).
As a full-stack developer who built a BSCpad-like app from scratch, I’ll walk you through the complete process—from stack selection and database design to feature implementation, API integration, and deployment. Whether you’re leaning toward JavaScript (Node.js + React) or PHP (Laravel or CodeIgniter), this guide gives you both paths.
Tech Stack: Choosing Between JavaScript and PHP Approaches
When I started building the BSCpad clone, the first big decision was the tech stack. Since the target audience included startups and crypto communities expecting fast performance, clean UX, and robust admin controls, I considered both modern JavaScript and classic PHP solutions. Here’s how I broke it down.
JavaScript Stack (Node.js + React)
I chose Node.js with Express for the backend and React for the frontend when performance, scalability, and real-time interactions were priorities. React helped me build dynamic components like staking dashboards, project listing interfaces, and countdown timers for IDO launches. Using a RESTful API built with Express, I managed endpoints for token data, user KYC, staking history, and tier eligibility. Node.js also made it easy to integrate with Web3 libraries and MetaMask for wallet connections. JWT handled authentication, and I used MongoDB for its flexibility in storing nested user and project data structures.
PHP Stack (Laravel or CodeIgniter)
For clients who preferred traditional server-side rendered apps with lower dev complexity, I built versions using Laravel and sometimes CodeIgniter. Laravel’s Blade templating made it easy to render pages like project details, tier breakdowns, and KYC submission forms. Laravel’s out-of-the-box authentication scaffolding with Auth Guards helped quickly set up role-based access (admin, user, auditor). Eloquent ORM was handy for managing relational data—ideal when storing user staking levels, KYC approvals, and token launch milestones. I used MySQL with optimized indexes for faster reads and query joins on key tables like users, tiers, and projects.
When to Choose What
If you’re targeting high interactivity, crypto wallet integration, and scalability—go with JavaScript (Node.js + React). But if you want faster MVP delivery, admin-focused functionality, and less front-end complexity, PHP (Laravel/CI) works great. In some cases, I even hybridized both: React frontend calling a Laravel backend. The key is matching your stack to the business goals and expected user flow.
Read More : Best BSCPad Clone Scripts in 2025: Features & Pricing Compared
Database Design: Structuring for Flexibility and Scale
A decentralized IDO platform like BSCpad requires a database design that can handle dynamic project data, user participation tiers, staking history, and KYC processes. I’ll break down how I structured the database in both JavaScript (MongoDB) and PHP (MySQL) environments.
MongoDB (JavaScript Stack)
With Node.js, I went for MongoDB because its document-oriented structure fits perfectly for variable project details and nested arrays like multiple token sales per project. Here’s a sample schema for the projects collection:
{
  _id: ObjectId,
  title: "ProjectX Token Sale",
  tokenSymbol: "PX",
  totalRaise: 500000,
  tiers: [
    {
      name: "Bronze",
      minStake: 1000,
      allocation: 5
    },
    {
      name: "Gold",
      minStake: 10000,
      allocation: 25
    }
  ],
  whitelist: [userId1, userId2],
  status: "upcoming",
  createdAt: ISODate
}
The flexibility of MongoDB allowed me to add new fields like vestingSchedule or auditReportURL without migrations. For user data, I stored wallet addresses, staked token amount, KYC status, and participation history all in a single users document—great for speed when rendering dashboards.
MySQL with Laravel (PHP Stack)
In Laravel, I used relational models with migrations. The schema was more normalized for data integrity. For instance:
userstable with fields: id, name, wallet_address, kyc_statusprojectstable: id, title, token_symbol, total_raise, statustierstable: id, project_id, name, min_stake, allocationstakestable: id, user_id, amount, staked_atwhitelisttable: id, project_id, user_id
This design helped me run optimized queries like “list all users whitelisted for Project Y” or “find total stakes by tier for analytics.” Laravel’s Eloquent relationships (hasMany, belongsTo) made it clean to access associated data in controllers or Blade views.
Scalability Tips
For both stacks, I added indexing on wallet addresses, project slugs, and timestamps to speed up filtering. In MongoDB, I used compound indexes on fields like userId + projectId for fast participation lookups. In MySQL, foreign keys maintained consistency between related tables like users and stakes. Also, I stored tier config in a separate collection/table so it could be reused across multiple launches.
Read More : Pre-launch vs Post-launch Marketing for BSCPad Clone Startups
Key Modules & Features: Building the Core of the App Like BSCpad
From a functionality standpoint, the BSCpad clone revolves around token launches, staking, whitelisting, and tier-based participation. Whether I built it using Node.js or Laravel, I modularized these into reusable components so they could be customized for different clients and token projects. Here’s how I approached each core feature in both stacks.
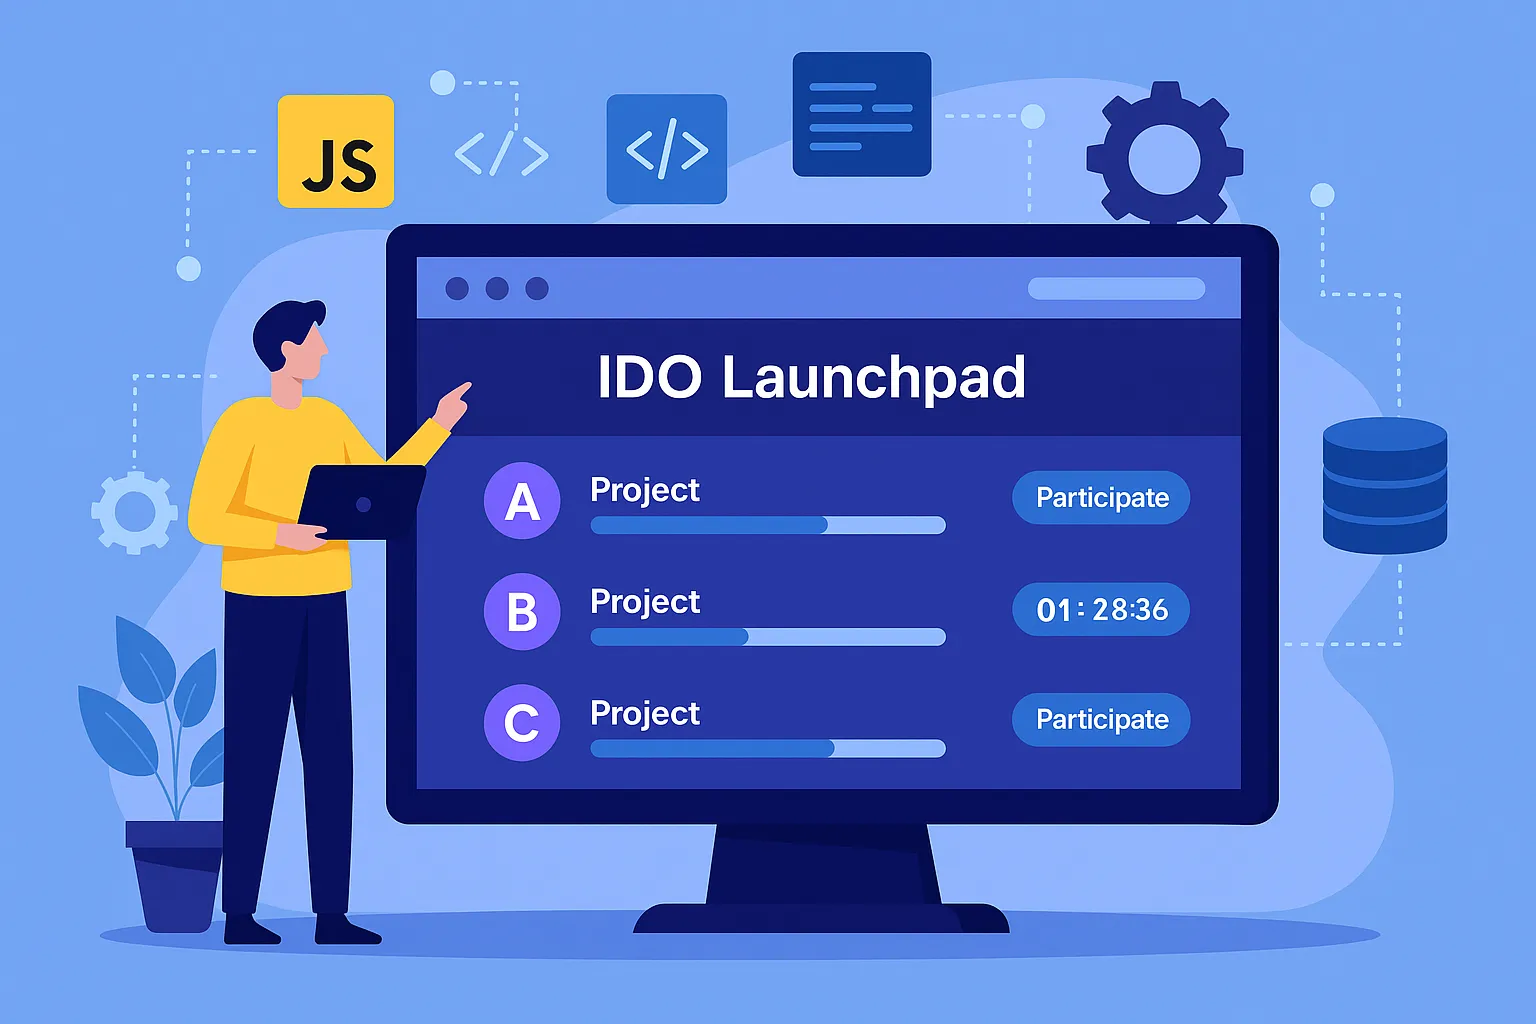
1. Project Launch Dashboard
In React, I created a card-based grid UI displaying each upcoming/past IDO. The React component pulled data from a /projects endpoint, which returned token name, total raise, status, and timer metadata. For Laravel, I used Blade templates to render a paginated list, with route-based filters like /projects?status=live.
For both stacks, the backend logic was built to support filtering (by status, tier eligibility, whitelist-only), pagination, and real-time status updates (e.g., switching a project from “upcoming” to “live”).
2. Staking & Tier System
This was a central logic block. In Node.js, I created a stakeController.js that handled:
- POST
/stake– logs user staking activity - GET
/tier/:userId– calculates the user’s tier based on stake and time locked
I also cached tier data in Redis to reduce API calls when loading dashboards.
In Laravel, I used a StakeController with methods like store() and getTier($userId), pulling user stake data and applying the same tier thresholds. The business logic lived in Laravel Services, which made it reusable and testable.
Tiers were configurable via admin panel in both setups, stored either in a tiers collection (Mongo) or table (MySQL), and referenced dynamically.
3. Whitelisting & Participation
Each project required manual or automated whitelisting. I implemented a simple UI in React that allowed admins to upload a CSV or approve users individually. For Laravel, the admin panel allowed bulk uploads via file input or manual entry using WhitelistedUserController.
On the backend, whitelisted user IDs were matched against the current session to show the “Join Pool” button. This protected the participation route from unauthorized access.
4. Token Sale Logic
This module handled pool caps, contribution tracking, and token allocations. In Node.js, I created an endpoint:
- POST
/projects/:id/participatewhich:- Verified user’s tier and whitelist status
- Checked hard cap limits
- Logged contribution with timestamp
For Laravel, I used route-based form submissions (POST /participate) with controller-level checks to enforce rules. CSRF protection was built-in with Laravel, while in Node.js I used JWT and anti-bot middlewares to secure endpoints.
5. Admin Panel
Both stacks featured a complete admin panel to manage:
- Project creation and editing
- Tier configurations
- KYC approvals
- Token sale metrics
In React, I built this with Ant Design. Data was fetched via secured APIs with JWT-based admin tokens. In Laravel, I used Voyager (a Laravel admin package) for quick setup, later customizing views with Blade and Alpine.js to refine the UX.
Read More : Reasons startup choose our bscpad clone over custom development
Data Handling: Managing Listings, APIs, and User-Generated Inputs
In building a BSCpad clone, data originates from two primary sources: external APIs (for blockchain stats, token metadata, gas price, etc.) and internal/admin-generated inputs like project listings, staking records, and whitelist entries. Handling both securely and efficiently was critical to the platform’s integrity.
Manual Project Listings via Admin Panel
Most of the project data—like token symbol, total raise, vesting schedule, tier rules—was entered manually by the admin. In React (JS stack), I built a multi-step form using Formik and Yup for validation. The form had dynamic fields that allowed admins to define multiple rounds (e.g., private, public), each with its own cap and vesting logic. On submit, data was posted to /admin/projects with the admin JWT for authorization.
In Laravel, I created a Blade form that posted to AdminProjectController@store, which validated input using Laravel’s FormRequest classes. I stored data in normalized MySQL tables, which made it easy to reuse common inputs like allocation strategies or launchpad fees across multiple projects.
External API Integration (e.g., Amadeus or Skyscanner-style)
Although BSCpad doesn’t integrate with travel APIs, it does interface with blockchain explorers oracles. For token price data, I used services like CoinGecko. Here’s how I handled that in both stacks:
JavaScript Approach (Node.js + Axios):
const axios = require('axios')

async function getTokenPrice(symbol) {
  const response = await axios.get(`https://api.coingecko.com/api/v3/simple/price?ids=${symbol}&vs_currencies=usd`)
  return response.data[symbol].usd
}
This function was triggered before displaying token info to users or calculating ROI metrics in dashboards.
PHP Approach (Laravel + Guzzle):
use GuzzleHttp\Client;

public function getTokenPrice($symbol) {
  $client = new Client();
  $response = $client->get("https://api.coingecko.com/api/v3/simple/price", [
    'query' => ['ids' => $symbol, 'vs_currencies' => 'usd']
  ]);
  $data = json_decode($response->getBody(), true);
  return $data[$symbol]['usd'] ?? null;
}
To reduce load on APIs and improve response times, I cached these values in Redis (Node) or Laravel Cache with 5-minute expiry. That way, the frontend wasn’t dependent on slow external API responses.
Data Security & Validation
Whether data came from a form or API, I always validated it rigorously. In Node.js, I used Joi to define schemas for project creation and stake submissions. In Laravel, the FormRequest class handled type casting, required fields, and cross-checks like “end date must be after start date.”
Additionally, all sensitive write operations required admin authentication and anti-bot tokens. Public read endpoints were rate-limited to prevent abuse, using express-rate-limit in Node and Laravel’s built-in throttle middleware.
Read More : BSCPad Features List: What Makes It the Launchpad Every Crypto Project Dreams Of
API Integration: Bridging Wallets, Blockchain Data, and Platform Logic
API integration is the heartbeat of a BSCpad clone—especially when it comes to wallet connections, fetching real-time blockchain stats, handling KYC, and enabling secure participation. Whether you’re building with JavaScript or PHP, clean API design is non-negotiable. Here’s how I structured this layer across both stacks.
Wallet Integration: Web3 + MetaMask
JavaScript Stack:
For wallet interactions, I used web3.js and ethers.js on the frontend. React components handled MetaMask connection using:
const connectWallet = async () => {
  if (window.ethereum) {
    const accounts = await window.ethereum.request({ method: 'eth_requestAccounts' })
    setWalletAddress(accounts[0])
  }
}
Once connected, the wallet address was stored in a secure token and sent to the Node.js backend to fetch staking history, tier status, or validate eligibility.
PHP Stack:
In Laravel, since PHP doesn’t interact directly with MetaMask, I handled wallet logic on the frontend (JavaScript) and passed the signed wallet address to the backend using an API call:
axios.post('/api/wallet-auth', { walletAddress, signature })Laravel verified the signature using a helper class and stored the session.
Project Participation API
Node.js Sample Endpoint:
app.post('/api/participate', authenticateUser, async (req, res) => {
  const { projectId, amount } = req.body
  const user = req.user
  const tier = await getUserTier(user.id)
  if (!isUserWhitelisted(user.id, projectId)) return res.status(403).send("Not allowed")
  const participation = await Participation.create({ userId: user.id, projectId, amount })
  res.status(200).json({ success: true, participation })
})
Laravel Route Example:
Route::middleware(['auth:api'])->post('/participate', [ParticipationController::class, 'store']);
Inside the controller, I used service classes to:
- Verify user tier
- Check whitelist status
- Save participation with timestamp
- Fire events to update pool caps and notify admins
KYC & External Services
For clients who requested KYC validation, I integrated third-party services like Blockpass or Sumsub.
In Node.js, I used a webhook route /kyc-callback that accepted POST requests from the provider and updated the user’s kyc_status.
In Laravel, I did the same using a KycController@handleWebhook, validating the secret token from headers and updating the database accordingly.
Admin APIs
All project creation, tier configuration, and approval workflows were done via internal APIs protected with role-based JWTs (Node) or Laravel Auth Guards with admin roles. These included:
- POST
/admin/projects - PUT
/admin/projects/:id - POST
/admin/whitelist - POST
/admin/tier-config
These APIs were used by the admin dashboard React frontend or Blade forms depending on the stack choice.
Read our complete guide on how to hire the best BSCpad clone developer to build a secure and scalable crypto launchpad platform.”
Frontend + UI Structure: Designing for Functionality and Flow
The front end of a BSCpad-like platform must strike a balance between clarity, responsiveness, and trust-building design. Whether built with React (JavaScript stack) or Blade templates (Laravel/PHP stack), I focused on delivering a seamless experience from wallet connect to IDO participation. Here’s how I structured the UI and handled responsiveness in both setups.
React (JavaScript Stack)
I used React with functional components and Hooks to build a modular, reusable interface. The layout was structured using a combination of CSS Grid and Flexbox for responsiveness. Key pages included:
- Home/Dashboard: Featured a grid of upcoming, live, and completed IDOs, each rendered via a
ProjectCardcomponent that pulled props dynamically. - Project Detail Page: Displayed token info, tier requirements, contribution form, vesting schedule, and countdown timer. I used
react-countdownfor dynamic IDO timers. - Staking Page: Showed current stake amount, staking history, and a dynamic calculator for tier upgrades.
- Wallet & Profile: After MetaMask connection, users could view their KYC status, tier eligibility, and previous participations.
I relied on Axios for API calls and React Router for page transitions. I also integrated loading spinners (react-loader-spinner) and toast notifications (react-toastify) to enhance feedback UX.
For responsiveness, I used media queries with custom breakpoints to ensure compatibility on mobile, especially for actions like joining a pool or switching tabs. I also added mobile drawer navigation with react-burger-menu.
Blade Templates (Laravel Stack)
In Laravel, the frontend used Blade with Bootstrap or Tailwind CSS. I structured the views into master templates and partials for headers, footers, and modals.
- Homepage (
home.blade.php): Used Blade@foreachto loop throughprojectspassed from the controller and show cards dynamically. - Project Detail: All logic was rendered server-side. Countdown timers used Alpine.js for lightweight reactivity.
- Staking Page: Forms posted to
StakeControllerroutes, and results were returned via redirected sessions or JSON if using AJAX. - Admin Panel: Custom-built or powered by Laravel Voyager, the UI included filters, tables, form validations, and permissions handled via middleware.
Blade made it easier to preload data without extra frontend logic. However, for dynamic interactions like switching between tiers or calculating allocations in real time, I used a bit of Vue.js or Alpine.js embedded within Blade components.
Mobile Considerations
In both stacks, I used a mobile-first design approach:
- Buttons and inputs had at least 44px hit area
- Tables became card layouts on screens <768px
- Sticky footer CTAs were added for “Connect Wallet” and “Join Pool”
- Touch-friendly dropdowns and switches replaced native selects
Performance-wise, React build was optimized with lazy loading and route splitting using React.lazy. In Laravel, I cached rendered views for anonymous users using Laravel View Caching.
Discover how much it costs to build a BSCpad-style launchpad in 2025 and how to optimize your budget for long-term profitability.
Authentication & Payments: Securing Access and Handling Transactions
Security and trust are non-negotiable in any crypto or DeFi platform, especially one that mimics the BSCpad model where real money and user identities are involved. I had to implement strong authentication for both users and admins, and handle payment flows such as token purchases, staking, and fee collection. Here’s how I approached this in both JavaScript and PHP stacks.
Authentication (Users and Admins)
JavaScript Stack (Node.js + JWT):
For the backend, I used jsonwebtoken to issue and verify access tokens. Users authenticated through wallet signatures, not traditional email-password logins. The flow looked like this:
- User connects MetaMask
- The backend sends a nonce
- User signs it with their wallet
- The signed message is verified and a JWT is returned
That JWT was stored in localStorage or HttpOnly cookies depending on client preferences. Every protected route (like /projects/:id/participate or /stake) was secured with a verifyToken middleware that parsed and validated the JWT.
Admins used a more traditional email/password login. Admin JWTs carried role claims and were restricted to admin endpoints. I also added 2FA via Google Authenticator for some clients using speakeasy.
PHP Stack (Laravel Auth Guards):
Laravel’s default auth:api guard worked well with Passport or Sanctum for token-based APIs. For wallet-based login, I built a custom guard that verified wallet signature and returned a token via createToken().
Example for user route:
Route::middleware('auth:user-api')->post('/stake', [StakeController::class, 'store']);Admins used standard Laravel login with hashed passwords, middleware like auth:admin, and route groups to restrict access. Laravel’s session management helped track login attempts and logout behaviors easily.
Payments: Staking, Participation & Platform Fees
While BSCpad itself doesn’t charge fiat, it deals with token staking and contributions. I had to simulate payment mechanics via smart contracts on BSC, but also support Stripe or Razorpay for platforms that accepted fiat (especially in client-specific adaptations).
Smart Contract-Based Staking (Web3):
- For React, I integrated Web3.js to call smart contracts directly from the frontend.
- The staking contract handled deposit, lock-in period, and withdrawal.
- I watched for blockchain events (e.g.,
StakeCompleted,TokensPurchased) and synced those to the backend via WebSocket listeners in Node.js or cron jobs in Laravel usingbscscanAPIs.
Fiat Payment Integration (Stripe / Razorpay):
Node.js Stripe Example:
const stripe = require('stripe')(STRIPE_SECRET)
app.post('/create-checkout-session', async (req, res) => {
  const session = await stripe.checkout.sessions.create({
    payment_method_types: ['card'],
    line_items: [{ price: req.body.priceId, quantity: 1 }],
    mode: 'payment',
    success_url: CLIENT_URL + '/success',
    cancel_url: CLIENT_URL + '/cancel',
  })
  res.json({ id: session.id })
})
Laravel Razorpay Example:
$api = new Api($keyId, $keySecret);
$payment = $api->payment->fetch($request->payment_id);
if ($payment->status == 'authorized') {
    $payment->capture(['amount'=>$payment->amount]);
    // Log to DB
}
In both cases, I secured callbacks/webhooks and verified signatures before updating the database. These fiat payments were used for token purchases, KYC fees, or premium platform features depending on the business model.
Read More : Top 5 Mistakes Startups Make When Building a Bscpad Clone
Testing & Deployment: Ensuring Reliability from Local to Live
Once all the features were developed and integrated, I shifted focus to testing and deployment—ensuring the BSCpad clone could run reliably in production and scale under user demand. I approached this differently in JavaScript and PHP stacks but with the same goal: stable, secure, and repeatable deployments.
Testing Strategy
JavaScript Stack (Node.js + React):
On the backend, I used Jest and Supertest to write unit and integration tests for routes like /stake, /participate, and admin APIs. I mocked wallet authentication and used an in-memory MongoDB instance during test runs.
On the frontend, React Testing Library and Jest helped simulate user actions like connecting a wallet, joining a pool, or submitting a stake. I added basic coverage tracking to ensure we weren’t missing any major flows.
PHP Stack (Laravel):
Laravel’s phpunit made it easy to test controllers, policies, and middleware. I especially focused on:
- Project creation with tier logic
- Whitelist checks
- KYC approval routes
- Stake amount calculations
Factories and seeders were used to populate test data. For integration testing, I ran php artisan test with SQLite in-memory setup to mimic live conditions without real DB hits.
Deployment & CI/CD
Node.js Deployment:
I containerized the app using Docker. Each service—API, frontend, database—was a separate container. Here’s a simplified Dockerfile for the API:
FROM node:18
WORKDIR /app
COPY package*.json ./
RUN npm install
COPY . .
EXPOSE 3000
CMD ["npm", "start"]
I used PM2 as the process manager to handle crashes and automatic restarts in production. For CI/CD, GitHub Actions deployed to DigitalOcean droplets or AWS EC2:
- Push to
maintriggered build - Tests ran automatically
- If passed, Docker image was rebuilt and deployed
Laravel Deployment:
I hosted most Laravel builds on VPS with Apache or Nginx. Here’s how I structured it:
- Composer to manage dependencies
.envfile for configurationphp artisan config:cacheandroute:cachebefore deploying- Supervisor for queue workers and scheduler for cron tasks (like stake audits)
I also set up GitHub Actions or GitLab CI to automate:
- Test run on push
- Artisan cache clear
- Deployment via SSH or Forge to production server
For database migrations, I always ran php artisan migrate with backup taken using mysqldump.
Monitoring & Logs
In Node.js, I integrated Winston and pushed logs to a central log store. In Laravel, logs were sent to storage/logs and rotated daily, then parsed via Logwatch or sent to external services.
Both stacks included UptimeRobot monitoring for downtime alerts and basic health check endpoints to verify DB and service availability.
Pro Tips: Lessons Learned Building a BSCpad Clone
After deploying several BSCpad-style platforms for clients across different stacks, I’ve collected a list of practical insights that helped streamline development, improve performance, and avoid painful post-launch issues. These tips come from real-world scenarios—each one can save you time, money, or reputation.
1. Optimize for Gas Fees and Wallet UX
On the blockchain side, even if you’re not writing smart contracts yourself, every interaction (staking, contribution, claiming tokens) costs gas. I recommend showing estimated gas fees using public APIs and letting users know what to expect before every wallet action. In React, I used ethers.utils.estimateGas() and displayed it next to the CTA button. For platforms using PHP backends, you can expose this data via JavaScript using MetaMask or Web3JS in the front-end templates.
2. Cache What You Can
APIs like CoinGecko or BscScan have rate limits. During IDO launches, many users hit the project page at once. Caching token prices, tier configurations, and project details for 60–120 seconds using Redis (Node.js) or Laravel’s Cache::remember() method significantly reduced load and latency.
3. Avoid Over-Normalizing Project Data
In early builds, I over-normalized project and tier data in MySQL, resulting in complex joins and slow dashboard rendering. For performance-critical modules, consider denormalizing repetitive data like tier labels and vesting info directly into the project table or document. This also simplifies queries for mobile apps and widgets.
4. Use Debounced Wallet Checks
On the front end, wallet connection status often re-triggers on every render or route change. I used useEffect with debounce logic to avoid unnecessary wallet pop-ups or API requests. This smoothed out the user experience and reduced load on endpoints checking eligibility and stake.
5. Design for Mobile First
A large percentage of retail crypto users are on mobile. Buttons should be large enough for touch, modals should scroll vertically, and tables should collapse into cards. I also ensured token contribution forms had numeric keyboards on mobile and avoided dropdowns for critical actions like tier selection—opt for toggle buttons instead.
6. Rate Limit and Log Everything
APIs like /participate, /stake, and /kyc-upload are sensitive and must be protected. I added IP-based rate limits using express-rate-limit in Node and Laravel’s ThrottleRequests middleware. I also logged every access attempt with user ID, IP, timestamp, and outcome to detect abuse patterns early.
Final Thoughts: Reflecting on the Build and the Trade-Offs
Building a BSCpad clone from scratch is no small feat—it’s a mix of DeFi mechanics, real-time user interaction, admin workflow logic, and Web3 integration. As a full-stack developer, one of the most rewarding parts of the project was seeing how the same business goals could be achieved via two very different technical stacks.
The JavaScript stack (Node.js + React) offered flexibility, better developer tooling, and superior real-time capabilities—especially when it came to wallet integration and dynamic user experiences. But it also required more setup and orchestration, particularly around deployment and caching.
The PHP stack (Laravel or CodeIgniter) was faster to prototype, especially for admin-heavy workflows like project management, KYC approvals, and tier configuration. With Laravel’s routing, form validation, and Blade templating, I could build stable MVPs very quickly—but the trade-off was having to mix in frontend JS when the client demanded more dynamic interactivity.
Ultimately, choosing between stacks comes down to your target user experience, your in-house team’s strengths, and your timeline. If you’re building for rapid launch with classic admin workflows, Laravel is a strong pick. If you’re focused on user-first interaction with real-time feedback and Web3 dynamics, go for Node.js + React.
If you’d rather not start from scratch, Miracuves offers a production-ready BSCpad Clone built with modular, customizable codebases available in both PHP and JS stacks. It’s ideal if you want to skip months of dev work and still retain flexibility.
FAQs: Founder-Focused Answers for Launching a BSCpad Clone
Q1: Do I need to understand blockchain development to launch a BSCpad clone?
No, but having a basic understanding helps. Most of the smart contract logic (staking, token sale) can be integrated using public contracts or audited libraries. With platforms like Miracuves’ BSCpad Clone, we abstract much of the Web3 complexity and expose easy-to-use endpoints. You can focus on business logic while still offering a fully crypto-native experience.
Q2: How do I manage different tier levels and allocation logic without hardcoding?
Both stacks support dynamic tier management. In Node.js, I used MongoDB documents to store tier rules that could be updated without redeploying. In Laravel, I stored them in a tiers table editable via the admin panel. You don’t need to hardcode tiers—instead, structure your app so tier logic pulls from a central config or DB reference.
Q3: Can I accept fiat payments (like Stripe) alongside crypto contributions?
Yes. In fact, some clients wanted to charge fiat for premium access or KYC verification. You can integrate Stripe or Razorpay in parallel with crypto wallet contributions. The trick is to isolate fiat-related flows in your participation controller logic and keep them separate from on-chain transaction handling.
Q4: How do I prevent bots and duplicate participation in token sales?
Rate-limiting and wallet whitelisting are your best defenses. I also recommend using nonces and signature-based validation for critical actions. For PHP, Laravel’s middleware stack makes it easy to throttle access. In Node.js, express-rate-limit combined with JWT and IP logging works well to stop abuse.
Q5: How long does it typically take to launch a working BSCpad clone?
If you’re starting from scratch, 6–8 weeks is realistic for a full-feature MVP—longer if you’re adding deep KYC workflows, custom smart contracts, or multi-language support. With Miracuves’ prebuilt BSCpad Clone, you can cut that down to under a week depending on branding and integrations.
Related Articles


