


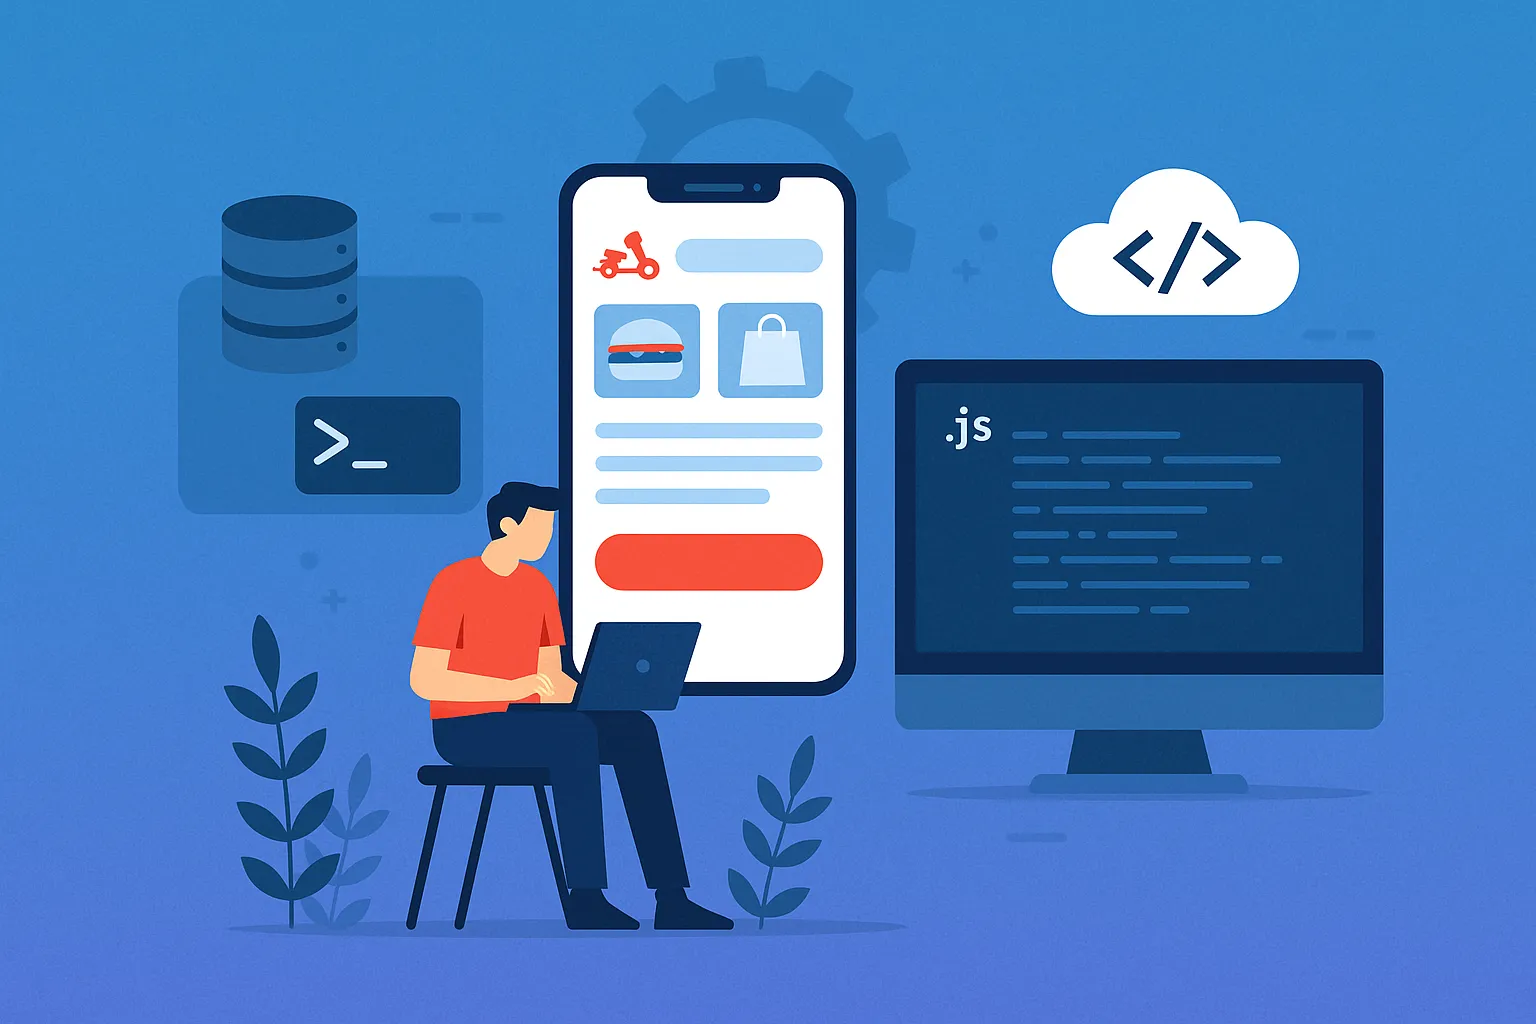
As someone who’s been building full-scale web and mobile applications for years, I can confidently say that the demand for hyperlocal delivery apps — especially App like Delivery Hero — is only going up. Whether you’re delivering food, groceries, medicines, or even pet supplies, users today expect real-time tracking, lightning-fast checkout, and seamless user experience across devices.
So when a client came to us asking for a Delivery Hero clone, we knew we weren’t just building a “food delivery app.” We were creating an ecosystem that connects vendors, delivery partners, and end-users — all in real time, across different geographies, payment systems, and device types.
This guide is a deep dive into exactly how we built it — using both JavaScript (Node.js + React) and PHP (Laravel or CodeIgniter) stacks. If you’re a startup founder, agency, or entrepreneur looking to build your own delivery marketplace or clone app, this post is for you.
Let me walk you through how we made it happen — from tech decisions to coding patterns, integration logic, UI structure, and even the deployment setup.
Tech Stack: JavaScript vs PHP – Choosing the Right Foundation
When building a Delivery Hero-like app, the first architectural decision is choosing the right tech stack. Since different businesses have different needs — some prefer real-time responsiveness and modern frontends, others want the reliability and familiarity of traditional backend systems — we built it using two parallel approaches: JavaScript (Node.js + React) and PHP (Laravel/CodeIgniter). Here’s how each plays out.
JavaScript Stack (Node.js + React)
We went with Node.js on the backend and React on the frontend for startups who value speed, scalability, and real-time interactions. Node.js shines when you need event-driven, non-blocking servers — ideal for things like order updates, driver tracking, and live chat between users and delivery agents.React (with Next.js for SSR if SEO is a concern) gave us the freedom to build fast, component-driven UIs. State management was handled using Redux Toolkit, and for routing, React Router worked well. Axios for API calls and Socket.IO for real-time tracking sealed the deal.
Why Node.js + React?
- Real-time tracking with WebSockets
- Scalable microservices architecture
- Unified language (JavaScript) across frontend and backend
- Faster MVP builds for modern startups
PHP Stack (Laravel or CodeIgniter)
For clients who already had PHP infrastructure or preferred a tried-and-tested LAMP environment, we built the app in Laravel and CodeIgniter, depending on their team’s familiarity. Laravel gave us elegant routing, built-in auth scaffolding, and Blade templating. CodeIgniter, though lighter, was great for quick deployments where server resources were limited.Both frameworks supported modular development, which helped us separate user-facing modules from admin and partner dashboards.
Why Laravel or CodeIgniter?
- Easier backend management for traditional teams
- Blade templating for structured UI rendering
- Mature community and support ecosystem
- Suitable for rapid deployment on shared hosting or VPS
Which One Should You Choose?
If you’re aiming for real-time interactivity, scalability, and a modern UI, go for Node.js + React. It’s a great fit for venture-backed startups and SaaS-minded founders.On the other hand, if you want a stable, easy-to-maintain system with fast backend rollout — or your team already knows PHP — Laravel is a solid bet. It’s especially effective for agencies and bootstrapped teams who want to go live fast without rethinking infrastructure.
Read More : Best Delivery Hero Clone Scripts in 2025: Features & Pricing Compared
Database Design: Structuring for Scale and Flexibility
Designing the database for a Delivery Hero-like app required thinking beyond just users and orders. We had to account for multiple vendors, dynamic menus, real-time order tracking, and location-based search — all while keeping the schema scalable and performant. Let’s break down how we structured this in both tech stacks.
Core Schema Components
At the heart of the system, we created the following essential tables/collections:
- Users (customers, vendors, delivery agents – with roles)
- Restaurants/Vendors (details, categories, working hours)
- Products/Menu Items (with variants, pricing, tags)
- Orders (linked to users, items, delivery agents, statuses)
- Addresses (supporting multiple addresses per user)
- Ratings & Reviews
- Notifications
- Payment Records
This structure had to be flexible enough to support both food and non-food deliveries — so instead of hardcoding “menus”, we designed products with nested categories and options. That meant you could have combo meals, single items, or grocery packs — all under one schema logic.
JavaScript (Node.js + MongoDB)
We used MongoDB with Mongoose ORM for the JavaScript stack. Its document-based model allowed us to nest related data (like menu options inside products or tracking updates inside orders), which made querying more efficient and eliminated unnecessary joins.
Here’s a simplified example of the Order schema in Mongoose:
const OrderSchema = new mongoose.Schema({
  userId: { type: mongoose.Schema.Types.ObjectId, ref: 'User' },
  vendorId: { type: mongoose.Schema.Types.ObjectId, ref: 'Vendor' },
  items: [{
    productId: mongoose.Schema.Types.ObjectId,
    quantity: Number,
    price: Number
  }],
  status: { type: String, enum: ['pending', 'accepted', 'on-the-way', 'delivered'] },
  deliveryAgentId: { type: mongoose.Schema.Types.ObjectId, ref: 'User' },
  paymentStatus: String,
  location: {
    lat: Number,
    lng: Number
  },
  createdAt: Date
})
MongoDB’s geospatial indexing was a big win for us when implementing nearby restaurant searches and delivery zones.
PHP (Laravel + MySQL)
In the PHP stack, we went with MySQL using Laravel’s Eloquent ORM. The schema was normalized with foreign keys and pivot tables for many-to-many relationships. For example, order_items became a pivot table linking orders and products with quantities and pricing.
A simplified SQL-style table setup:
usersvendorsproductsordersorder_itemsdelivery_partnerspaymentsnotifications
Geolocation was handled using POINT fields and spatial queries through Laravel’s MySQL Spatial extensions. While it required a bit more setup than MongoDB, it offered precise control over joins and indexing — especially helpful when filtering based on cuisines, ratings, or vendor availability.
Flexible and Future-Proof Design
To support things like coupon systems, delivery fees by distance, or loyalty points later, we kept the design modular. Every transactional entity (order, payment, review) was stored in its own table or document, linked by reference IDs. That made it easy to update logic or migrate to services like Firebase or Stripe in the future without rewriting the database layer.
Read More : DeliveryHero App Marketing | Delivering Growth That Last
Key Modules & Features: Building the Core Engine of an app like Delivery Hero
Building a Delivery Hero clone isn’t just about placing orders. The real complexity lies in the ecosystem of modules that talk to each other — customers, vendors, delivery agents, and admin. We broke the app into modular components that could be reused and extended across both JavaScript and PHP versions.
1. User Registration & Role Management
In both stacks, we used role-based access control to differentiate between customers, vendors, delivery partners, and admins.
- Node.js: Used middleware to validate roles in JWT tokens.
- Laravel: Leveraged Laravel Gates and Middleware to protect routes and load role-specific dashboards.
Each user has a role attached in the DB, and during login, we issue a token (JWT or Laravel Sanctum) that contains permissions. Frontends react accordingly by showing or hiding role-based menus.
2. Vendor Dashboard & Product Management
Vendors need tools to manage their listings, orders, and availability. We built the vendor module with:
- Product CRUD (with variants, add-ons)
- Order alerts (socket or polling)
- Schedule/timing editor
- Earnings report
- Offer/banner management
Node.js + React: REST APIs backed by Mongoose handled vendor product updates. We used React forms with dynamic fields to support combos and variants.
Laravel: Controllers handled product logic, with Blade templates and Vue.js for interactivity on form elements. Image uploads went to AWS S3 with real-time previews.
3. Search, Filters & Discovery
Discovery drives conversion, so the search engine had to be fast and context-aware.
- Location-based filtering using lat/lng
- Cuisine or product category filters
- Ratings, delivery time, min order toggle
MongoDB: We indexed location and categories fields for near-instant geo queries.
MySQL: Used JOIN queries and full-text search across vendors and products, with eager loading to reduce N+1 problems.
4. Cart & Checkout Flow
- Cart logic handled item-level details, taxes, delivery fees, and applied coupons.
- Multi-vendor cart was optional (toggle based on client preference).
- Orders created only on successful payment or COD confirmation.
In both stacks, we used session/localStorage for storing cart on frontend, and re-validation on backend before order creation. Payment status was updated only after webhook verification from Stripe or Razorpay.
5. Real-Time Order Tracking
This was the most dynamic piece — tracking the delivery agent’s movement and updating order status in real-time.
Node.js: Implemented using Socket.IO — drivers send coordinates every X seconds, and customers’ UI reflects position on a map.
Laravel: Used Pusher for broadcasting events. It’s solid, though more dependent on external services than the Node stack.
Both versions used Google Maps API or Mapbox to visualize delivery movement.
6. Admin Panel
Admins can:
- Add/Edit vendors
- View order stats
- Assign delivery partners manually
- Manage app-wide settings, zones, content pages
Node.js: We used React-admin for the backend interface. It’s open-source and highly customizable.
Laravel: Built with Blade + Livewire components. AdminLTE or CoreUI gave us a quick and clean UI base.
Each admin action was backed by an audit trail table — so actions are logged with IP and timestamp, useful for multi-admin setups or white-labeled deployments.
Read More : Reasons startup choose our Delivery Hero clone over custom development
Data Handling: Integrating APIs and Manual Vendor Listings
One of the trickier decisions in building a Delivery Hero-like app is how to source your vendor and product data. Should you integrate with large-scale APIs or rely on a manual onboarding system via the admin panel? We designed the system to support both approaches, allowing clients to start lean or scale via partnerships with aggregators.
Third-Party API Integration (Aggregator or Delivery Data Feeds)
In cases where clients had access to partner APIs (e.g., local food marketplaces or delivery data platforms), we built connectors that synced vendor data, menus, and availability dynamically.
- Example APIs: Amadeus (for travel), Yelp or Zomato for restaurants (depending on market)
- Integration: We scheduled background jobs to hit these APIs, parse responses, and sync vendors and products into our DB.
- Challenges: Handling inconsistent data formats, missing fields, or rate limits. We built a transformation layer to map external data to our internal schema.
In Node.js:
We used node-cron to schedule jobs and Axios to call external APIs. Parsed responses were validated using Joi and stored using Mongoose models.
cron.schedule('*/30 * * * *', async () => {
  const res = await axios.get('https://partnerapi.example.com/vendors')
  res.data.forEach(async (vendor) => {
    await Vendor.updateOne({ externalId: vendor.id }, { $set: transformVendor(vendor) }, { upsert: true })
  })
})
In Laravel:
We used Laravel’s Schedule and Http::get() from the HTTP client. Transformations were done via Service classes, and Laravel Queues handled retries or errors gracefully.
$schedule->call(function () {
  $response = Http::get('https://partnerapi.example.com/vendors');
  foreach ($response->json() as $vendor) {
    Vendor::updateOrCreate(['external_id' => $vendor['id']], transformVendor($vendor));
  }
})->everyThirtyMinutes();
This made the system plug-and-play for any client who could strike a data-sharing deal with local or global aggregators.
Manual Vendor Onboarding via Admin Panel
For clients launching in newer or niche markets without third-party access, we built a powerful manual listing system. Admins (or vendors themselves) could onboard restaurants, upload menus, set delivery zones, and manage timing all from the dashboard.
Vendor Features:
- Upload logo, banner, address, timing
- Add food items with variants and pricing
- Define availability by day/time
- Offer promos and discounts
Admin Capabilities:
- Review and approve vendor listings
- Edit data in bulk or via CSV import
- Suspend vendors or flag duplicate listings
React-based frontend (Node stack):
Used dynamic forms, image previews, and autosave features to simplify data entry for vendors. Validations were handled in both frontend and backend to prevent incomplete records.
Blade UI (Laravel stack):
Vendors filled out structured multi-step forms, with file uploads stored in S3 or local disk depending on environment. Data was validated using Laravel Form Requests.
Syncing Strategy
Regardless of the source — API or manual — all vendors and products were normalized into our database structure. This ensured that the search, discovery, and cart modules worked seamlessly no matter how the data was sourced.
API Integration: Powering the Engine Room
APIs are the glue holding everything together in a Delivery Hero clone. Whether it’s placing an order, updating a delivery location, or managing vendor listings — robust, well-structured APIs are the foundation of your system. We built RESTful APIs in both Node.js (Express) and Laravel, focusing on clarity, scalability, and performance.
Routing and Versioning
All endpoints were versioned (/api/v1/) to allow backward compatibility in future updates.
- Node.js: Used Express.js with modular routing (by feature:
auth.routes.js,order.routes.js, etc.) - Laravel: Leveraged Laravel’s built-in route grouping with middleware for auth and role protection
Sample: Place Order API
Node.js (Express)
// POST /api/v1/orders
router.post('/', authenticateUser, async (req, res) => {
  const { items, addressId, paymentMethod } = req.body
  const order = await OrderService.createOrder(req.user.id, items, addressId, paymentMethod)
  res.status(201).json({ success: true, order })
})
We abstracted business logic into OrderService to keep controllers lean and testable.
Laravel
// routes/api.php
Route::middleware('auth:sanctum')->post('/orders', [OrderController::class, 'store']);

// OrderController.php
public function store(Request $request) {
  $order = $this->orderService->createOrder(auth()->id(), $request->all());
  return response()->json(['success' => true, 'order' => $order], 201);
}
We used Service classes in Laravel as well to separate logic from controllers, which improved testability and maintenance.
Sample: Real-Time Driver Location Update
Node.js (Socket.io)
io.on('connection', (socket) => {
  socket.on('driverLocationUpdate', ({ driverId, lat, lng }) => {
    DriverLocation.update(driverId, { lat, lng })
    io.to(`order-${driverId}`).emit('locationUpdate', { lat, lng })
  })
})
This enabled seamless real-time location updates to customers’ apps.
Laravel + Pusher
event(new DriverLocationUpdated($driverId, $lat, $lng));The DriverLocationUpdated event broadcasted location via Pusher Channels to listening clients on the frontend.
Sample: Product Search API
Node.js
router.get('/search', async (req, res) => {
  const { q } = req.query
  const results = await Product.find({ name: { $regex: q, $options: 'i' } }).limit(10)
  res.json(results)
})
Laravel
public function search(Request $request) {
  $query = $request->get('q');
  $results = Product::where('name', 'LIKE', "%{$query}%")->limit(10)->get();
  return response()->json($results);
}
Both implementations allowed for easy autocomplete and search across menus.
Security & Auth
- Used JWT in Node.js for stateless authentication
- Used Laravel Sanctum for token-based auth in Laravel
- Protected routes by role using middleware
- API rate limiting applied via Express middleware or Laravel’s
ThrottleRequests
Each response was standardized with { success: true/false, data, message } to make frontend error handling simpler.
Frontend & UI Structure: Designing a Seamless Multi-User Experience
A Delivery Hero-like app involves three core user journeys: the customer placing orders, the vendor managing listings, and the admin overseeing the platform. We designed the frontend to ensure a fast, responsive, and intuitive UX across all roles — with mobile-first design principles and component reuse at the heart of the architecture.
Customer-Facing Frontend
React (Node.js Stack)
We built the customer UI using React, structured around reusable components and responsive layout using Tailwind CSS.
- Routing: React Router DOM
- State Management: Redux Toolkit
- Forms: React Hook Form + Yup for validation
- Styling: Tailwind CSS for consistency and responsiveness
Core pages included:
- Home (dynamic vendor listing by location or cuisine)
- Search (autocomplete + filters)
- Vendor Detail (menu, timing, ratings)
- Cart & Checkout
- Order Tracking (Mapbox + socket integration)
- Profile & Order History
The layout was mobile-optimized using Flexbox and Grid layouts, with breakpoints adjusted for tablets and desktops. We used lazy loading on images and pagination/infinite scroll on lists to improve speed.
Blade Templates (Laravel Stack)
For the PHP version, we used Laravel Blade with either Bootstrap or Tailwind for styling, depending on client preference.
- Blade Components: Modularized headers, cards, buttons
- Vue.js: Integrated for parts needing interactivity (e.g., live search, real-time updates)
- Localization: Blade’s translation system allowed multi-language support easily
We mirrored the same page flow as React, ensuring feature parity. Mobile responsiveness was handled using Bootstrap’s grid or Tailwind classes, depending on the project setup.
Vendor Dashboard UI
Vendors needed a compact but powerful dashboard to:
- Manage their menu/products
- View live orders and statuses
- Access analytics on orders and earnings
- Adjust working hours and availability
React-based Version: Used Material UI for structured layout, with tabs and drawers to manage complexity. Data tables were enhanced with sorting, filters, and actions using react-table.
Laravel Blade Version: Built with Livewire components or standard Blade pages. We used AdminLTE for basic UI or CoreUI for a cleaner layout. Tables were handled with server-side pagination using Laravel’s pagination helpers.
Admin Panel UI
Admins had a broader interface with:
- User/vendor management
- Order monitoring
- Delivery partner tracking
- Revenue reports
- CMS controls (banners, terms, FAQs)
React Admin (Node.js): We used react-admin package for its plug-and-play backend interface. It’s customizable and perfect for CRUD-heavy admin work.
Blade (Laravel): Used a customized Bootstrap-based dashboard with role-based access and modular card layouts.
UX Enhancements Across Both
- Skeleton loaders on product/vendor pages
- Sticky cart on mobile for faster checkout
- Map view toggles for locating nearby vendors
- Dark mode support for certain themes
- PWA support for React version (Add to Home Screen on Android)
Every layout was planned mobile-first, with offline tolerance (service workers in React) and graceful fallbacks for image and map failures.
Read More : Delivery Hero Features Explained for Startups
Authentication & Payments: Secure Logins and Smooth Transactions
When it comes to a Delivery Hero-like app, two areas you can’t afford to get wrong are authentication and payments. If login is slow or buggy, users churn. If checkout fails, revenue disappears. We implemented secure, scalable solutions for both — across JavaScript and PHP stacks — with support for multiple payment gateways and region-specific flows.
Authentication
Node.js (JWT-Based Auth)
We used JWT (JSON Web Tokens) for stateless authentication. Tokens were issued on login and stored in secure HTTP-only cookies or localStorage (configurable based on platform).
- Login/Register APIs return access + refresh tokens
- Middleware (
authenticateUser) checked token validity for protected routes - Role Guards ensured only vendors could access vendor endpoints, and so on
Sample middleware:
const authenticateUser = (req, res, next) => {
  const token = req.headers.authorization?.split(' ')[1]
  if (!token) return res.status(401).json({ message: 'Unauthorized' })
  try {
    const decoded = jwt.verify(token, process.env.JWT_SECRET)
    req.user = decoded
    next()
  } catch (err) {
    return res.status(403).json({ message: 'Invalid token' })
  }
}
Forgot Password & OTP: We integrated email + SMS OTP using services like Twilio. OTP codes were short-lived (5 min) and verified server-side.
Laravel (Sanctum-Based Auth)
Laravel Sanctum handled token-based authentication. It supports SPA and mobile tokens natively.
- Login/Register returns bearer token
- Middleware (
auth:sanctum) ensures valid requests - Role-based gates protect routes at the controller level
// AuthController.php
public function login(Request $request) {
  $user = User::where('email', $request->email)->first();
  if (!$user || !Hash::check($request->password, $user->password)) {
    return response()->json(['error' => 'Invalid credentials'], 401);
  }
  return response()->json([
    'token' => $user->createToken('access-token')->plainTextToken,
    'user' => $user
  ]);
}
We also added social logins (Google, Facebook) using Laravel Socialite and Passport-based fallback where needed.
Payments
We integrated Stripe, Razorpay, and Cash on Delivery (COD) — based on the target geography and business model. Each gateway was modular so new ones could be added with minimal changes.
Stripe (International)
- Stripe Elements used in React for card input
- Webhooks handled via
stripe.webhooks.constructEvent()in Node andRoute::post('webhook/stripe')in Laravel - Orders were only confirmed after verifying
payment_intent.succeeded
Razorpay (India & Asia)
- Used Razorpay Checkout for seamless UX
- Backend verified
razorpay_signaturefor authenticity - COD orders marked as
pending_paymentand adjusted upon delivery status update
Node.js Payment Flow (Stripe Sample)
const stripe = require('stripe')(process.env.STRIPE_KEY)
const paymentIntent = await stripe.paymentIntents.create({
  amount: totalAmount * 100,
  currency: 'usd',
  metadata: { orderId: order._id.toString() }
})
res.send({ clientSecret: paymentIntent.client_secret })
Laravel Payment Flow (Razorpay Sample)
use Razorpay\Api\Api;
$api = new Api($key, $secret);
$payment = $api->payment->fetch($request->razorpay_payment_id);
if ($payment->status == 'captured') {
  $order->update(['payment_status' => 'paid']);
}
We ensured all payment interactions had fallback handling — like retries, expired sessions, and canceled intents — and logged all attempts to help admins resolve disputes later.
PCI Compliance & Security
- Card data was never stored — we relied on tokenization via Stripe/Razorpay
- All API endpoints were behind HTTPS
- Sensitive keys stored in environment variables
- CSRF protection on Laravel forms and same-origin headers in Node.js
- All frontend payment forms used iframe/tokenized elements to avoid direct exposure
Testing & Deployment: Making It Stable and Scalable in Production
Once development was stable, we shifted focus to testing, deployment, and environment optimization. For any Delivery Hero-style app, especially one with real-time data and payments involved, the deployment pipeline needs to be tight — automated, test-driven, and secure. We implemented end-to-end CI/CD workflows for both stacks and ensured runtime optimization for stability and scale.
Testing Strategy
We covered both automated and manual testing, based on each component’s sensitivity and business logic depth.
Node.js Stack
- Unit Testing: Used Jest for services, controllers, and utility functions
- Integration Testing: Tested full API endpoints using Supertest
- E2E Testing: Cypress used to simulate full user journeys (e.g., register → order → pay → track)
- Load Testing: Apache Benchmark (ab) and Artillery for simulating 500–1000 concurrent users
Example Jest test:
test('creates a new order successfully', async () => {
  const res = await request(app).post('/api/v1/orders').send({ ...payload })
  expect(res.statusCode).toBe(201)
  expect(res.body.order.status).toBe('pending')
})
Laravel Stack
- Unit Testing: PHP Unit with Laravel’s built-in test scaffolding
- Feature Testing: Artisan command
php artisan testto simulate user routes - Database Seeding: Used factories and seeders for dummy data
- Browser Testing: Laravel Dusk enabled browser automation for scenarios like login + checkout flows
Laravel Dusk sample:
$this->browse(function (Browser $browser) {
  $browser->visit('/login')
          ->type('email', '[email protected]')
          ->type('password', 'secret')
          ->press('Login')
          ->assertPathIs('/dashboard');
});
All test scripts were part of the Git repo and triggered on every PR or staging deploy.
CI/CD Pipelines
Node.js
- GitHub Actions ran tests, lints, and build checks
- Docker image built and pushed to registry
- Staging Deploy to Heroku or DigitalOcean App Platform
- Production Deploy to AWS EC2 via Ansible or Capistrano script
- PM2 handled process management, with zero-downtime reloads
GitHub Actions sample:
jobs:
  build:
    runs-on: ubuntu-latest
    steps:
      - uses: actions/checkout@v2
      - run: npm install
      - run: npm test
      - run: docker build -t delivery-app .
Laravel
- GitLab CI or GitHub Actions ran unit/feature tests on push
- Deployer script for SSH deploys to staging or production
- Envoy for zero-downtime rollouts
- Apache/Nginx + PHP-FPM handled the runtime
- Supervisor ran queue workers and socket services
Sample deployment script (Deployer):
task('deploy', [
  'git:clone',
  'composer:install',
  'artisan:migrate',
  'artisan:config:cache',
  'artisan:queue:restart',
]);
Dockerization
We created separate Docker containers for:
- Web (React or Blade PHP frontend)
- API (Node.js or Laravel backend)
- Database (MongoDB or MySQL)
- Redis (queues & caching)
- Nginx (reverse proxy + SSL termination)
All services defined in a docker-compose.yml to allow local and staging parity.
services:
  web:
    build: ./frontend
    ports:
      - "3000:3000"
  api:
    build: ./backend
    ports:
      - "5000:5000"
  db:
    image: mysql:5.7
    environment:
      MYSQL_ROOT_PASSWORD: root
Logging & Monitoring
- Winston and Morgan for logging in Node.js
- Laravel Log Channels with daily rotation
- Sentry for error tracking
- Uptime Robot and Pingdom for availability checks
- PM2 Monitoring Dashboard or Laravel Telescope for real-time insights
By combining robust tests with containerized deployments and CI/CD flows, we shipped faster with fewer bugs and could roll back or scale up with confidence.
Read More : Business Model of Delivery Hero | Global Food Delivery Success
Pro Tips: Real-World Lessons & Performance Hacks
Building and scaling a Delivery Hero clone isn’t just about getting the code right — it’s about making smart decisions under real-world conditions. From handling unpredictable user behavior to surviving production traffic spikes, here are some of the most valuable lessons and optimizations we learned.
1. Cache Smart, Not Just Fast
We avoided over-fetching by applying targeted caching for high-frequency queries.
- Node.js: Used Redis to cache category lists, popular vendors, and homepage banners.
- Laravel: Leveraged Laravel’s
Cache::remember()for product categories and featured listings.
We set different TTLs depending on how often the data changed — e.g., 60 seconds for trending vendors, 24 hours for static pages.
// Node.js (Redis Cache)
const cachedVendors = await redis.get('top_vendors')
if (cachedVendors) return res.json(JSON.parse(cachedVendors))
// Fetch from DB if not cached, then store
// Laravel Cache
$vendors = Cache::remember('top_vendors', 60, function () {
return Vendor::orderBy('rating', 'desc')->limit(10)->get();
});2. Optimize Mobile Performance First
80%+ of our traffic was mobile — not even mobile apps, but mobile browsers. So we:
- Reduced initial payloads using dynamic imports and route-level code splitting
- Compressed images using Cloudinary or local tools
- Used flexbox and fluid containers to avoid UI breakage on small screens
- Avoided modals for mobile; used drawers and bottom sheets instead
For Blade-based Laravel apps, we tested everything in Chrome’s mobile simulator and added dedicated mobile styles.
3. Use Queues for Heavy Tasks
Payment verification, notification dispatch, and order confirmation emails were handled asynchronously using queues.
- Node.js: Used Bull with Redis
- Laravel: Used Laravel Queue with Redis driver and Supervisor to keep workers running
This kept APIs snappy and made the system more resilient to network slowness or gateway delays.
4. Don’t Rely on WebSockets Alone
WebSockets are great, but we added fallbacks using HTTP polling for lower-tier hosting environments or flaky networks.
- React clients checked for socket connection, then downgraded to polling
/api/order-status/:id - Laravel used Pusher Channels for live tracking but allowed polling mode when disconnected
5. Design for Vendor Error
Vendors often forget to update menu items, prices, or timings. We built in:
- Auto-disable of vendors after X days of inactivity
- Admin alerts when stock or timing isn’t updated
- Time-based reminders (cron jobs) to vendors to refresh menus weekly
This avoided abandoned listings or broken user flows.
6. Build for Expansion, Not Just MVP
Even when building a clone, we made choices that supported future growth:
- Created multilingual-ready UI using i18n (React) or Laravel Localization
- Used environment-based configs to enable/disable features (e.g., multi-vendor cart, tipping, ratings)
- Modularized the code to allow adding subscription billing or loyalty points later
7. Track the Right Metrics from Day One
We integrated basic analytics early:
- Google Analytics or PostHog for user flows
- Custom event tracking for key actions (add to cart, checkout initiated, order delivered)
- Monitored conversion rates by vendor, helping clients spot low-performing listings
All of this fed back into business strategy, not just tech refinement.
Final Thoughts: Custom vs Clone — What Really Works
After engineering this Delivery Hero-style platform end-to-end in both JavaScript and PHP stacks, one thing is absolutely clear — the right build path depends on your launch speed, dev resources, and product maturity.
If you’re a startup founder focused on speed to market and early traction (say, for regional groceries, pharmacy delivery, or niche segments like vegan food), starting with a Miracuves ready-made clone lets you bypass months of development overhead. Our solution isn’t a cookie-cutter template — it’s a modular, production-ready foundation that can be fully customized to fit your branding, business model, and operational flow.
On the other hand, if you have highly specific workflows, deep integrations, or advanced product logic that a clone can’t support directly, we help you go custom — leveraging our stack expertise in Node.js and Laravel to architect a solution from the ground up.
From a developer’s perspective, I’ve seen how founders move significantly faster when they start with a proven Miracuves base — already API-ready, modular, and scalable — and layer their uniqueness on top.
Whether you’re choosing JavaScript for real-time performance or Laravel for backend stability, the goal is the same: launch smart, iterate fast, and grow without friction.
The best tech decision is the one that saves you time while setting you up for scale — and that’s exactly what the Miracuves Delivery Hero Clone is built to do.
FAQs: What Founders Ask Before Building a Delivery Hero Clone
1. Can I customize the features in your Delivery Hero Clone to fit my niche (e.g., medicine delivery, pet food, groceries)?
Absolutely. The system is modular, so you can enable or disable features like variant pricing, delivery slot scheduling, tipping, and even vendor approval workflows. Whether it’s for food, pharma, or hyperlocal services — the clone can be tailored easily on both Node.js and Laravel stacks.
2. Which stack is better for me — Node.js or Laravel?
It depends on your team and goals. Node.js (with React) is perfect if you want real-time updates, a modern SPA frontend, and scalability for millions of users. Laravel is excellent if you prefer rapid development, stability, and easier backend management — especially if you or your team already know PHP.
3. Can the platform support multi-city or country expansion?
Yes. The database design supports multiple zones, languages, currencies, and timezones. You can configure vendors and delivery agents by city or country and use sub-admins to manage localized operations. We’ve also added support for multi-language content and RTL layouts if needed.
4. How does the system handle high traffic and real-time orders?
We use Redis queues, WebSockets, and efficient database queries to keep the app responsive even under load. Node.js leverages non-blocking architecture while Laravel’s queue and event system ensure smooth background processing. Deployment is Dockerized and scalable on AWS, DigitalOcean, or your preferred cloud.
5. How long does it take to launch with your ready-made clone?
In most cases, clients go live in 7–14 days. That includes branding, basic customization, setting up vendors and products, payment gateway integration, and deployment. If you have special features in mind, we scope and implement them as add-ons with dedicated timelines.
Related Articles


