


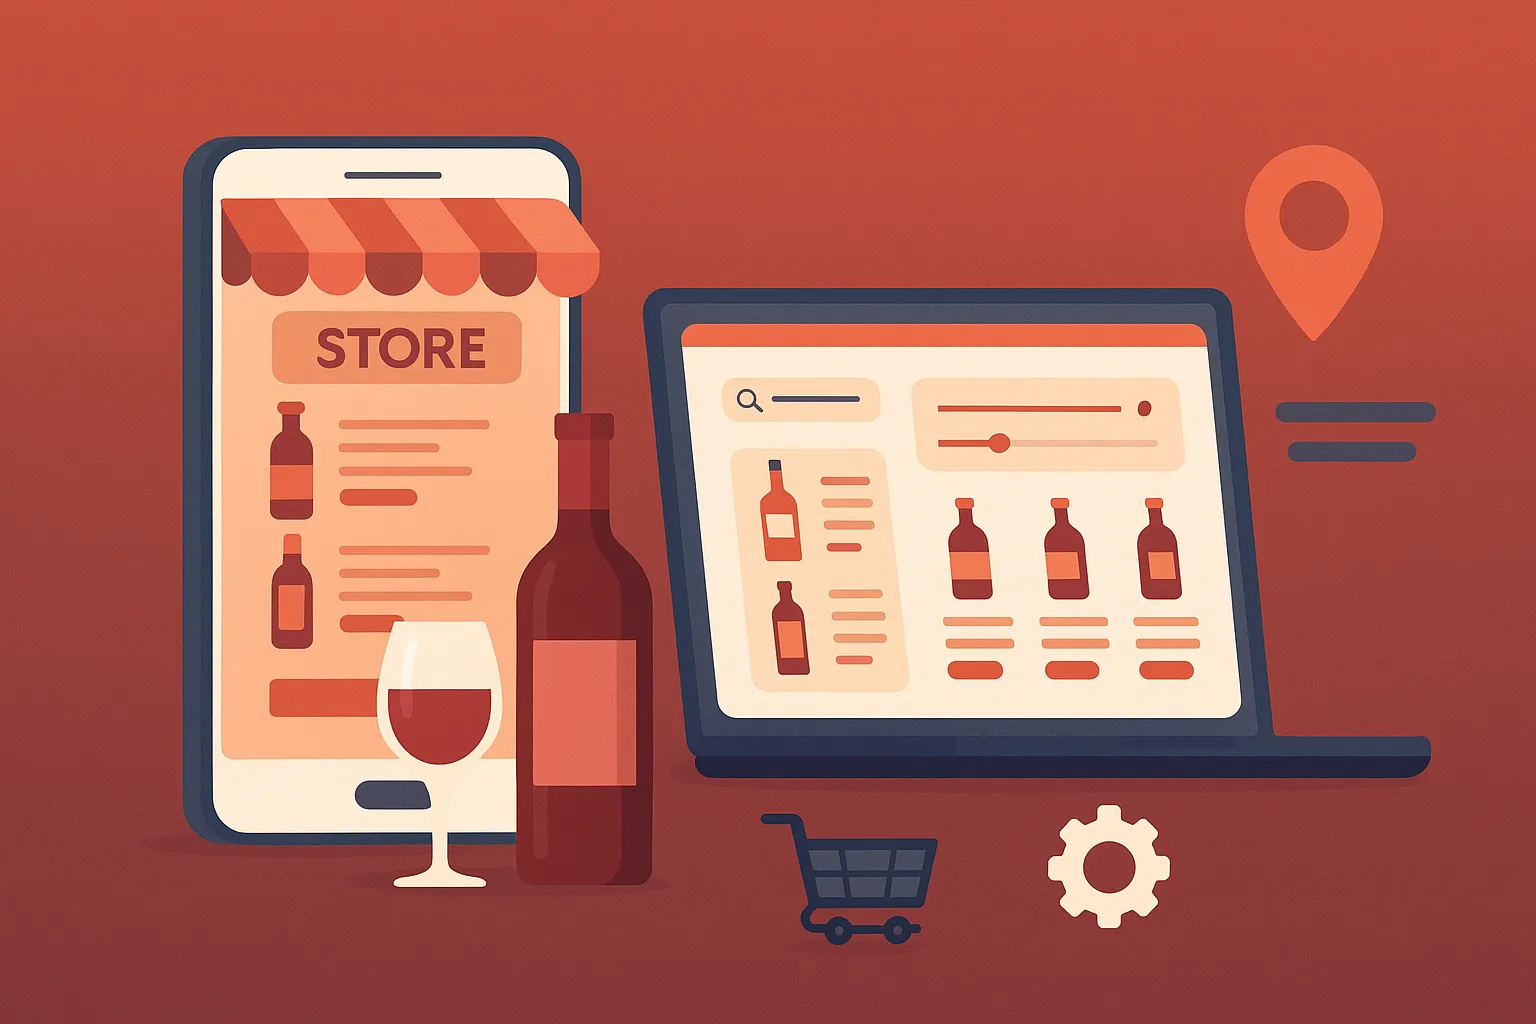
Drizly has carved out a strong niche in the booming on-demand alcohol delivery market. It’s not just another delivery app — it’s a smart, compliant, and hyper-local platform that connects users with real-time inventory from nearby liquor stores, handles ID verification, and ensures seamless order fulfillment. If you’re wondering how to build an app like Drizly or searching for a Drizly clone development guide, you’re in the right place.
I’m sharing my experience building a Drizly-style app from the ground up — using two different tech stacks: JavaScript (Node.js with React) and PHP (Laravel). As a full-stack developer, I’ve explored the challenges, made real-world trade-offs, and deployed working platforms in both ecosystems.
This guide is written for startup founders, entrepreneurs, and agencies looking to create an alcohol delivery app like Drizly — either as a custom project or using a clone solution. I’ll cover architecture, database design, key modules, API integrations, frontend decisions, authentication, payments, deployment, and more.
Whether you’re deciding between Laravel or Node.js, evaluating build vs buy, or looking to understand the inner workings of a Drizly clone — this walkthrough will give you a grounded, honest perspective.
Choosing the Right Tech Stack for Your Drizly Clone
When starting out, the first decision I had to make was the tech stack. This choice impacts everything—from speed of development to long-term scalability and team hiring. Since the goal was to offer flexibility to different types of clients, I developed the app using both a JavaScript stack (Node.js + React) and a PHP stack (Laravel). Here’s how I approached both.
JavaScript Stack – Node.js + React
This combo is ideal for fast-paced startups that prioritize performance, modern UI, and real-time data handling. On the backend, Node.js gave me non-blocking I/O and quick API response times. It worked great for order tracking, user actions, and inventory syncing in real time. React on the frontend helped me build a dynamic, component-based interface that’s mobile responsive and highly interactive. I also used Redux for state management and React Router for navigation. Node.js paired well with MongoDB for flexibility in handling nested schemas like product variants or store metadata.
PHP Stack – Laravel Framework
Laravel offers structure, security, and developer productivity. It’s a great choice if your team already has PHP experience or you’re building for clients who prefer shared hosting environments. Laravel made routing, middleware, and authentication logic super clean. It’s also fantastic for building admin panels quickly with tools like Laravel Nova or Voyager. I used MySQL as the database with Laravel’s Eloquent ORM, which handled relationships and queries with minimal effort. If you want more traditional MVC-style architecture with lots of helper functions out of the box, Laravel is a solid bet.
When to Choose Which
Use the Node.js + React stack if:
- You need real-time features like order status updates
- You’re aiming for a highly interactive frontend
- Your team is comfortable with JavaScript end to end
Use the Laravel stack if:
- You need to build quickly with solid conventions
- You want easier server-side rendering for SEO
- You’re targeting markets where PHP hosting is standard
Read More : Best Drizly Clone Scripts in 2025: Features & Pricing Compared
Scalable and Flexible Database Design
Designing the database for a Drizly-like app meant planning for dynamic inventory, user preferences, order history, store locations, and compliance data like ID verification. The architecture needed to scale across cities, support fast queries, and allow easy expansion for things like promo codes or delivery tracking. Here’s how I approached the schema design for both tech stacks.
MongoDB for Node.js
I chose MongoDB because of its document-based structure, which works great when you need to store nested data like product categories, store hours, or stock variations. Each liquor store had its own Store document containing metadata, location, delivery zones, and a nested array of products. This reduced the need for expensive joins and allowed fast lookups for things like “show me available items within 5km”. Here’s a simplified schema example:
{
  _id: ObjectId,
  name: "Wine & Spirits NYC",
  location: {
    type: "Point",
    coordinates: [-73.935242, 40.730610]
  },
  deliveryRadius: 10,
  products: [
    {
      name: "Grey Goose Vodka",
      category: "Vodka",
      price: 39.99,
      inStock: true
    }
  ],
  hours: {
    mon: "10:00-22:00",
    tue: "10:00-22:00"
  }
}
For users, I stored their addresses, order history, and age verification status as embedded sub-documents. This helped with personalization and quick reordering logic.
MySQL with Laravel Eloquent
In the Laravel version, I used a relational model with clear foreign key relationships. Each store had a stores table, and products were linked via a store_id foreign key. Categories, users, carts, and orders all lived in separate normalized tables. Laravel’s migrations and Eloquent ORM made it easy to define relationships like:
// Store.php
public function products() {
    return $this->hasMany(Product::class);
}
While the relational model required more joins than MongoDB, Laravel handled eager loading very efficiently, so performance was solid. I also used pivot tables for managing many-to-many relationships, such as user favorites or promo code assignments.
Key Design Considerations
- Geospatial Queries: MongoDB’s geospatial indexing gave me an edge for real-time store filtering by location. In MySQL, I used the
ST_Distance_Spherefunction with spatial columns to achieve similar behavior. - Scalability: MongoDB offered faster reads with fewer joins, which is ideal for scaling listings. MySQL ensured strong consistency, which is valuable for payment and order processing.
- Flexibility: MongoDB allowed more freedom to iterate during early development. Laravel gave me safety nets with data integrity checks and validations.
Building Core Modules and Features
A Drizly-like app isn’t just an online catalog. It’s an end-to-end system with real-time inventory syncing, hyperlocal search, dynamic pricing, and regulatory compliance. I designed the app to support five core modules: store onboarding, product listings, smart search and filtering, the cart and checkout engine, and an admin panel. Here’s how I implemented each in both the Node.js and Laravel stacks.
Store Onboarding and Management
In Node.js: I created a secure onboarding flow using Express and JWT for authentication. Each store owner could register, upload licenses, add inventory, and set delivery zones. I used Multer for file uploads (e.g., license docs) and stored them in S3-compatible storage. Role-based access control was handled using middleware that checked tokens and roles before allowing access to admin routes.
In Laravel: I leveraged Laravel’s built-in auth scaffolding and used spatie/laravel-permission for role management. Store documents were uploaded using Laravel’s Storage API. Each store had its own dashboard powered by Blade templates and Livewire, making it reactive without a heavy frontend dependency.
Product Listings and Inventory Management
In Node.js + MongoDB: Products were nested inside store documents. I created routes like POST /api/stores/:id/products and supported PATCH for bulk inventory updates. Each product included category tags, pricing, quantity, and availability toggles. Inventory was updated in real time using sockets to reflect changes on customer-facing listings instantly.
In Laravel + MySQL: Products lived in a products table, linked to stores. I built CRUD operations using Laravel’s Resource Controllers and used Nova for backend interfaces. Each store owner could add/edit products, upload images, and set inventory levels. I also used scheduled jobs to auto-disable out-of-stock items based on thresholds.
Smart Search and Filters
Node.js with Elasticsearch: I used Elasticsearch to handle fuzzy search, category filters, and distance-based ranking. For example, a query like “whiskey near me” used a geospatial filter plus text relevance scoring to surface best-matching stores and items.
Laravel with MySQL + Scout: I integrated Laravel Scout with Algolia for indexed search. It allowed autocomplete, faceted filtering (by price, category, brand), and full-text matching. I cached filters per location to reduce API hits.
Cart and Checkout System
Node.js: The cart was stored in Redis for quick access, synced with user sessions via JWT. Stripe was used for card payments, and Razorpay for regions like India. I validated cart contents in real-time during checkout using middleware and availability checks.
Laravel: The cart was session-based, stored in the database for logged-in users and temporarily in cookies for guests. Payment integrations used Laravel Cashier (for Stripe) and Razorpay SDK. I used Laravel Events to trigger inventory locks during checkout and queue emails after purchase.
Admin Panel
Node.js + React Admin Panel: I built a custom React-based dashboard with role management, analytics charts (using Chart.js), and store controls. Admins could approve stores, moderate listings, and monitor order logs. APIs like /admin/metrics powered dynamic dashboards.
Laravel + Nova: Laravel Nova made it dead simple to spin up a polished admin interface. I defined metrics for top-selling products, active users, and revenue. Nova also handled soft deletes, status toggles, and export actions natively.
Every module was built with extensibility in mind, whether adding alcohol age verification, supporting promotions, or enabling delivery partnerships.
How Much Does Drizly App Development Cost in 2025? Get the Full Price Breakdown & Budget Smart!
Handling Data Sources and API Integrations
One of the most important architectural decisions when building a Drizly-like app is how to source the inventory data. Some stores may want to enter listings manually, while others prefer automated syncing via APIs or spreadsheets. I designed the platform to support both options — allowing for flexible data handling, whether it’s pulling from a partner’s database or entering products via a simple admin UI.
Manual Data Entry via Admin Panel
In Node.js: I built product management forms using React with dynamic input fields (e.g., for alcohol content, size, packaging, brand). These forms sent JSON data to the Express backend, which performed server-side validation (using joi) before storing it in MongoDB. Store owners could upload CSV files to bulk import products — I parsed them using csv-parse and mapped the columns to product schema fields.
In Laravel: Laravel’s form request validation was a big help for sanitizing product data. For bulk uploads, I used Laravel Excel to parse and import XLS or CSV files. Store owners could use a downloadable template, and the admin panel would show line-by-line validation errors before confirming the import.
Third-Party API Integration
For clients that had POS (point-of-sale) systems or used centralized product databases, I built connectors to pull in real-time data. While Drizly uses direct partnerships, I simulated similar functionality using vendor APIs and background sync processes.
Example: External Inventory API Integration
In Node.js:
app.get('/api/integrations/vendor-inventory', async (req, res) => {
  const response = await axios.get('https://api.vendor.com/inventory', {
    headers: { Authorization: `Bearer ${vendorToken}` }
  });
  const formattedData = transformVendorData(response.data);
  await updateStoreProducts(storeId, formattedData);
  res.send({ success: true });
});
In Laravel:
public function syncInventory(Request $request) {
    $client = new \GuzzleHttp\Client();
    $res = $client->get('https://api.vendor.com/inventory', [
        'headers' => ['Authorization' => 'Bearer ' . $vendorToken]
    ]);
    $data = json_decode($res->getBody(), true);
    $this->updateProductsFromVendor($data);
    return response()->json(['success' => true]);
}
These endpoints would run on-demand or via cron jobs to keep the inventory fresh. I also used webhooks where supported, so updates pushed directly from vendor systems could trigger product syncs.
Hybrid Mode for Flexibility
To support both manual entry and API-based syncs, I built logic to lock certain fields for API-managed products. This prevented store managers from accidentally overriding automated data. Products were flagged with a sync_source field (manual, csv, api) so we could track where each entry originated.
Image Handling
Since liquor listings often require high-quality images, I integrated lazy loading and compression. On Node.js, I used sharp to resize images at upload. In Laravel, I used the Intervention Image package for the same. All images were stored on cloud storage (AWS S3 or DigitalOcean Spaces) with CDN support for fast delivery.
API Architecture and Endpoint Design
Once the data layer was solid, I focused on building clean, scalable APIs to power both the customer-facing frontend and internal admin operations. Whether using Node.js or Laravel, I stuck to RESTful design principles and ensured all endpoints were secured, versioned, and performance-optimized.
API Structure and Versioning
For both stacks, I used /api/v1/ as the base path. This allowed future-proofing in case we needed to release v2 without breaking mobile apps or frontend clients.
Key endpoint categories included:
/auth/*for login, signup, and token refresh/stores/*for listing and filtering local stores/products/*for item details, categories, and search/cart/*for cart operations/orders/*for order creation and tracking/admin/*for management operations (with auth guard)
Node.js API Implementation (Express)
In Node.js, I built the backend using Express.js. Each route file handled a specific module, with middleware layered for authentication, input validation, and rate limiting. I used JWTs for auth and express-validator for input checks.
Example – Fetch Products for a Store
// routes/products.js
router.get('/store/:storeId', authMiddleware, async (req, res) => {
  const products = await Product.find({ storeId: req.params.storeId, inStock: true });
  res.json(products);
});
Example – Create Order
router.post('/orders', authMiddleware, async (req, res) => {
  const { cart, addressId, paymentMethod } = req.body;
  const order = await createOrder({ cart, userId: req.user.id, addressId, paymentMethod });
  res.status(201).json({ success: true, order });
});
I also used PM2 to keep the server running in production, along with CORS policies and input sanitization to keep endpoints safe.
Laravel API Implementation (Laravel Sanctum)
Laravel made API routing a breeze. I grouped routes with middleware, used API resources for formatting output, and protected sensitive routes with Sanctum tokens.
Example – Fetch Products for a Store
Route::middleware('auth:sanctum')->get('/products/store/{id}', function ($id) {
    return Product::where('store_id', $id)->where('in_stock', true)->get();
});
Example – Place Order
Route::middleware('auth:sanctum')->post('/orders', [OrderController::class, 'store']);
Inside OrderController@store, I handled logic for stock verification, payment capture, order creation, and notifications.
API Response Format
To ensure consistency, all APIs returned responses in the following structure:
{
  "success": true,
  "data": { ... },
  "message": "Optional contextual message"
}
I also added HTTP status codes and error handling middleware to capture and log issues.
API Authentication
- Node.js: JWT tokens with refresh token logic. Tokens were sent in
Authorization: Bearerheaders. I built custom middleware to decode and verify them. - Laravel: Used Laravel Sanctum for API token management. This integrated well with the frontend via CSRF tokens or API guards.
Frontend Architecture and UI Implementation
Once the backend was solid and API endpoints were up and running, it was time to focus on the frontend — the part users interact with every day. I built the frontend twice: once using React for a fully dynamic SPA experience, and once using Blade templating in Laravel for a more traditional server-rendered approach. Both paths had different strengths and workflows, depending on the project goals and team setup.
React Frontend for Node.js Stack
UI Stack: React + Redux + Axios + React Router
The React app was set up using Vite for blazing-fast dev builds. I structured it using feature-based folders like /store, /product, /cart, /auth, and /admin to keep components modular and reusable.
Routing: I used React Router DOM for route management, with protected routes that checked auth tokens. Navigation was smooth thanks to lazy-loaded components and code splitting.
State Management: Redux was my choice for global state — cart items, user session, store selection, and filters were all managed in a central store. I also used Redux Toolkit to streamline slices and reducers.
Mobile Responsiveness: Tailwind CSS made it incredibly fast to design responsive layouts. I defined breakpoints for mobile, tablet, and desktop and used flexbox/grid utilities to adjust layouts dynamically.
UI/UX Focus:
- Sticky cart and store location detection for mobile UX
- Real-time store product availability indicators
- Search with debounced input and auto-suggestions
- Snackbar alerts for actions like “Added to cart” or “Out of stock”
Blade Templates and Bootstrap in Laravel
If the project required a quicker setup or SEO-friendly pages, Blade was the way to go. Laravel’s templating engine allowed me to build dynamic server-rendered pages while still injecting Vue components or AlpineJS for interactivity where needed.
Blade Layout Structure:
layouts.appas the base layout with header/footer includes- Sections like
@yield('content')for injecting views - Blade components for reuse: product cards, search bar, category filter
UI Libraries: Bootstrap was the base styling library, paired with custom SCSS for brand styling. I used Laravel Mix for asset bundling.
Responsive Design: Bootstrap’s grid made layouting simple, and the site looked clean on all devices. I also added custom media queries for store-specific elements like delivery availability banners.
Frontend Interactivity: For cart operations and product filters, I used AlpineJS. It was lightweight, reactive, and ideal for small frontend logic without requiring a full React-like system.
Progressive Enhancements:
- Lazy-loaded product images using
loading="lazy" - Modal overlays for quick product views
- Pagination and infinite scroll options for store catalogs
Real-World Considerations
- SSR vs SPA: React needed a proper SEO strategy since it’s client-rendered. I considered Next.js for SSR in future iterations. Blade templates were SEO-ready out of the box.
- Performance: React required more front-loading of assets but gave snappier navigation post-load. Laravel + Blade was faster on initial load but less fluid for heavy client-side actions.
- Forms & Validation: React used client-side validation with
react-hook-form. Laravel used server-side validation with friendly error bag support and old input flashes.
Authentication and Payment Integration
Security and seamless transactions are mission-critical for any on-demand delivery platform — and especially for an app like Drizly where legal compliance and payment trust are key. I architected authentication systems for both customers and store admins and integrated payment flows that were flexible, PCI-compliant, and localized (Stripe for international, Razorpay for Indian clients). Here’s how I handled authentication and payments in both the Node.js and Laravel versions of the app.
Authentication and User Management
Node.js + JWT
I built token-based authentication using JWT (JSON Web Tokens) for both customers and store admins. After login, the server issued an access token and a refresh token. The access token was used for 15-minute sessions and refreshed silently via the refresh token every hour.
Signup & Login Flow:
- Signup:
/api/v1/auth/signup– Created user, hashed password with bcrypt - Login:
/api/v1/auth/login– Verified credentials, returned tokens - Refresh:
/api/v1/auth/refresh-token– Rotated access tokens - Middleware: Used a JWT middleware to protect all sensitive routes
const authMiddleware = (req, res, next) => {
  const token = req.headers['authorization']?.split(' ')[1];
  try {
    const decoded = jwt.verify(token, process.env.JWT_SECRET);
    req.user = decoded;
    next();
  } catch (err) {
    return res.status(401).json({ message: 'Invalid token' });
  }
};
I also implemented route-based access control using roles (customer, store_admin, super_admin), attached inside the JWT payload.
Laravel + Sanctum
Laravel Sanctum was my go-to for API token authentication. It provided CSRF protection out of the box for SPA and mobile compatibility.
Auth Setup:
- Used
php artisan make:authwith tweaks for role-based logic - Passwords hashed using Laravel’s
Hash::make() Auth::guard()used to differentiate store users and admins- Sanctum tokens issued on login and stored securely in the frontend
Blade UI Login Example:
<form method="POST" action="{{ route('login') }}">
    @csrf
    <input type="email" name="email" required>
    <input type="password" name="password" required>
    <button type="submit">Login</button>
</form>
Login attempts were rate-limited and failed logins were logged for admin review.
Payment Integration – Stripe and Razorpay
Stripe Integration (Global)
Node.js: I used the stripe npm package to create payment intents. Before placing an order, I validated the cart, calculated tax and delivery fee, and generated a Stripe Payment Intent which the frontend used to complete the transaction.
const stripe = require('stripe')(process.env.STRIPE_SECRET);
const paymentIntent = await stripe.paymentIntents.create({
  amount: totalAmount,
  currency: 'usd',
  metadata: { userId: req.user.id }
});
Laravel: I used Laravel Cashier to manage Stripe billing. It simplified everything from creating charges to handling webhooks for success/failure. I linked orders to Stripe charge IDs and showed transaction receipts in the user dashboard.
Razorpay Integration (India)
Node.js: I used the razorpay npm package to create orders and verify signatures post-payment. Razorpay’s real-time webhook system helped me update order statuses asynchronously.
Laravel: I integrated Razorpay using the official PHP SDK and wrote controller logic to generate the order, capture the payment, and update order status based on webhook callbacks.
$api = new Api($key, $secret);
$order = $api->order->create([
  'receipt' => 'order_rcptid_11',
  'amount' => $amount,
  'currency' => 'INR'
]);
Security Enhancements
- Enabled HTTPS with HSTS and secure cookies
- Used reCAPTCHA v3 on signup/login forms
- Stored only hashed passwords with salting
- Logged auth events with IP/user agent details
- Stripe/Razorpay webhooks validated with secret tokens
Read More : Reasons startup choose our drizly clone over custom development
Testing, CI/CD, and Deployment Strategy
After completing the core features and integrations, I turned my focus to testing and deployment — the final critical phase before launch. A well-tested app deploys smoothly and scales confidently. I followed a consistent DevOps process across both stacks, with CI/CD pipelines, containerization using Docker, and environment-specific configurations. Here’s how I approached it all.
Testing the Application
Node.js – Unit, Integration, and API Tests
I used Jest as the primary test runner and Supertest for endpoint testing. All core modules — from authentication to product filtering — were covered with unit and integration tests.
- Unit Tests: Tested utility functions, service logic (e.g., cart calculations, tax rules)
- Integration Tests: End-to-end flow from login to order placement using mock DB
- API Tests: Ran with mock tokens, asserting status codes and JSON responses
describe('POST /api/orders', () => {
  it('should create a new order if user is authenticated', async () => {
    const res = await request(app)
      .post('/api/orders')
      .set('Authorization', `Bearer ${token}`)
      .send(mockOrderData);
    expect(res.statusCode).toBe(201);
  });
});
I also ran linting with ESLint, used husky to run tests before every commit, and maintained over 85% test coverage.
Laravel – PHPUnit and Feature Tests
Laravel made testing intuitive with PHPUnit and built-in testing scaffolds. I wrote:
- Feature Tests using
$this->post('/login')syntax to simulate real interactions - Database Tests using
RefreshDatabasetrait and SQLite in-memory for fast testing - Browser Tests using Laravel Dusk for UI flows like login, add to cart, checkout
Example:
public function test_user_can_register() {
    $response = $this->post('/register', [
        'name' => 'John',
        'email' => '[email protected]',
        'password' => 'secret123'
    ]);
    $response->assertStatus(302);
    $this->assertDatabaseHas('users', ['email' => '[email protected]']);
}
CI/CD Pipelines
Node.js with GitHub Actions + PM2
I created a CI pipeline using GitHub Actions. On every push to main, the app would:
- Run lint and test commands
- Build the production bundle
- SSH into the staging/production server
- Pull latest code
- Restart with PM2 (Process Manager for Node)
jobs:
  build-and-deploy:
    runs-on: ubuntu-latest
    steps:
      - uses: actions/checkout@v2
      - run: npm install && npm run test
      - run: ssh deploy@server "cd app && git pull && pm2 restart all"
Laravel with GitHub Actions + Apache
For Laravel, I set up GitHub Actions to trigger deployment scripts via Envoyer or manually via SSH and Git hooks. The flow:
- Composer install
- Run tests
- Run migrations
- Clear and rebuild caches
- Deploy with
artisan down/upsequence
php artisan down
git pull origin main
composer install --no-dev
php artisan migrate --force
php artisan config:cache
php artisan up
I hosted it on a VPS using Apache2 with SSL configured via Let’s Encrypt.
Docker and Environment Configs
Both versions supported Docker-based local dev:
- Defined
Dockerfileanddocker-compose.ymlfor Node/Laravel + DB services - Used
.envfiles for environment separation (local, staging, production) - Leveraged volume mounts and shared DB networks in dev mode
This setup made onboarding new developers smooth and consistent.
Monitoring and Logs
- Node.js: Used PM2 logs and integrated with LogDNA for real-time alerts
- Laravel: Used
laravel.logwith custom logging channels + Sentry for exceptions - Health check endpoints were exposed for uptime monitoring (e.g.,
/api/health)
Read More : Drizly App Features Every Startup Should Know
Pro Tips and Real-World Lessons from Building an App Like Drizly
By the time the platform was live, I had run into — and resolved — dozens of tricky edge cases that aren’t obvious when you first start building. Here are the most valuable lessons, optimizations, and design decisions I’d recommend keeping in mind before you launch your own Drizly-style app.
1. Avoid Overengineering Early
It’s tempting to build everything perfectly — but the fastest path to launch is getting a working MVP into users’ hands. I initially planned multi-zone delivery, dynamic pricing engines, and AI-powered recommendations — all of which were overkill before the first 100 orders. Stick to:
- Manual store onboarding before automating syncs
- Flat delivery fees before going full geo-fenced logic
- Basic filters before AI search
Start lean. Then layer on complexity only if users actually need it.
2. Mobile-First Isn’t Optional
Most traffic came from mobile devices, even for store admins. I made sure the UI was usable on smaller screens:
- Used off-canvas navigation instead of traditional sidebars
- Built full-screen cart and checkout flows
- Ensured button hit areas were large and spacing was thumb-friendly
If you’re building in React, use tailwindcss with sm, md, lg breakpoints from the beginning. If you’re on Blade, keep reusable components mobile-aware and test layouts on real devices, not just emulators.
3. Cache Aggressively, but Carefully
Page speed matters — especially when listing hundreds of products across stores. I cached:
- Store listings per location for 5 minutes
- Product categories and filters for 1 hour
- Guest user carts in localStorage (React) or cookies (Blade)
In Node.js, I used Redis for caching filtered queries and rate limiting. In Laravel, cache() helpers and remember() methods on queries helped massively. Just remember to invalidate caches when product stock or pricing changes.
4. Compliance is a Feature, Not a Hurdle
ID verification and local delivery laws aren’t optional in the alcohol space. I built in:
- Date of birth fields during signup and order
- Upload verification for age-restricted products
- Time-based delivery restrictions per store (e.g., only allow orders 10am–10pm)
Make this part of your data model and UI early. It’s a value-add that makes your app trustworthy.
5. Gracefully Handle Store Unavailability
Stores go offline. Products go out of stock. Drivers get delayed. Build:
- Real-time stock syncs before checkout
- Store-wide “temporarily closed” toggles
- Alert systems for admins when orders are pending too long
Your app should recover gracefully from inventory gaps — showing nearby alternatives or re-stocking alerts.
6. Segment Your Admin Roles Early
I built tiered admin roles from the start:
- Super Admin: Full access
- Store Admin: Manages their own store/products/orders
- Customer Support: Read-only access to orders and users
This made it easier to manage permissions, prevent misuse, and scale the platform for white-labeling or multiple store ownership.
With these real-world insights in place, you’ll avoid a lot of the common pitfalls I faced early on.
Read More : Drizly’s Strategy to Dominate Alcohol Delivery
Final Thoughts – Custom Build vs Clone Solution
Having built this platform from scratch twice — once with Node.js and once with Laravel — I can confidently say: there’s no “one right way.” Whether you go fully custom or start from a pre-built Drizly clone depends entirely on your goals, budget, and go-to-market speed.
When to Build Custom
If you’re solving a highly specific problem, have in-house dev talent, or are building for long-term innovation, going custom gives you full control. You can:
- Design data models exactly for your use case
- Integrate with niche third-party tools or local POS systems
- Optimize every aspect of UX and performance
That said, it takes serious engineering effort — and a few months of focused development — to reach Drizly-level polish. Expect to manage deployment, monitoring, compliance, and bugs yourself.
When a Clone Solution Makes More Sense
If you’re launching in a new market, validating a startup idea, or need to move fast for investor demos — going with a solid Drizly clone can save you 70–80% of the dev time and cost.
A good clone solution (like what we offer at Miracuves) already includes:
- Alcohol-specific compliance features
- Geolocation filtering
- Real-time inventory systems
- Stripe and Razorpay payment flows
- Admin panel with role control
- Scalable tech stack options in Laravel or Node.js
You can customize the branding, tweak the features, and still be live within weeks — not quarters.
👉 Explore our full-featured solution here: Miracuves Drizly Clone
Whether you’re a founder with big plans or an agency delivering for a client, Miracuves offers developer-vetted codebases, clean architecture, and ongoing support.
Frequently Asked Questions – Drizly Clone Development
How long does it take to build an app like Drizly from scratch?
If you’re building from scratch with a full team, expect 8–12 weeks for MVP readiness — assuming a well-defined scope and tight dev cycles. That includes backend, frontend, admin panel, testing, and deployment. With a clone solution like ours, you can cut that down to 2–3 weeks with customizations.
Can I integrate with local liquor store POS systems?
Yes. Both Node.js and Laravel stacks support third-party integrations via REST APIs, CSV imports, or even FTP. We’ve built modules to sync inventory from POS tools or internal store databases. You’ll need proper field mapping and access credentials from the stores.
How do I ensure compliance with alcohol delivery laws?
Compliance starts with data modeling (DOB, ID verification, legal delivery windows), continues with UI warnings and backend checks, and ends with admin auditing. We’ve included these workflows out of the box in our clone app to help stay compliant.
What’s the best way to scale this across cities?
Use geospatial indexing (MongoDB or MySQL spatial columns) to serve stores and products near each user. Add city-based caching, modular store onboarding, and location filters. On the infra side, use horizontal scaling (Docker, load balancers) and CDN for assets.
What makes Miracuves different from other clone app providers?
We offer developer-grade solutions, built with scalable architecture (Node.js or Laravel), clean code, and the ability to fully customize. Unlike rigid templates, our clones are more like head starts — with all critical modules pre-built and engineered for production from day one.
Related Articles


