


When I first started building a App like GMX — a decentralized crypto exchange offering perpetual trading, swap pools, and liquidity provisioning — I knew I was entering one of the most demanding but rewarding spaces in Web3 development. What made GMX appealing wasn’t just its clean UI or low-fee swaps; it was the underlying complexity and flexibility it offers to both traders and liquidity providers.
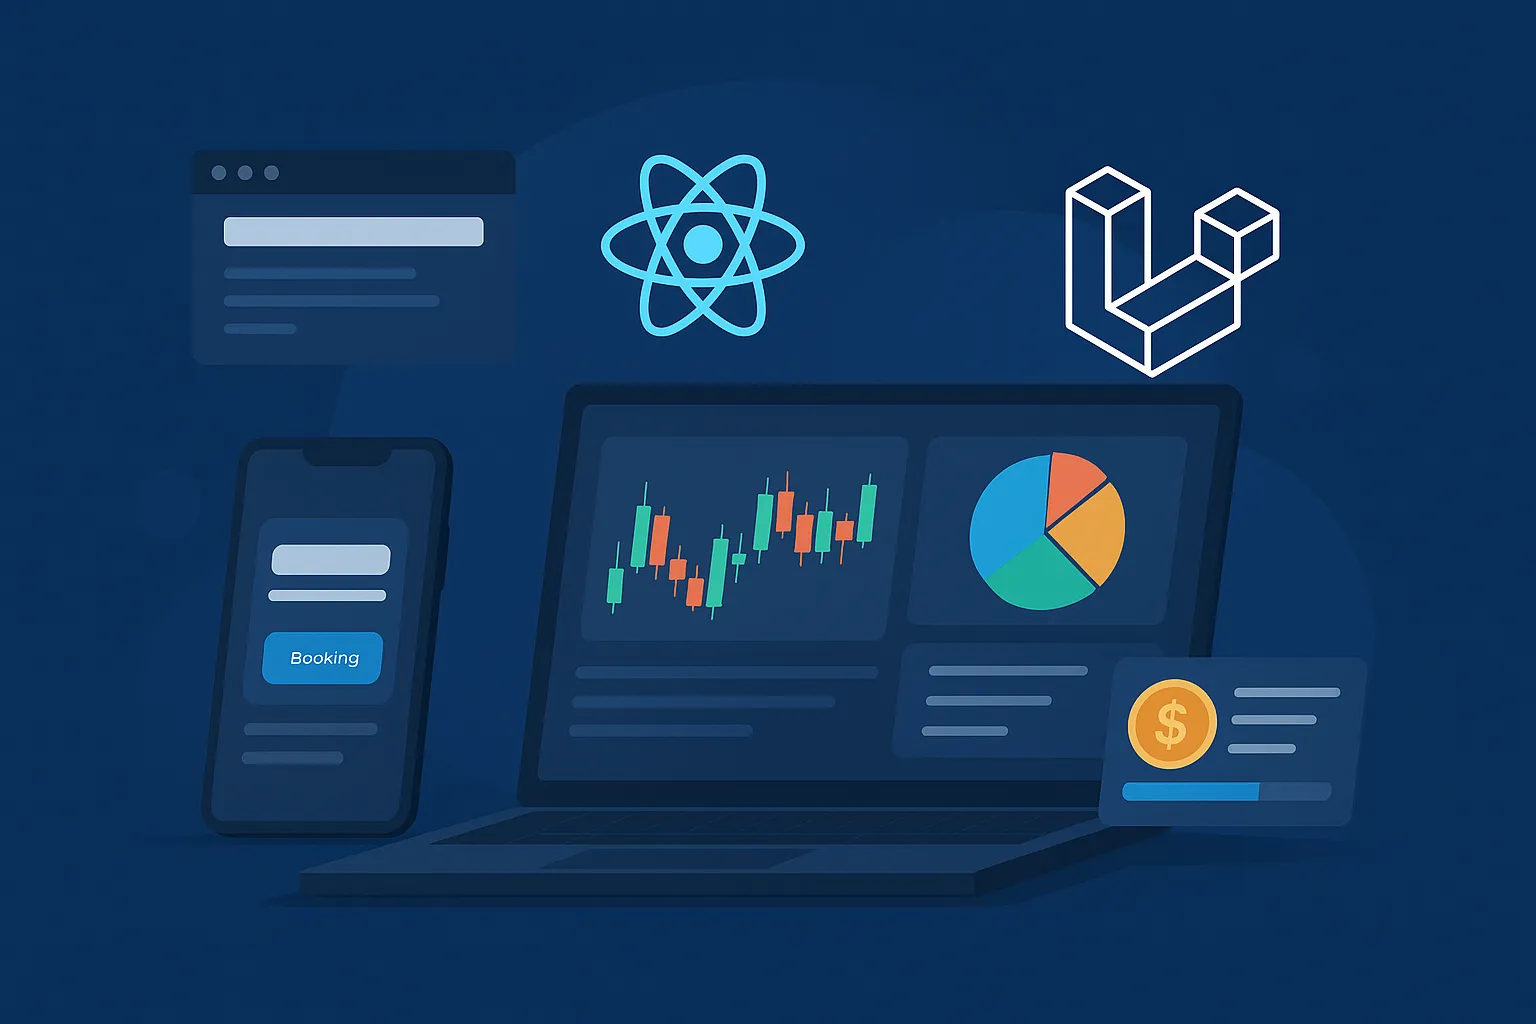
In this tutorial, I’ll walk you through how I built a GMX clone from scratch — covering two paths: one using JavaScript with Node.js and React, and the other with PHP (Laravel or CodeIgniter). Whether you’re a startup founder exploring the market potential, or a dev agency planning to ship an exchange clone fast, this will give you a real-world blueprint with full-stack insights.
Why a GMX Clone?
GMX taps into three major Web3 trends:
- Decentralized finance (DeFi) with perpetual futures (no expiry)
- Low slippage swaps via multi-asset liquidity pools
- Yield generation via tokenized LP positions
If you’re building for the future of crypto, an app like GMX positions you at the intersection of trading innovation, liquidity incentives, and user empowerment. And unlike centralized exchanges, the GMX model is modular and easier to decentralize.
Now, let’s dive into the full-stack approach — from choosing the right tech stack to launching production-ready code.
Tech Stack Breakdown: JavaScript vs PHP Approaches
When I started architecting the GMX clone, I knew from experience that tech stack flexibility is a major decision point for startups. Some teams prefer the modern, event-driven ecosystem of JavaScript (Node.js + React), while others lean toward the robust simplicity of PHP frameworks like Laravel or CodeIgniter. I built and tested both routes — here’s how they stack up.
JavaScript Stack (Node.js + React)
This is my go-to for building responsive, real-time apps — especially when WebSocket support and snappy APIs are key. For the backend, Node.js with Express handled the RESTful endpoints and socket streaming efficiently. I chose React for the frontend to support component reuse across dashboards, trader screens, and analytics pages. Combined with tools like Redux Toolkit and Web3.js/Ethers.js, this stack gave me complete control over Ethereum contract interactions, pricing oracles, and user state management.
PHP Stack (Laravel or CodeIgniter)
PHP surprised me. With Laravel, I could scaffold features fast — authentication, request validation, and migrations were nearly plug-and-play. Laravel’s ORM (Eloquent) was excellent for managing wallet data, swap history, and LP positions. For a lighter alternative, CodeIgniter was snappier to deploy and easier on hosting — ideal if you’re targeting shared environments or want fast iteration without complex DevOps. Blade templating in Laravel made it easy to integrate user dashboards, admin panels, and trade logs.
When to Use What?
- Go with JavaScript if you need heavy front-end interactivity, live trading dashboards, real-time pricing, or plan to integrate a wallet browser extension (like MetaMask) directly into the UI.
- Choose PHP if you’re optimizing for admin-heavy portals, a CMS-like dashboard for pool management, or launching fast on traditional LAMP servers with minimal Web3 interaction.
Database Design: Structuring for Flexibility, Speed, and Scale
Designing the database was one of the most critical parts of the GMX clone. While blockchain data is immutable and decentralized, the app still needs fast-access off-chain storage for trade history, user sessions, pool stats, and analytics. I used both MongoDB (with Node.js) and MySQL (with PHP), depending on the stack. Here’s how I structured key schemas.
1. Liquidity Pools Table/Collection
This powers the swap interface and the yield calculator. Each pool can have multiple tokens, associated APYs, and user LP positions.
MongoDB (Node.js)
{
  "_id": "eth-usdc-pool",
  "assets": [
    { "token": "ETH", "reserve": 1200.34 },
    { "token": "USDC", "reserve": 870000 }
  ],
  "totalLiquidityUSD": 1023000,
  "feeAPR": 13.5,
  "createdAt": "2024-01-10T12:22:00Z"
}
MySQL (PHP Laravel)
CREATE TABLE liquidity_pools (
  id INT AUTO_INCREMENT PRIMARY KEY,
  name VARCHAR(50),
  assets JSON,
  total_liquidity_usd DECIMAL(18,2),
  fee_apr FLOAT,
  created_at TIMESTAMP DEFAULT CURRENT_TIMESTAMP
);
2. Trade History
Used to show order books, history tabs, and audit trails. It also helps in calculating aggregated stats on user dashboards.
Shared fields: tx_hash, user_wallet, pool, amount_in, amount_out, status, timestamp
In both MongoDB and MySQL, I ensured proper indexing on user_wallet and pool for fast querying.
3. Wallet Balances
Though actual balances are on-chain, I maintain a cached version for fast rendering. Updated every few seconds via worker jobs.
Schema: wallet_address, token, cached_balance, last_sync_time
Why This Matters
Having both nested flexibility (in MongoDB) and strict relational structure (in MySQL) allowed me to support multiple frontends — admin, analytics, trader view — without restructuring data pipelines. In production, I also ran Redis to cache frequently accessed liquidity stats, top tokens, and gas fees.
Read More : Best GMX Clone Scripts in 2025: Features & Pricing Compared
Key Modules and Features: Building the Core Trading Engine
Recreating GMX wasn’t just about frontend charts or token tickers. It required careful engineering of core modules like the trading engine, liquidity management, price feeds, user portfolios, and admin controls. I’ll break down each major module I built — and how the implementations differed across Node.js and PHP stacks.
1. Swap & Perpetual Trading Engine
This is the heart of the GMX clone. Users can swap tokens or open leveraged long/short positions.
Node.js Approach
I used Web3.js to fetch live token prices from Chainlink oracles. Trade calculations (entry price, slippage, fees) ran in real-time on the backend, with socket streams broadcasting the updates to React. Executed trades were written to MongoDB and mirrored with on-chain calls via smart contracts.
PHP (Laravel)
Since PHP isn’t great with long-running processes or WebSockets, I built a cron-based execution model with Laravel Queues. Users submit trade intents, which are processed in job queues that interact with ethers-php or shell scripts calling smart contracts via CLI tools like hardhat or cast.
2. Liquidity Provision & Rewards
Users can deposit tokens into pools and earn yield from trading fees. I built interfaces to track total value locked (TVL), APR, and position breakdown.
Node.js
I created a service layer that watches pool contracts and emits reward data via sockets. React displayed dynamic charts and a personalized “My Positions” section.
PHP
Here, I relied on scheduled jobs (using Laravel’s schedule:run) to pull pool metrics every minute and cache them. Blade templates showed LP token values, rewards earned, and pool breakdowns.
3. Search Filters & Token Browser
Traders often search by token, pool type, or reward % to decide where to allocate capital.
Node.js + React
Search was client-side powered by Fuse.js for fuzzy matching with dynamic token suggestions.
PHP + Laravel
Used Eloquent queries with LIKE filters and paginated results to handle search queries efficiently.
4. Admin Panel
Admins can list new tokens, adjust pool configs, or moderate users.
React (Node stack)
Built with React Admin and secured via role-based access (RBAC) with JWT tokens.
Blade (Laravel stack)
Laravel’s built-in scaffolding and @can() directives made it easy to restrict access. Admin pages were fast to set up using Blade components and Livewire for partial reloads.
5. Notification System
Trade confirmations, reward updates, and margin calls need real-time alerts.
Node.js
I used Socket.IO for live push and Nodemailer for fallback email updates.
PHP
Used Laravel Notifications, queued via Redis, with FCM (Firebase) for push and Mailgun for emails.
Data Handling: APIs, On-Chain Data & Manual Listings
Handling data in a GMX-style app involves a mix of real-time blockchain reads, third-party DeFi APIs, and admin-driven manual controls. Both JavaScript and PHP stacks needed separate strategies to manage this efficiently, depending on how deep the integration went.
Third-Party APIs
To fetch live pricing, token metadata, and gas fees, I integrated APIs from sources like Coingecko, Chainlink, and 1inch. In the JavaScript build, I used Axios to poll these APIs and cache results via Redis every 30 seconds. The Node backend served this cached data to React for near-instant rendering.
In the PHP version, I used Laravel HTTP Client to fetch and store price feeds. I scheduled cron jobs to refresh token info and synced it into a MySQL token_prices table. Laravel’s caching layer (with Redis or file-based fallback) ensured that frontend pages didn’t hit external APIs directly.
On-Chain Data Fetching
With smart contracts powering the pools and trades, I relied heavily on Ethereum event logs.
In Node.js, I used Ethers.js to listen for events like SwapExecuted, LiquidityAdded, or PositionClosed. These events were parsed, transformed, and stored in MongoDB collections.
In PHP, I used a bridge approach: Node.js handled Web3 events and wrote data to Redis or a database. The Laravel app simply read from Redis or queried the SQL cache.
Manual Listings via Admin Panel
For tokens or pools not listed via API (say, low-cap tokens or testnet assets), I built a manual listing interface.
Admins could upload token info (symbol, contract address, decimals, icon) or create LP pairs directly via the dashboard.
In React, I built an inline form editor with validations and real-time feedback using Formik + Yup. The backend (Node.js) saved these records into MongoDB and triggered webhook pings to indexers.
In Laravel, I used simple form components, with validation via Request classes and CSRF protection. Blade made it straightforward to manage UI consistency.
Why This Hybrid Approach Works
Not everything in DeFi is fully automated. Some liquidity providers list niche tokens manually. Having a system that supports both API-driven and manual data ensures maximum flexibility without breaking user trust.
In both stacks, I made sure admin edits were logged, version-controlled, and reversible — especially important in a financial app where one wrong field can affect pricing logic.
Read More : Pre-launch vs Post-launch Marketing for GMX Clone Startups
API Integration: Designing Endpoints in Node.js and PHP
To support everything from trades to user portfolio stats, I built a REST API layer that was clean, secure, and scalable. While the frontend (React or Blade) handled the UI, the backend API was the real backbone — syncing with the blockchain, managing business logic, and exposing structured data.
1. Trade Execution Endpoint
Node.js (Express)
// POST /api/trade
router.post('/trade', verifyJWT, async (req, res) => {
  const { tokenIn, tokenOut, amount, leverage } = req.body
  const user = req.user
  const txHash = await executeTrade(tokenIn, tokenOut, amount, leverage, user.walletAddress)
  await TradeModel.create({ user: user.id, tokenIn, tokenOut, amount, leverage, txHash })
  res.json({ success: true, txHash })
})
2. Token Price Endpoint
Node.js
// GET /api/token-price/:symbol
router.get('/token-price/:symbol', async (req, res) => {
  const { symbol } = req.params
  const price = await redisClient.get(`price:${symbol}`)
  res.json({ symbol, price })
})
Laravel
// GET /api/token-price/{symbol}
public function price($symbol) {
  $price = Cache::get("price:$symbol")
  return response()->json(['symbol' => $symbol, 'price' => $price])
}
3. Liquidity Pool Stats
Exposed as /api/pools returning token pairs, TVL, APR, and user positions.
In Node.js, this was a controller using async aggregation from MongoDB.
In PHP, I joined pools and liquidity_positions tables with eager loading via Eloquent.
4. Web3 Wallet Auth
I also built an endpoint to issue a nonce, verify signatures, and issue JWT. This reduced password use and relied on wallet ownership for login.
Both stacks used a challenge-response flow where the user signs a message, and the backend verifies it using ECDSA.
Best Practices I Followed
- Used rate-limiting middleware in both stacks to prevent abuse
- All sensitive actions like trades or LP withdrawal were gated by JWT authentication
- Responses were normalized using transformers in Laravel and DTOs in Node.js
- Errors were caught and logged with full context for audit and rollback
Read More : GMX App Marketing Strategy: How to Make Your DeFi Exchange Stand Out
Frontend + UI Structure: Building with React and Blade
The frontend is where trust is built. In DeFi, UX directly impacts trading confidence. So whether I built using React (for Node.js) or Blade (for Laravel), my focus was on clarity, responsiveness, and fast feedback loops.
React Frontend (JavaScript Stack)
React gave me the agility to design an interactive, real-time trading experience. I built a modular layout using React Router, TailwindCSS, and Redux Toolkit for state management.
Layout Strategy
- Header: Wallet connect, gas tracker, language toggle
- Sidebar: Navigation (Dashboard, Trade, Pools, Rewards, Settings)
- Main Area: Dynamic pages for each module with React Suspense for lazy loading
- Toast Notifications: Real-time confirmations for trades, LP actions, or errors using libraries like
react-toastify
Components - TradeForm.jsx: Token selectors, slippage, leverage slider, and submit button
- ChartWidget.jsx: Integrated TradingView and on-chain price overlays
- LPCard.jsx: Liquidity pool stats with deposit/withdraw options
The UI was fully responsive. On mobile, I collapsed menus into drawers and used swipeable modals for token selection and order previews. Web3 integration (wallet connect, signature prompts) was handled usingweb3modalandethers.js.
Blade Templates (PHP Stack)
For Laravel, I used Blade templating with TailwindCSS and Alpine.js for interactivity. The layout mimicked the React version but with server-rendered components.
Layout Strategy
layouts.apphad the global nav and yield stats- Views like
trade.blade.php,pools.blade.php, andadmin.blade.phpinherited the layout - I added
@includepartials for shared UI like token dropdowns and reward cards
Dynamic UX via Alpine.js
I used Alpine for reactive behavior like toggling modals, validating inputs, and live calculations. For instance, when adjusting leverage, the UI would instantly recalculate estimated liquidation price and fees.
Mobile Responsiveness
Blade + Tailwind made responsive behavior simple with utility classes. I focused on tap-friendly buttons, full-width sliders, and dropdown navs for mobile traders.
Common UX Patterns Used
- Skeleton loaders for async data
- Dark mode toggle with
useEffectin React or Alpine toggles in Blade - Real-time balance updates using polling in PHP and sockets in JS
- A11y features: semantic HTML, keyboard navigation, and readable labels for screen readers
Authentication & Payments: Wallet Login, JWT, and Payment Integrations
For an app like GMX, secure authentication and smooth payment processing are non-negotiables. Since the app operates in the crypto space, I focused on Web3 wallet-based login rather than traditional email/password — but still included fallback methods for admin and hybrid scenarios.
Authentication via Wallet (Web3 Login)
Node.js + React
The login flow starts with a nonce challenge. The backend (Node) generates a random string and sends it to the frontend. The user signs it using MetaMask. The signature is then sent back and verified using ECDSA against the public address.
Once verified, I issued a JWT token (using jsonwebtoken) that persisted in the frontend via HttpOnly cookies or local storage depending on user type.
Middleware like verifyJWT was applied to all routes needing auth (trade submission, LP rewards view, etc.).
Laravel (PHP)
In Laravel, I created a controller to issue a nonce and a signature verification service using kornrunner/ecdsa. Upon successful signature verification, I authenticated the user using Auth::login() or issued a JWT via the tymon/jwt-auth package.
This approach let me maintain session-based login for admin and JWT for users — perfect hybrid model for decentralized frontend and secure admin backend.
Admin Login (Password Auth)
Admins had traditional login credentials.
In React, I used a basic email/password login and issued JWT tokens with role info embedded.
In Laravel, I used Laravel Breeze for a quick setup and added is_admin guards to restrict access.
Payments Integration: Stripe & Razorpay
While GMX is crypto-first, for things like premium analytics, bot subscriptions, or fiat onboarding, I added Stripe and Razorpay as payment options.
Node.js + Stripe
I used the official stripe Node SDK. When users clicked “Subscribe”, the backend created a Checkout Session and redirected them. On success, a webhook updated the user’s premium flag.
const session = await stripe.checkout.sessions.create({
  payment_method_types: ['card'],
  line_items: [{ price: 'price_abc', quantity: 1 }],
  mode: 'subscription',
  success_url: `${process.env.APP_URL}/success`,
  cancel_url: `${process.env.APP_URL}/cancel`
})
Laravel + Razorpay
I used the razorpay/razorpay package to generate orders and pass them to the frontend. After payment, Razorpay redirected with a signature that I verified on the backend.
$api = new Api(env('RAZORPAY_KEY'), env('RAZORPAY_SECRET'))
$order = $api->order->create([
  'receipt' => Str::uuid(),
  'amount' => 99900,
  'currency' => 'INR'
])
Security Practices I Followed
- Used CSRF tokens in Blade forms and
helmetmiddleware in Express - All payments validated via server-side signature check
- JWT tokens had expiry and refresh tokens for long sessions
- Admin APIs were rate-limited and IP-restricted
Read More : GMX Features List: Everything You Need to Know Before You Dive In
Testing & Deployment: CI/CD, Docker, and Production Configuration
Getting the GMX clone production-ready meant more than just writing clean code. I had to ensure everything ran reliably at scale, across environments, and under real-world traffic. That required thorough testing, Dockerization, and a proper CI/CD pipeline for both the Node.js and PHP stacks.
Testing Strategy
Node.js (Mocha + Chai)
I wrote unit tests for core logic like trade validation, price calculations, and JWT middleware using Mocha and Chai. For API routes, I used Supertest to simulate full HTTP calls. All contract interaction functions were mocked using Sinon so tests didn’t rely on RPC calls.
Integration tests covered wallet login, swap execution, and pool APYs using in-memory MongoDB instances via mongodb-memory-server.
Laravel (PHPUnit)
Laravel made testing smooth. I used PHPUnit and Laravel’s built-in test helpers.
- Used
actingAs()to simulate authenticated users - Wrote feature tests for trade submission, wallet sync, and LP dashboard
- Used
RefreshDatabasetrait to reset between tests
For API testing, Laravel’sTestResponsemethods helped assert structure and response formats. I also tested rate limits, auth guards, and validation errors.
Dockerization
To unify environments, I built Docker containers for backend, frontend, and database services.
Node.js App Dockerfile
FROM node:18
WORKDIR /usr/src/app
COPY package*.json ./
RUN npm install
COPY . .
EXPOSE 5000
CMD ["npm", "start"]
Laravel App Dockerfile
FROM php:8.2-fpm
WORKDIR /var/www
RUN apt-get update && docker-php-ext-install pdo pdo_mysql
COPY . .
RUN composer install
Docker Compose
version: '3.8'
services:
  app:
    build: .
    ports:
      - "8000:8000"
  db:
    image: mysql:8
    environment:
      MYSQL_ROOT_PASSWORD: secret
      MYSQL_DATABASE: gmx_clone
CI/CD Pipelines
Node.js with GitHub Actions
- On every push to
main, the app ran tests, built Docker images, and deployed to a VPS via SSH or to a cloud host (like Render or Railway) - Used
PM2as the process manager in production
Laravel with GitLab CI
- CI ran
php artisan test, static analysis (PHPStan), and built Docker images - Deployed via GitLab Runner to a staging server using
Envoyfor zero-downtime deployment - Used Apache with
mod_rewriteand SSL via Let’s Encrypt for the Laravel stack
Runtime Config & Monitoring
- Environment variables were loaded using
dotenvor Laravel’s.envsystem - Enabled centralized logging via Winston (Node) and Monolog (Laravel)
- Used Sentry for error tracking and UptimeRobot for heartbeat pings
- All services were behind NGINX as a reverse proxy with rate limits and cache headers for static assets
Wondering how to hire the best GMX clone developer? Discover the proven steps to build your own high-performance crypto trading platform.
Pro Tips: Speed, Scale, and Real-World Lessons
After building and shipping the GMX clone, I learned some valuable lessons that I wish I had known from day one. These tips apply whether you’re launching on Node.js or PHP — and they’ll save you from painful bottlenecks, UX issues, or scalability traps.
1. Cache Aggressively
APIs like Coingecko or Chainlink can rate-limit you fast. Even blockchain reads can be expensive.
In Node.js, I used Redis to cache token prices, pool stats, and gas fees. TTLs were set between 30–60 seconds depending on volatility.
In Laravel, I cached API calls using Cache::remember() and tagged caches by context (e.g., cache::tags('token_prices')->flush() on updates).
2. Use Pagination Early
Trade history, token lists, and LP logs grow fast. I made the mistake of loading entire datasets in v1. On both stacks, I switched to paginated endpoints with server-side limits and sorting.
React used infinite scroll via react-query, and Laravel Blade used {{ $results->links() }} for elegant pagination.
3. Be Smart About Wallet UX
Connecting wallets can be flaky, especially on mobile. I added fallback modals, reconnect logic, and signature retries.
Avoid asking for wallet signatures unless absolutely necessary — especially during onboarding.
4. Avoid Over-Reliance on WebSockets
I initially streamed everything via Socket.IO, but mobile networks dropped connections too often. For less critical data (like leaderboard or APR), I moved to REST polling every 10s. It reduced flakiness without sacrificing real-time feel.
5. Test on Real Devices
DeFi traders are mobile-savvy. Test your app on Android + iOS, dark mode, low-bandwidth, and Safari. I had several layout bugs that never showed up on desktop Chrome.
In React, I optimized mobile breakpoints and used touch-friendly components. In Blade, I simplified markup and removed hover dependencies.
6. Build a Staging Chain Environment
I deployed contracts to a testnet (Arbitrum Goerli) and ran full-feature staging before pushing to prod. In Laravel, I switched chain RPC via .env. In Node.js, I mapped environments using config.js files.
7. Use Static Asset Versioning
CDN caching caused issues when deploying updates. I versioned JS/CSS bundles using build hashes in React and Laravel Mix’s mix.version() method. This ensured users always got the latest code.
These optimizations made the GMX clone faster, more stable, and easier to scale — especially under traffic spikes during token launches or airdrops.
Read our complete 2025 guide on GMX-like platform development costs, with detailed breakdowns by features, tech stack, and security needs.
Final Thoughts: Custom Build vs Clone Script — What I’d Recommend
After going deep into building a GMX clone from scratch, I can confidently say this — if your startup is ready to invest time and wants full control over every detail, a custom build gives you long-term flexibility. But if you’re racing to launch, validate product-market fit, or attract liquidity quickly, starting with a ready-made clone script is the smart move.
When I’d Go Custom
- You need deeply custom features: custom risk engines, yield strategies, or L2 bridging
- You want to write your own smart contracts from scratch for fine-grained protocol control
- Your dev team already has Web3 experience and is comfortable managing audits, gas optimization, and wallet integration
When I’d Use a Clone
- You’re a startup founder or agency aiming to go live in weeks, not months
- Your use case is 80% similar to GMX and only needs minor UX adjustments or branding changes
- You want to test the waters with MVPs and shift later to custom contracts once you gain traction
For our own dev cycle, building from scratch was a huge learning experience — but it took weeks of R&D, security testing, and infra setup. If I were launching a GMX-like exchange again for a client or new venture, I’d start with a clone script from Miracuves and customize on top of it.
You get the core trading, LP, and wallet features out of the box — and both Node.js and PHP stacks are supported, giving your dev team flexibility. It’s a serious head start without sacrificing scalability or quality.
👉 If you’re looking for a battle-tested GMX clone script that’s production-ready and customizable, check out Miracuves’ GMX Clone
FAQ: Founders’ Questions About GMX Clone Development
1. Can I launch a GMX-like app without writing my own smart contracts?
Yes. Many clone scripts, including those from Miracuves, come with pre-audited smart contracts or integrate with protocols like Uniswap V3 or Synthetix for backend logic. You can run the UI and backend off-chain while relying on tested on-chain contracts to reduce risk and speed up launch.
2. What’s the best stack for long-term scalability — Node.js or PHP?
If you’re building for real-time performance, heavy UI interactivity, and plan to deeply integrate with wallets and Web3 protocols, Node.js + React is better suited. PHP (Laravel or CodeIgniter) is great for admin dashboards, centralized control, and rapid MVPs — especially if your team is already comfortable with LAMP environments.
3. How do I handle liquidity without a large user base?
Initially, you can bootstrap liquidity manually or partner with a liquidity provider. Alternatively, use stablecoin-only pools to keep volatility low. Some clone scripts allow liquidity simulation or off-chain liquidity routing to keep the front end functional while scaling users.
4. Is it legal to launch a GMX clone?
Yes, as long as you’re not copying their branding or misrepresenting yourself. Most DeFi protocols are open-source, and building a similar model (like a perpetual DEX with LP pools) is legal. That said, always check your local jurisdiction and ensure compliance with financial regulations.
5. How do I monetize a GMX clone?
Revenue typically comes from trading fees, liquidity withdrawal fees, premium analytics or subscription add-ons, and native token issuance (if you go that route). Some platforms also charge fees for creating new pools or enable governance-based decision-making for fees and incentives.
Related Articles
- How to Build an App Like Binance: A Developer’s Guide
- Build an App Like PinkSale: A Full-Stack Developer’s Step-by-Step Guide
- How I Built a BSCpad-Like IDO Launchpad: Full-Stack Developer Guide for JavaScript & PHP Stacks


