


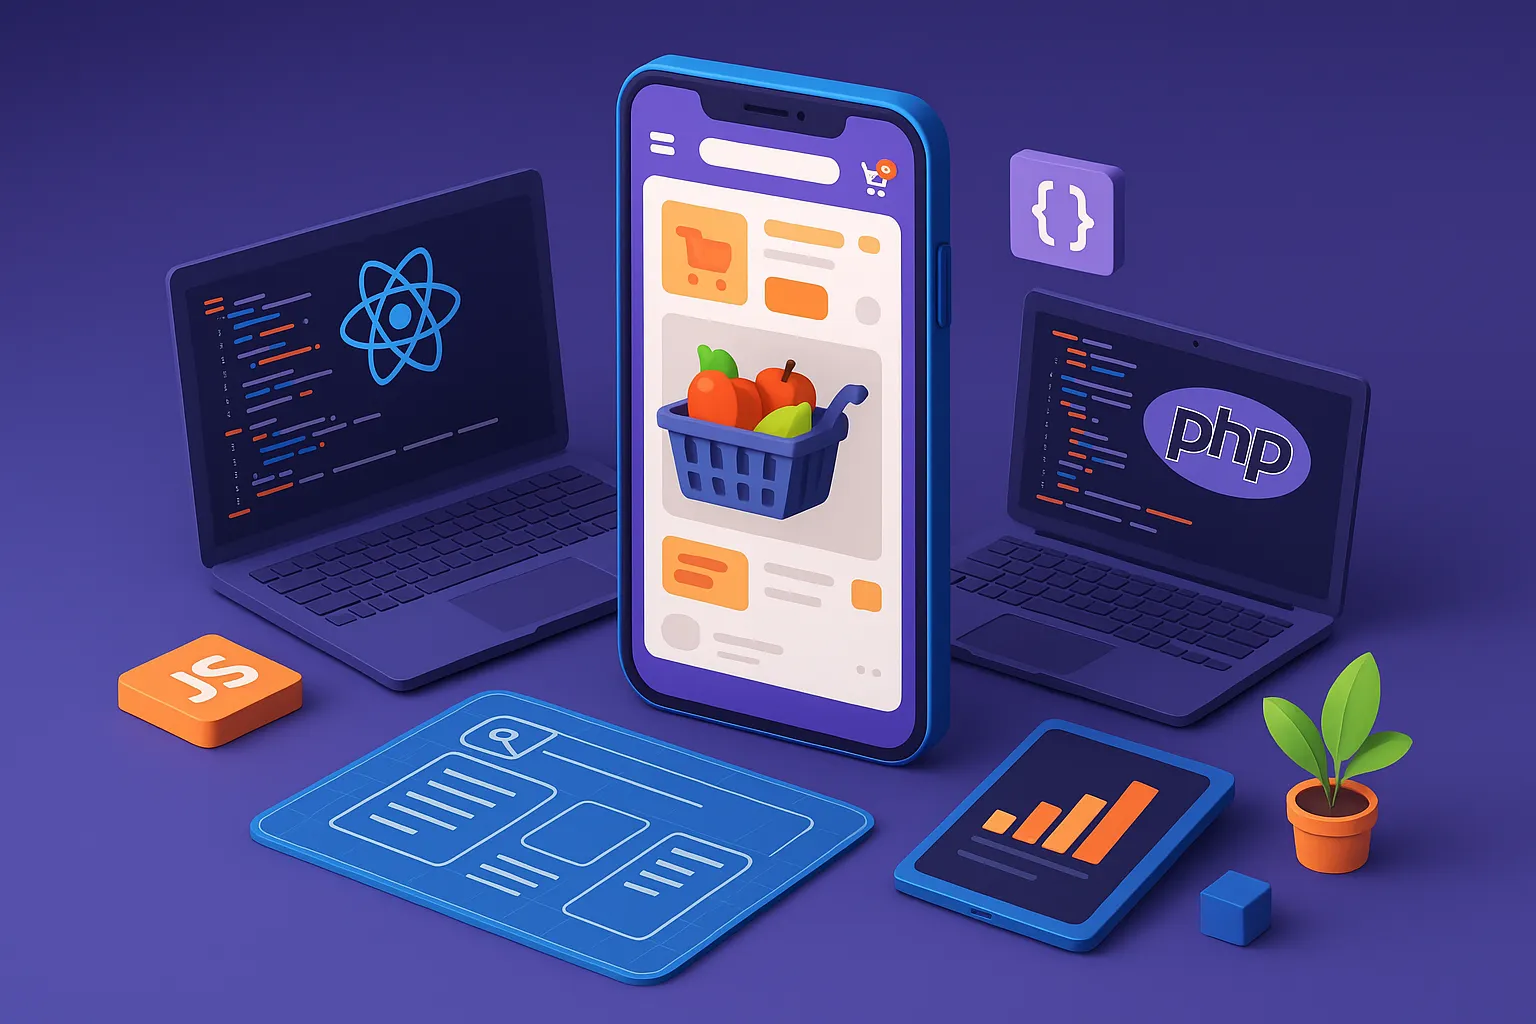
If you’re thinking about launching a hyperlocal delivery platform in 2025, you’ve probably looked at players like Grofers (now Blinkit) and thought — could I build something like that? The short answer: yes, absolutely. I recently built an App Like Grofers from scratch, and in this guide, I’m going to walk you through exactly how I approached it.
We’ll talk about how I structured the architecture, chose between JavaScript (Node.js + React) and PHP (Laravel or CodeIgniter), and tackled real-world challenges like third-party API integrations, real-time delivery updates, payments, and more.
Whether you’re a founder who wants to understand what’s under the hood or a tech agency evaluating stack decisions for a client, this guide should help you get clarity, fast.
Despite the buzz around 10-minute delivery and consolidation in the grocery space, the demand for hyperlocal grocery delivery platforms is stronger than ever. New cities, Tier-2 markets, and niche categories (like organic, local farm produce, or pet supplies) are still underserved.
That’s where clone-based approaches shine — especially when they’re flexible enough to support both full-stack JavaScript and PHP-based backends. I built it with both options in mind, and I’ll show you how.
Choosing the Right Tech Stack: Node.js + React vs PHP (Laravel or CodeIgniter)
When I first scoped out the Grofers app like blinkit , I knew I needed to offer flexibility — not just for my own learning, but for founders or teams who might want to scale this across different tech environments. So, I built it in parallel using two different stacks: one in JavaScript (Node.js for backend, React for frontend), and the other in PHP (Laravel and CodeIgniter variants). Both have strengths depending on the kind of team and product velocity you’re aiming for.
JavaScript Stack: Node.js + React
This stack gives you a full JavaScript experience across both frontend and backend. If you’re aiming for real-time operations (like delivery tracking or live inventory), Node.js shines with its non-blocking I/O and WebSocket support. React is powerful for building dynamic UIs, especially when you want snappy, app-like behavior on mobile and web. I used Express for the backend, MongoDB for the document store (though you can also use PostgreSQL), and JWT for user authentication.
Use this stack if:
- You want a modern, API-first architecture
- Real-time features are a priority
- Your dev team is already JS-fluent
- You plan to scale into microservices or serverless down the road
PHP Stack: Laravel or CodeIgniter
Laravel is great for structured, fast backend development with built-in ORM (Eloquent), routing, and authentication scaffolding. For teams that already use shared hosting or traditional LAMP infrastructure, Laravel or CodeIgniter can be ideal. I used Laravel for admin-heavy setups, where backend logic was more complex — such as inventory batching, zone-level delivery mapping, and coupon engines. For leaner builds or MVPs, CodeIgniter offered just enough to get up and running quickly.
Use this stack if:
- You or your client is already comfortable with PHP
- You want a conventional MVC setup with minimal setup time
- You’re deploying on shared or cPanel environments
- You need to move fast and optimize later
Hybrid Reality: Supporting Both
Here’s the key: I built the architecture to support both stacks behind the same business logic. That means you can mix and match depending on your team. Want a React frontend with Laravel backend? No problem. Prefer Inertia.js with Laravel Blade? Also doable. The flexibility was baked in from day one, and it’s what makes a Grofers Clone truly ready to scale.
Read More : Best Grofers Clone Scripts in 2025: Features & Pricing Compared
Database Design: Flexible, Scalable & Real-Time Ready
Designing the database for a Grofers-style app is one of the trickiest — and most important — parts of the build. You’re not just dealing with users and products. You’ve got delivery zones, order batching, promo codes, live inventory, vendor-side dashboards, and more. From the start, I had to architect something that could handle both structured and semi-structured data, real-time updates, and scale without falling apart under concurrent usage.
Schema Breakdown: Core Tables & Collections
In the JavaScript/Node.js version, I used MongoDB for its flexibility with nested structures. For the PHP/Laravel build, I leaned on MySQL with optimized indexing and foreign key constraints.
Here’s a simplified schema overview:
Users Table / Collection
- user_id (PK)
- name
- email / phone
- password hash
- role (customer/vendor/admin)
- address list [JSON or has-many]
Products
- product_id (PK)
- title
- category_id
- brand
- pricing (JSON for base price, discount, offer)
- availability status
- vendor_id (FK)
- delivery_zone_ids [Array or pivot]
Orders
- order_id (PK)
- user_id (FK)
- status (enum: pending, packed, on-the-way, delivered)
- product_list [JSON with qty, price, product_id]
- payment_method
- delivery_slot
- delivery_address_id
Vendors / Admin Stores
- store_id
- name
- location (lat/lng for geo queries)
- delivery_zones [array or relation]
- active_products_count
- admin_id (FK if store is managed by superadmin)
Delivery Zones
- zone_id
- name
- coordinates (polygon for map-based range)
- assigned_riders or hubs
- surcharge rules
This modular approach meant that if a feature like multi-zone pricing or rider incentives was needed, I could just add extension fields or reference tables.
Why MongoDB Worked for JS Stack
With MongoDB, the nested nature of documents made it easier to store variable-length product options, price brackets, and even multi-level category trees in a single object. It also made it faster to retrieve an entire order (user info + address + product breakdown) in one query using aggregation pipelines.
Why MySQL Was Better for Laravel
Relational schemas worked great in Laravel thanks to Eloquent ORM. I used eager loading to reduce query count and built smart pivot tables to link stores, products, and delivery zones. Laravel’s migrations, seeders, and factory-based testing also helped move quickly with dummy data.
Whichever stack you pick, the key is to design for extensibility from day one. Assume you’ll need multi-vendor listings, flash sales, or zone-specific delivery rules at some point — because you will.
Key Modules & Features of an App Like Grofers
Once the database was ready, I moved on to the modules that drive real functionality — the stuff users actually interact with. These aren’t just pages or screens; they’re systems in themselves: booking logic, inventory sync, delivery status tracking, admin controls, vendor dashboards. Let’s break down how I built them using both JavaScript (Node + React) and PHP (Laravel/CodeIgniter) approaches.
1. Product Discovery & Search Filters
In React, I implemented a dynamic product grid with category and subcategory filters, powered by a real-time search API. Users could filter by tags like “organic,” “discounted,” or “bestsellers”. I cached popular categories client-side and used debounce logic to avoid overwhelming the backend.
In Laravel, I built search using Eloquent queries combined with whereHas() and like operators. The filters were sent via GET parameters, and the Blade template used @foreach to render product cards dynamically. To speed up responses, I indexed the most-used fields and cached filter combinations using Laravel’s built-in cache facade.
2. Booking & Checkout System
For both stacks, the cart and order system were modular — but the implementation varied.
Node.js Approach:
I created a CartController with endpoints like /add-to-cart, /update-qty, and /checkout. Orders were stored in MongoDB with a history log (status changes, timestamps). I also used Stripe webhooks to listen for successful payments and auto-confirm orders.
Laravel Approach:
Used session-based carts stored in Redis or DB. Upon checkout, a service class handled the transaction, payment intent, and order creation atomically. Laravel’s middleware handled post-payment redirects and confirmations.
3. Admin Panel
I built an admin panel for inventory control, vendor approvals, zone management, and promo creation.
React + Node Admin Panel:
Used React Admin with custom components. Backend used Role-Based Access Control (RBAC) with route guards and JWT verification. Each section (like “Products” or “Orders”) had granular API permissions.
Laravel Nova (or Custom CI Panel):
For Laravel, Nova was an efficient way to spin up an admin backend. For CI, I built a clean Blade-powered UI with server-side tables and role checks in controllers. Admins could bulk update inventory, assign stores to zones, and track order-level logs.
4. Vendor Dashboard
Vendors had their own login — completely separate from customers. They could add products, set prices, track their orders, and manage availability.
In both stacks, I created separate middleware/auth guards so vendor routes stayed isolated. APIs for vendors supported CRUD operations for product listing, inventory sync, and performance metrics.
5. Delivery Management & Live Tracking
This module required real-time capabilities.
In Node.js, I used Socket.io to send updates to both user and delivery dashboards when an order status changed. Riders marked their pickup/drop via the delivery app UI, and it updated instantly.
In PHP, I built a polling system where the frontend called /order-status every 10 seconds. Not real-time, but reliable enough for most markets. For Laravel, I queued notifications and used Laravel Echo + Redis when a real-time bridge was needed.
The real power of this app lies in how well these modules communicate — and how extensible they are. I wrote clean, reusable service layers in both stacks so I could swap pieces out later (e.g., replace Stripe with Razorpay, or add a new delivery partner).
Read More : Reasons startup choose our Grofers clone over custom development
Data Handling: Third-Party APIs vs Manual Listings
One of the decisions I had to make early on was — how should the app ingest data? Should I pull inventory from external sources like grocery APIs, or allow vendors/admins to add everything manually? I ended up supporting both, because real-world clients often want flexibility.
Manual Listing via Admin Panel
Manual mode is still the most common scenario. Admins or vendors log in, upload product images, set pricing, assign delivery zones, and define availability.
In Laravel, I used form-based CRUD via Blade views or Nova resources. Product creation handled file uploads (Laravel’s storage facade), then stored metadata in the MySQL DB. I added validation with Laravel’s FormRequest classes and used Spatie MediaLibrary to manage product galleries.
In React + Node.js, I built an admin upload panel using React Dropzone and Material-UI forms. Product images went to AWS S3 via pre-signed URLs. On submit, the React app hit /api/products/create, and the backend validated fields before inserting the product into MongoDB.
The manual approach was ideal for small teams or local admins who wanted tight control over listings.
Third-Party APIs (e.g., Amadeus, Skyscanner-style Inventory)
For some clients, especially those who want to pull grocery or product data from a wholesaler or catalog API, I implemented scheduled ingestion jobs.
In Node.js, I wrote a cron job (using node-cron) that pulled products from an external API every 12 hours. The script handled mapping of categories, deduplication, and price normalization before saving to MongoDB. I logged each sync run for traceability.
In Laravel, I used Laravel Scheduler to run php artisan sync:products commands that fetched external data. I stored incoming payloads in a temporary table, then cleaned, normalized, and merged them into the main products table. If an item already existed, it updated the stock and pricing; if not, it created a new record.
This hybrid model (manual + API) gave clients a choice: run a full self-managed inventory or augment it with real-time listings from suppliers.
API Integration: Structuring Clean, Scalable Endpoints
A Grofers-style app is basically a front-end that lives and breathes via APIs — from product listings and cart operations to user management, order tracking, and payments. Whether I was working in Node.js or Laravel, my goal was to keep the APIs consistent, versioned, and easy to extend. Here’s how I structured them and some sample logic in each stack.
API Routing & Structure
I versioned all APIs from the start. Everything went under /api/v1/ to future-proof the app. The routes were grouped logically: /auth, /products, /orders, /cart, /vendors, /admin.
In Node.js (Express), I organized the API like this:
/routes
  authRoutes.js
  productRoutes.js
  orderRoutes.js
  vendorRoutes.js
/controllers
  authController.js
  productController.js
  ...
/middleware
  authMiddleware.js
  errorHandler.js
In Laravel, the structure followed Laravel’s conventions:
/routes/api.php
  Route::prefix('v1')->group(function () {
    Route::post('login', [AuthController::class, 'login']);
    Route::get('products', [ProductController::class, 'index']);
    Route::middleware('auth:sanctum')->group(function () {
        Route::post('order', [OrderController::class, 'store']);
    });
  });
Sample Endpoint: Fetching Products
Node.js Example (Express + MongoDB)
router.get('/products', async (req, res) => {
  try {
    const category = req.query.category;
    const filters = {};
    if (category) filters.category = category;
    const products = await Product.find(filters).limit(50);
    res.json(products);
  } catch (err) {
    res.status(500).json({ error: 'Server Error' });
  }
});
Laravel Example (Controller + MySQL)
public function index(Request $request)
{
    $query = Product::query();
    if ($request->has('category')) {
        $query->where('category_id', $request->category);
    }
    return response()->json($query->limit(50)->get());
}
Auth APIs
JWT in Node.js:
Used jsonwebtoken and middleware for protecting routes. Tokens were sent in headers and verified on each protected endpoint.
Sanctum in Laravel:
Implemented Laravel Sanctum for SPA-friendly token auth. Tokens were issued on login and auto-attached via Axios headers in frontend.
Payments Webhooks & Order Confirmation
Stripe Webhook (Node.js)
app.post('/webhook', express.raw({ type: 'application/json' }), (req, res) => {
  const sig = req.headers['stripe-signature'];
  const event = stripe.webhooks.constructEvent(req.body, sig, endpointSecret);
  if (event.type === 'payment_intent.succeeded') {
    const orderId = event.data.object.metadata.order_id;
    Order.updateOne({ _id: orderId }, { $set: { status: 'paid' } });
  }
  res.json({ received: true });
});
Razorpay Capture (Laravel)
public function capturePayment(Request $request)
{
    $signature = $request->header('X-Razorpay-Signature');
    if (!$this->isValidSignature($request->getContent(), $signature)) {
        return response()->json(['error' => 'Invalid signature'], 403);
    }
    $payload = json_decode($request->getContent(), true);
    Order::where('razorpay_id', $payload['payload']['payment']['entity']['id'])
        ->update(['status' => 'paid']);
    return response()->json(['status' => 'ok']);
}
APIs are the heartbeat of this kind of platform. The trick is to keep them fast, secure, and modular enough that you can test and update them without breaking the app.
Frontend & UI Structure: React vs Blade in the Real World
This app needed to feel fast, intuitive, and native-like — whether on a mobile browser or a desktop admin dashboard. I had to make the UI responsive, performant, and flexible enough to be reused across user roles (customers, vendors, admins). Depending on the stack, I approached the frontend either with React (for the Node.js build) or Blade templates (for the PHP/Laravel build). Both approaches worked well, but had different trade-offs.
React Frontend (for Node.js Stack)
I used React with React Router for the frontend and structured the UI as a Single Page Application (SPA). Here’s how I broke down the major parts:
Folder Structure:
/src
  /components
    ProductCard.js
    CategoryFilter.js
    Header.js
  /pages
    Home.js
    ProductDetails.js
    Cart.js
    Checkout.js
    Dashboard.js
  /hooks
    useAuth.js
    useCart.js
  /contexts
    AuthContext.js
    CartContext.js
  App.js
I used Context API for managing auth state and cart data globally. Tailwind CSS handled styling — clean, utility-first, and mobile-first out of the box. Product cards used lazy loading for images, while the homepage fetched featured categories and recent products via paginated API calls.
Routing was protected with PrivateRoute wrappers. Vendor and admin dashboards had their own layout components, with sidebar navs and tables rendered via MUI or TanStack Table for performance.
Responsiveness:
Mobile-first design was baked in. I tested across Chrome dev tools, Safari iOS, and Android Chrome. Key mobile tweaks included:
- Sticky bottom navigation for user pages
- Full-width CTA buttons (Add to Cart, Checkout)
- Accordion-style collapsible filters on category pages
Blade Frontend (Laravel or CodeIgniter)
For the PHP builds, I stuck to Blade templates with Bootstrap for styling. Laravel made it easy to pass data to views using compact controllers. While not as dynamic as React, Blade was quicker for admin panels or vendor backends where you want SSR (server-side rendering) for SEO or performance.
Key Techniques I Used:
- Component-based views (
@include('components.navbar')) - Blade layouts with
@yieldand@section - jQuery for light DOM interactivity (search filters, modal popups)
- Laravel Mix to compile SASS and JS bundles
Vendor dashboards used DataTables for order management and chart.js for performance tracking. I also used Blade conditionals to toggle visibility based on roles (@if(auth()->user()->isAdmin())).
Design System & Consistency
Regardless of stack, I kept a consistent visual design:
- Product cards with name, price, offer badge, and cart icon
- Categories as swipeable rows or accordion filters
- Delivery slots as selectable time ranges with validation
- Ratings and stock badges where needed
I also made sure form elements (add/edit product, login/signup, coupon input) used uniform spacing, error handling, and loading states. This is one of the areas where founders often cut corners — but good UX is what keeps users converting.
Authentication & Payments: Securing Users and Handling Transactions
No matter how sleek the UI or powerful the features, if your authentication flow is clunky or your payments fail, users will churn. That’s why I focused hard on making auth seamless and payment processing bulletproof — and I built it differently depending on the tech stack. Let’s break it down.
User Authentication
Both customers and vendors needed secure login and registration. Admins had a separate protected backend. Here’s how I handled authentication in both stacks.
Node.js with JWT
Login/Register APIs:
I used bcrypt to hash passwords and jsonwebtoken to issue JWT tokens. Tokens were returned on successful login and stored in localStorage (for web) or secure storage (for mobile apps).
Middleware Protection:
All protected routes used a simple authMiddleware.js:
const jwt = require("jsonwebtoken")
module.exports = (req, res, next) => {
  const token = req.headers['authorization']
  if (!token) return res.status(403).json({ error: "Unauthorized" })
  try {
    const decoded = jwt.verify(token.split(" ")[1], process.env.JWT_SECRET)
    req.user = decoded
    next()
  } catch {
    return res.status(403).json({ error: "Token invalid" })
  }
}
Token Expiry & Refresh:
I implemented token expiry with a 1-hour window and optional refresh token logic if required. Sensitive routes like checkout and cart updates used this guard extensively.
Laravel with Sanctum
Laravel made token management easy with Sanctum. Upon login, a token was created using:
$user->createToken('auth_token')->plainTextTokenMiddleware & Guards:
Routes were protected using auth:sanctum in api.php, and I created custom middlewares for checking user roles (admin/vendor/customer).
Password Hashing & Validation:
Laravel’s built-in validation and hashing system (Hash::make(), Auth::attempt()) made this super secure and readable.
Payments Integration
I needed to support both Stripe (more common globally) and Razorpay (popular in India). I created abstract service layers so that either could be plugged in depending on the region.
Stripe in Node.js
Client-side:
Stripe.js handled the frontend payment UI. The user selected a card, the client generated a paymentIntent, and sent it to the backend.
Backend logic:
const paymentIntent = await stripe.paymentIntents.create({
  amount: totalAmount,
  currency: "usd",
  metadata: { order_id: orderId }
})
Webhooks:
Once Stripe confirmed the payment, it hit a webhook (/webhook) that updated the order’s status and triggered a confirmation email.
Razorpay in Laravel
Frontend Integration:
Used Razorpay Checkout script with order ID generated from Laravel backend:
$order = Razorpay::order()->create([
  'receipt' => $orderId,
  'amount' => $total * 100,
  'currency' => 'INR'
])
Verification:
After successful payment, the signature was validated using Razorpay’s PHP SDK before marking the order as confirmed.
Refunds & Failed Payments:
Both stacks handled webhook events for payment.failed or refund.initiated, updating the UI and notifying the user accordingly.
Role-Based Access Control
All critical actions were guarded by role checks:
- Only vendors could add/edit products
- Only admins could manage delivery zones or view full reports
- Users could only view their own orders
This logic lived in middleware (authMiddleware.js for Node, policy/guard classes in Laravel). It prevented any cross-access or escalation attacks.
Plan Your Budget Smart: 2025 Full Guide to Grofers App Development Cost and Launch Your Grocery Delivery Success
Testing & Deployment: Going from Dev to Production Smoothly
Once the core features were working and integrated, I turned my attention to making sure everything held up in real-world usage — multiple users, concurrent orders, downtime risks, and scaling challenges. This is the part where many clone projects fumble. Here’s how I structured testing, CI/CD, and deployment in both the Node.js and Laravel setups to ensure a smooth launch.
Testing Strategy
Unit & Feature Tests
In Node.js, I used Jest and Supertest to run unit and integration tests. Each controller had its logic decoupled from route definitions to allow isolated testing. For example, order validation and pricing logic were tested without actually hitting the database.
In Laravel, I wrote PHPUnit tests using Laravel’s built-in testing scaffolding. With model factories, I could generate fake users, products, and orders in seconds. Each test class covered:
- API response structure
- Auth-protected route access
- Business logic (e.g. delivery slot validation, payment status)
Frontend Testing
React components used React Testing Library for rendering and interaction tests. I wrote smoke tests for key flows: homepage, add to cart, login/logout, checkout.
Blade-based frontend testing was more manual — I relied on Laravel Dusk for end-to-end browser testing in the admin and vendor panels.
CI/CD Pipelines
JavaScript Stack (Node + React)
I used GitHub Actions to build, test, and deploy both backend and frontend. Here’s a simplified pipeline:
- Run Jest tests on push
- Lint codebase using ESLint
- Build frontend using
npm run build - Deploy backend to Render (or DigitalOcean) and React frontend to Vercel or Netlify
For production, I managed Node with PM2 and enabled process monitoring, log rotation, and graceful reloads.
Dockerization:
FROM node:18
WORKDIR /app
COPY package*.json ./
RUN npm install
COPY . .
EXPOSE 3000
CMD ["npm", "start"]
PHP Stack (Laravel / CI)
I deployed Laravel apps on Cloudways, Ploi, or Forge — depending on the client’s stack. Laravel’s .env files, queue workers, and php artisan optimize made deployment snappy.
CI with GitHub Actions:
- On push, it ran PHPStan static analysis
- Executed PHPUnit tests
- Deployed via SSH to VPS (configured via Forge)
Apache or Nginx handled traffic, and I ran queue:work and schedule:run via Supervisord for background jobs and cron tasks.
Docker for Laravel (when needed):
FROM php:8.2-fpm
WORKDIR /var/www
RUN apt-get update && docker-php-ext-install pdo pdo_mysql
COPY . .
CMD ["php-fpm"]
Performance Optimization
- Caching: Used Redis for caching popular product queries, categories, and vendor lists
- Compression: Enabled Brotli + Gzip on production servers
- Lazy Loading: Deferred loading of product images, skeleton loaders for better UX
- Minification: Laravel Mix and Webpack handled JS/CSS bundling and compression
Monitoring
For Node, I used PM2 Logs, UptimeRobot, and New Relic for tracking performance and downtime.
For Laravel, I used Laravel Telescope in staging, and Sentry + Blackfire.io in production to track performance bottlenecks and errors.
Read More : Grofers App Features Every Startup Should Know
Pro Tips from the Trenches: What Actually Made a Difference
Every build teaches you something the docs won’t. Building a Grofers-style app from scratch across both stacks gave me a front-row seat to what works — and what trips you up. Here are some practical tips and battle-tested lessons that helped me ship faster, scale smoother, and avoid messes later.
1. Always Design for Zones Early
If you think you’ll “add delivery zones later,” stop. Do it now. Your product, vendor, and delivery logic will all need to consider geography at some point. I made zones a core part of the schema — everything from product availability to delivery charges was zone-aware. This also helped in testing city-specific pricing or vendor availability.
2. Cache Smartly, Not Aggressively
I initially tried caching entire product lists, but any inventory update made the cache stale and misleading. Instead, I cached:
- Category filters
- Static banners/offers
- Popular products (with auto-refresh every 5 minutes)
For Node.js, Redis + ioredis did the job. In Laravel, I used Cache::remember() with tags to invalidate selectively.
3. Avoid Nested Cart Logic in the DB
Don’t store the entire cart as a nested JSON blob. Break it down into line items. Makes updates, analytics, and abandoned cart recovery far easier. I kept cart_items as a separate table/collection and calculated totals on the fly.
4. Image Compression is Non-Negotiable
Large product images will slow down even the snappiest UI. I added server-side compression during upload:
- In Node.js: used
sharp - In Laravel: used
spatie/image-optimizer
Also implemented lazy loading in the frontend to improve time-to-interactive.
5. Use One Payment Provider at First
Supporting Stripe and Razorpay from day one complicated things. Start with one based on your market. Abstract your payment logic so you can switch later. I used a simple PaymentService layer in both stacks with interchangeable drivers.
6. Build a Reusable Notification System
Whether it’s a new order alert, a failed payment, or a delivery delay — you’ll want to notify users. I created a NotificationService that sent emails, push notifications (via OneSignal), and in-app toasts from one place. Easier to scale and debug.
7. Test Mobile Responsiveness As You Build
I made this mistake once — building all pages desktop-first, then scrambling to fix layout bugs for mobile. Switching to a mobile-first CSS approach with Tailwind and Bootstrap’s grid saved me a lot of back-and-forth.
8. Separate Customer & Vendor Auth Early
Don’t use the same login table or route structure. Vendors will have completely different permissions, flows, and interfaces. I used guards and different middleware for each role. Saved me huge refactor headaches later.
These aren’t just nice-to-haves. They’re lessons that shaved off hours (sometimes days) of dev time — and made the app more stable, extensible, and scalable from the get-go.
Read More : Grofers Marketing Strategy: Beyond Just Groceries
Final Thoughts: Custom Build or Clone Solution?
After building this Grofers-style app from the ground up — twice — I can confidently say this: you don’t always need to reinvent the wheel. But you do need to understand how it rolls.
If you’re a founder, there are three paths you can take:
- Build Custom from Scratch – Full control, full cost. Ideal if you’re solving a deeply unique problem or need tight system integrations.
- Start with a Clone, Customize Later – The fastest way to test a business model without burning months and thousands on dev.
- Use a Clone with a Flexible Stack – Like what we’ve built — supports JS and PHP, integrates with APIs, and is modular enough to grow with you.
My biggest takeaway? Clone solutions are only as good as their architecture. A lot of ready-made scripts out there are rigid, spaghetti-coded, or can’t scale past a few thousand users. That’s why we built our Grofers Clone with real developer needs in mind — clean separation of concerns, support for real-time delivery logic, multi-zone pricing, and secure payments.
For most founders, starting with a flexible clone like this gets you 80% of the way — fast. You validate faster, launch leaner, and spend time where it matters: growth, not plumbing.
If you’re serious about launching your own hyperlocal delivery platform, I’d recommend checking out the ready-to-go Grofers Clone by Miracuves. It’s the exact architecture I’ve outlined here — production-ready and built for scale.
FAQs: What Founders Ask Before Building a Grofers-Style App
1. Can I launch the Grofers Clone with just one city and scale later?
Absolutely. The architecture I built supports location zones from the start — so you can launch in one city with custom delivery areas and expand regionally without refactoring. You’ll just assign products, vendors, and delivery settings to new zones as you grow.
2. What’s the difference between your Grofers Clone and a cheap script from Codecanyon?
Most scripts are monolithic, hardcoded, and not built to scale. Ours is modular, RESTful, API-driven, and supports both PHP and Node.js environments. You can plug in real-time delivery tracking, swap payment providers, or launch vendor onboarding flows without tearing everything apart.
3. How fast can I go live with this?
If you’re using the Miracuves Grofers Clone with minimal customizations, you can go live in 2–3 weeks. That includes product setup, delivery zone mapping, vendor onboarding, and branding. With custom features, budget 4–6 weeks depending on complexity.
4. Do I need a separate app for vendors or is it included?
The vendor module is already built. Vendors can log in via their dashboard, manage their listings, handle orders, and monitor earnings. If you want native mobile apps, those can be added on top of the existing APIs.
5. Will this work for categories beyond groceries — like medicine or pet supplies?
Yes. The product model is category-agnostic. I’ve used the same base for a medical delivery platform and a pet food startup. You’ll just rename categories, adjust attributes, and maybe tweak some UI labels.
Related Articles


