


If you’ve been watching the fintech wave, you’ve likely seen how neobanks are transforming the way people interact with money. These digital-only banks offer everything traditional banks do—checking, savings, payments, loans—but without the brick-and-mortar overhead. Think Revolut, Chime, N26, or Monzo.
The appeal? Simplicity, speed, and customer-first design. Whether it’s sending money in seconds, budgeting smarter, or earning interest on the go—users love the control and UX of neobanking apps.
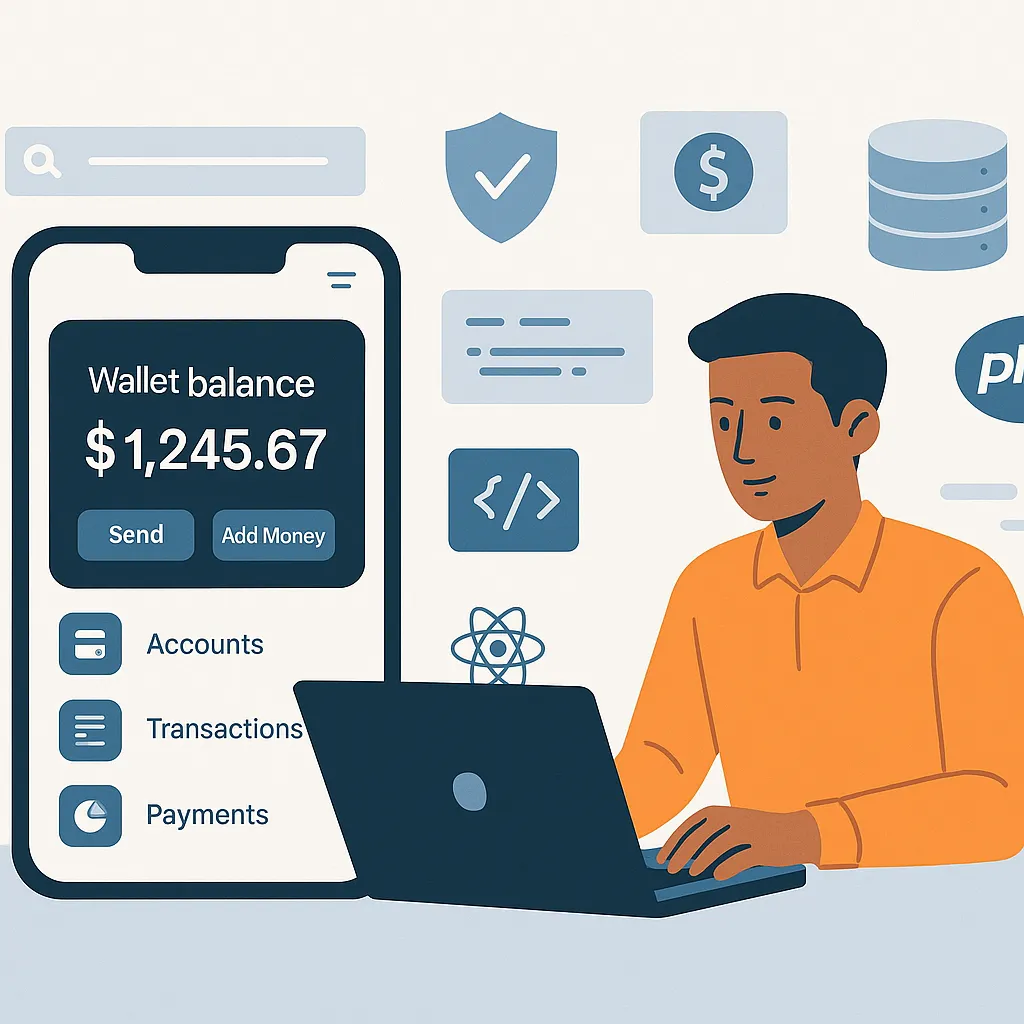
As a full-stack developer, I recently built a Neobank clone from scratch—twice. Once using a JavaScript stack (Node.js + React), and once using PHP (Laravel). This wasn’t a templated job. It was real engineering—handling KYC flows, payment APIs, user authentication, and an intuitive dashboard.
In this guide, I’ll walk you through exactly how I built it—code architecture, stack decisions, challenges, and pro tips—so you can understand what it really takes to launch an app like Neobank.
Tech Stack: JavaScript vs PHP – Choose What Fits You
When building a neobank app clone, the stack you choose will shape your speed, scalability, and future flexibility. Since I built the project twice—once with Node.js + React and once with Laravel (PHP)—I’ll break down how each one performed and where each shines.
JavaScript Stack: Node.js + React
This combo is great if you’re aiming for:
- Real-time performance – WebSocket-based live updates for transactions and balance changes
- Scalable architecture – Event-driven Node.js backend fits well with microservices
- A single language across the stack – JavaScript everywhere
Why I Liked It
I loved how I could share validation logic and data types between frontend and backend using TypeScript. Also, using Express for the API made it fast to prototype, while React with Redux made state management clean and reactive.
Best Use Case: If you’re targeting growth and want a modern, reactive UI with real-time features—this stack is future-proof.
PHP Stack: Laravel or CodeIgniter
If you’re more comfortable with PHP or want fast backend prototyping with strong conventions, Laravel is a powerful choice.
- Laravel: Comes with built-in routing, migrations, Eloquent ORM, queues, guards, and middleware.
- CodeIgniter: Lightweight and good for smaller builds, but I’d recommend Laravel for anything fintech-related.
Why I Liked It
Laravel’s Blade templating engine and MVC structure made it easier to rapidly set up clean, secure forms and views. Features like Sanctum for API auth, queue workers for background jobs, and Cashier for Stripe integration saved a ton of time.
Best Use Case: If you’re building fast and want something rock-solid and secure with minimal JS overhead, Laravel will deliver.
Comparison Snapshot
| Feature | Node.js + React | Laravel (PHP) |
|---|---|---|
| Language | JavaScript (Full Stack) | PHP backend, Blade views |
| Real-time Capabilities | Excellent (Sockets) | Moderate (Pusher, Echo) |
| API Structure | REST / GraphQL (Express) | REST (Laravel Controllers) |
| Learning Curve | Higher (esp. for state mgmt) | Lower (with Laravel docs) |
| Dev Speed | Moderate | Fast |
| Community Support | Huge | Huge |
| Ideal For | Scale, microservices | Rapid launch, strong backend logic |
No matter which path you take, both can get you to MVP and beyond. I’ll walk you through both in this guide so you can decide which makes more sense for your team, your goals, or your comfort zone.
// MongoDB Schema (Mongoose)
const AccountSchema = new mongoose.Schema({
  userId: ObjectId,
  currency: String,
  balance: Number,
  transactions: [{
    type: { type: String },
    amount: Number,
    status: String,
    createdAt: Date
  }]
});
In PHP (Laravel + MySQL), I opted for normalized relational tables. Laravel migrations made structuring the DB straightforward:
Schema::create('accounts', function (Blueprint $table) {
  $table->id();
  $table->foreignId('user_id')->constrained();
  $table->string('currency');
  $table->decimal('balance', 15, 2);
  $table->timestamps();
});
Why Flexibility Matters
In fintech apps, you can’t afford to hard-code assumptions. Users might have multiple accounts, currencies, or cards. Your schema should support:
- Nested relationships (user > account > transactions)
- Soft deletes for audit trails
- Historical snapshots (especially for balance at a given point)
- KYC/AML tracking (e.g., storing submitted docs, approval logs)
Scale Considerations
In Node.js, I used MongoDB Atlas with sharding on userId for scalability. In Laravel, MySQL with indexing on user_id and created_at worked well for transactional data queries.
Caching also matters. I used Redis (both stacks) to cache account balances and reduce real-time DB lookups for dashboards.
The database must scale with user volume, but also be flexible enough for product iterations—like adding crypto wallets or recurring payments later. That’s why a well-abstracted schema is non-negotiable.
Read More : Best Neobank Clone Scripts in 2025: Features & Pricing Compared
Key Modules & Features for App Like Neobank – What Brings It All Together
Neobank apps aren’t just pretty dashboards—they’re a complex network of feature modules working seamlessly together. Whether I was working in Node.js or Laravel, I broke the build into core modules first. Each one needed to be modular, testable, and secure. Here’s how I approached them.
1. User Onboarding & KYC
First impressions matter, especially in fintech. Users must register, verify their identity, and get access fast—but securely.
In Node.js, I used Express, Multer (for document uploads), and integrated with a mock KYC service via REST. Documents and selfies were uploaded to AWS S3, and verification status was updated asynchronously.
In Laravel, I used file uploads with Storage::disk('s3') and dispatched verification jobs via Laravel’s queue system. Status was stored in a kyc_verifications table tied to the user.
The UI (React or Blade) guided users step-by-step, validating fields with instant feedback.
2. Wallet System
This is the heartbeat of any neobank. Users needed to see balances, send/receive funds, and view transaction histories.
In both stacks, wallet balance was never fetched raw from the database—instead, I computed it using transactional deltas, then cached it via Redis. Each transaction carried metadata: type (deposit, transfer, refund), status, notes, and timestamps.
Node.js example:
// Recalculate balance
const balance = await Transaction.aggregate([
  { $match: { accountId } },
  { $group: { _id: null, total: { $sum: "$amount" } } }
]);
Laravel example:
$balance = Transaction::where('account_id', $accountId)->sum('amount');
3. Send Money & Transfers
Transfers required validation (like minimum balances, fee deductions, daily limits), then atomic updates to both sender and receiver.
In Node.js, I used Mongoose transactions to wrap debit/credit logic. Laravel made this easier with DB::transaction() closures.
I also added an internal transaction reference system for tracking, along with optional OTP verification before confirming large transfers.
4. Admin Panel
Admins needed superpowers: approve KYC, freeze accounts, view logs, trigger refunds. I used React Admin for Node builds and Laravel Nova for PHP builds.
Key tools included:
- Role-based access control (RBAC)
- Audit trails on actions
- Notification system (email + in-app)
- Reconciliation dashboard for payment anomalies
5. Search & Filters
Every screen—transactions, users, support tickets—needed dynamic filtering.
In React, I used useDebounce + query strings with API endpoints like:
GET /transactions?user=123&status=completed&date=2025-06In Laravel, I built a reusable scopeFilter trait for Eloquent queries and used Livewire for dynamic filtering in the admin interface.
6. Notifications & Alerts
I integrated push and email notifications for transaction alerts, KYC updates, and admin messages.
- Node.js: Used Firebase Cloud Messaging (FCM) and Nodemailer
- Laravel: Used Laravel Notifications with Mail and FCM drivers
All notifications were also stored in a notifications table and displayed in-app via React/Blade components.
Each feature added complexity but also value. I made sure modules talked to each other cleanly using service classes (Laravel) or helper utilities (Node), keeping code clean and composable.
Data Handling – APIs and Manual Listings
Neobank apps rely heavily on real-time data—whether it’s transaction histories, currency rates, or KYC verification statuses. The challenge? Balancing automation through third-party APIs with manual control via admin panels. I designed the Neobank clone to support both seamlessly.
Third-Party APIs
To simulate real-world banking scenarios, I integrated APIs for:
- Currency exchange: Using Fixer.io and Open Exchange Rates for live forex values.
- KYC verification: Mocked integration with ShuftiPro and Onfido (simulated via sandbox endpoints).
- Card issuing/payment: Created mock endpoints similar to Stripe Issuing and Marqeta to simulate virtual card generation.
In Node.js, I used axios for HTTP requests and wrapped each service in its own class, like KycService, ForexService, etc., ensuring clean abstraction.
// Example: ForexService.js
class ForexService {
  async getRates(base = 'USD') {
    const response = await axios.get(`https://api.exchangeratesapi.io/latest?base=${base}`);
    return response.data.rates;
  }
}
In Laravel, I created service classes using the app/Services directory pattern. Laravel’s built-in Http::get() made API calls clean and expressive.
// ForexService.php
class ForexService {
  public function getRates($base = 'USD') {
    $response = Http::get("https://api.exchangeratesapi.io/latest?base={$base}");
    return $response->json()['rates'];
  }
}
To avoid slow dashboard loads, I scheduled cron jobs to cache exchange rates and reused them via Redis.
Manual Listings via Admin Panel
Admins needed control—especially in test environments or for local deployments without live APIs. So, I built out form-based modules in both stacks for:
- Manually approving KYC
- Creating static exchange rate entries
- Simulating transactions
- Issuing or revoking virtual cards
In React, these were form-driven UIs using Formik + Yup validation. In Laravel Blade, I used Livewire components and validation rules on the backend.
For example, in Laravel, an admin could create a currency rate manually:
Rate::create([
  'base_currency' => 'USD',
  'target_currency' => 'EUR',
  'rate' => 0.93
]);
Each manual entry was logged with created_by, created_at, and a comment field for audit clarity.
Hybrid Mode
Eventually, I built a toggle setting for each integration in the admin panel:
Forex API Mode: [ Live API | Manual ]KYC Verification: [ Auto (API) | Manual Approval ]
This hybrid setup made it ideal for clients in different regulatory environments or early-stage startups doing manual KYC before full automation.
Bottom line: whether data comes from APIs or admins, the structure has to be clear, auditable, and switchable.
Read More : Neobank App Marketing Strategy: How to Build Buzz and Bank Big
API Integration – Sample Endpoints in JS and PHP
No matter how beautiful your UI is, your app lives and breathes through APIs. Everything—from showing wallet balances to processing payments—flows through well-designed endpoints. I built a clean, secure RESTful API layer for both versions of the Neobank clone. Here’s how I approached it in Node.js (Express) and Laravel (PHP).
RESTful Structure
I kept the API structure simple and consistent, following resource naming and REST verbs:
GET /accounts– list user accountsPOST /transactions– initiate a transferGET /transactions/:id– view a specific transactionPUT /profile– update user settingsPOST /kyc/upload– upload KYC documentsPOST /auth/login– authenticate users
Node.js (Express + JWT)
In the JavaScript version, I used Express for route handling and jsonwebtoken for authentication middleware. Each route was scoped by user role (user/admin) and protected with a JWT token.
Example: Creating a Transaction
// routes/transactions.js
router.post('/', authenticateUser, async (req, res) => {
  const { amount, toAccountId } = req.body;
  const result = await TransactionService.createTransfer(req.user.id, toAccountId, amount);
  res.status(201).json(result);
});
The authenticateUser middleware extracted and verified the JWT:
function authenticateUser(req, res, next) {
  const token = req.headers['authorization'];
  if (!token) return res.status(401).send('Access Denied');
  try {
    const verified = jwt.verify(token.split(' ')[1], process.env.JWT_SECRET);
    req.user = verified;
    next();
  } catch (err) {
    res.status(400).send('Invalid Token');
  }
}
Laravel (PHP) + Sanctum
In Laravel, I used Laravel Sanctum for API authentication. Middleware like auth:sanctum simplified protecting endpoints.
Example: Creating a Transaction
// routes/api.php
Route::middleware('auth:sanctum')->post('/transactions', [TransactionController::class, 'store']);
TransactionController.php
public function store(Request $request) {
  $validated = $request->validate([
    'amount' => 'required|numeric|min:1',
    'to_account_id' => 'required|exists:accounts,id'
  ]);

  $result = $this->transactionService->createTransfer(auth()->id(), $validated['to_account_id'], $validated['amount']);
  return response()->json($result, 201);
}
Laravel’s built-in validation and response formatting made error handling straightforward.
Versioning and Rate Limiting
I also versioned the API: api/v1/ prefix, with room to upgrade in future. Rate limits were applied using Laravel’s Throttle middleware and express-rate-limit in Node.js.
Webhooks
For card charges, deposits, and KYC updates, I built webhook handlers:
POST /webhooks/kyc-statusPOST /webhooks/payment
Each webhook validated an HMAC signature to confirm origin and queued internal jobs.
This API foundation was crucial for powering both the frontend and mobile clients, and ensured third-party integrations had a clean surface to plug into.
Frontend + UI Structure – React vs Blade Layouts
When it comes to fintech apps like a Neobank clone, frontend experience isn’t just about aesthetics—it’s about clarity, trust, and usability. I built two UI versions: one in React for the Node.js stack and one using Blade templates for Laravel. Each had its strengths, but both focused on clean UX, mobile responsiveness, and snappy interactions.
React (Node.js Stack)
In the React build, I used:
- React Router for page-based routing
- Redux Toolkit for managing wallet, user, and transaction state
- Tailwind CSS for styling and utility-first layout control
- Axios for API calls
- Framer Motion for subtle animations
UI Structure:
Sidebar: Quick access to Wallet, Transactions, SettingsTopbar: User info, notifications, logoutMainView: Dynamic content based on routesModals: Used for sending money, KYC document uploads, etc.
Mobile UX: I used media queries and conditional rendering to collapse the sidebar into a bottom navigation on mobile. Every component was responsive out of the box, thanks to Tailwind’s sm, md, lg classes.
Example: Account card layout
<div className="p-4 bg-white shadow-md rounded-lg sm:flex sm:justify-between">
  <div>
    <h3 className="text-lg font-semibold">USD Wallet</h3>
    <p className="text-gray-600">Balance: $1,245.67</p>
  </div>
  <button className="mt-2 sm:mt-0 bg-blue-600 text-white px-4 py-2 rounded">Send Money</button>
</div>
Animations made transitions smooth—like when switching accounts or submitting a KYC doc.
Blade + Laravel (PHP Stack)
In the Laravel build, I used:
- Blade templates for rendering UI
- Laravel Mix with SCSS for styling
- Livewire for reactive components like filters, search, and modals
- Alpine.js for lightweight frontend interactivity
UI Structure:
layouts/app.blade.php: Contained the global nav, sidebar, and yield content- Each page (dashboard, transactions, KYC) was its own Blade view
- Livewire handled dynamic table filters, modal toggles, and pagination without full reloads
Mobile UX: Blade layouts were wrapped in responsive containers with container, mx-auto, and w-full classes. I used Alpine.js for drawer menus and collapsibles on mobile.
Example: Account balance component
<div class="p-4 bg-white rounded shadow">
  <h2 class="text-lg font-bold">USD Wallet</h2>
  <p class="text-gray-700">Balance: {{ number_format($account->balance, 2) }} USD</p>
  <button class="mt-2 px-4 py-2 bg-blue-600 text-white rounded">Send Money</button>
</div>
Performance Optimization
- Lazy loading: Used
React.lazyandSuspensein JS;@includeWhenconditionals in Blade - Bundle size: Tree-shaking in React via Vite; minified assets in Laravel Mix
- Mobile-first design: Optimized clickable areas, form spacing, and modal behavior on small screens
UX Choices That Mattered
- Instant feedback after transfers, with loading states and success confirmations
- Dark mode toggle for dashboard (React only, Blade planned later)
- Accessibility enhancements like focus states, keyboard shortcuts, ARIA labels
Whether you’re building with React or Blade, the goal is the same—make users feel secure, in control, and confident. A great UI wins trust in fintech.
Read More : Neobank App Features List: What Every Modern Digital Bank Must Have
Authentication & Payments – Security and Integration Flow
When handling money, security is not optional—it’s the foundation. From login flows to payment processing, I implemented robust, modern solutions in both the Node.js and PHP versions of the Neobank clone. Here’s how I approached authentication, authorization, and payments across stacks.
Authentication (Login, Tokens, Guards)
Node.js (JWT + Bcrypt)
For the Node build, I used bcrypt to hash passwords and jsonwebtoken for issuing secure JWT tokens. Upon login, a token is issued and stored in localStorage or cookies (for SSR builds).
Login flow:
- User submits email/password
- Server verifies credentials and issues a JWT
- Frontend stores token and attaches it in the
Authorizationheader for all API requests
Sample login route:
router.post('/login', async (req, res) => {
  const user = await User.findOne({ email: req.body.email });
  if (!user || !bcrypt.compareSync(req.body.password, user.password)) {
    return res.status(401).json({ message: 'Invalid credentials' });
  }
  const token = jwt.sign({ id: user._id }, process.env.JWT_SECRET, { expiresIn: '7d' });
  res.json({ token });
});
Laravel (Sanctum + Guards)
Laravel Sanctum made API auth easy. I used session-based auth for the admin and token-based auth for the API.
Login flow:
- User submits email/password
Auth::attempt()authenticates and issues a token- Token used for subsequent
auth:sanctumprotected routes
public function login(Request $request) {
  if (!Auth::attempt($request->only('email', 'password'))) {
    return response()->json(['message' => 'Invalid login'], 401);
  }
  $token = $request->user()->createToken('api-token')->plainTextToken;
  return response()->json(['token' => $token]);
}
I also used middleware for role-based access control (isAdmin, isUser) in both stacks to lock down sensitive endpoints.
Two-Factor Authentication (2FA)
2FA was optional but supported. I used Google Authenticator-compatible codes.
- Node.js: Used
speakeasy+qrcodeto generate secret and QR - Laravel: Used the
pragmarx/google2fa-laravelpackage
The system enforced a time-based OTP challenge on high-risk actions like large transfers.
Payments (Stripe + Razorpay)
The app needed to support both card funding and peer-to-peer transfers. I integrated:
- Stripe (globally supported)
- Razorpay (India-specific)
Payment Flow:
- User initiates “Add Money”
- Frontend sends the amount to backend
- Backend creates a payment intent (Stripe) or order (Razorpay)
- User completes checkout on client side
- Webhook confirms payment, triggers wallet credit
Node.js Example (Stripe):
const paymentIntent = await stripe.paymentIntents.create({
  amount: 1000,
  currency: 'usd',
  metadata: { userId: req.user.id }
});
res.send({ clientSecret: paymentIntent.client_secret });
Laravel Example (Razorpay):
$order = $api->order->create([
  'receipt' => 'rcptid_11',
  'amount' => 50000,
  'currency' => 'INR'
]);
return response()->json(['orderId' => $order['id']]);
Webhook Verification
Both platforms handled asynchronous payment confirmations through webhooks. I verified webhook signatures and recorded the payment event before updating balances.
I also added an internal reference ID system for traceability and built retry logic for missed webhooks.
Fraud Prevention
To prevent misuse:
- Rate limiting on payment and login endpoints
- IP-based logging and blocking on suspicious behavior
- Manual review flags for unusual amounts or frequency
- Backend logic to lock user after repeated failed transactions
With authentication and payments tightly locked down, the app felt production-grade—and more importantly, secure and trustworthy.
Read our 2025 neobank development cost guide for a detailed breakdown by features, compliance requirements, and market size.
Testing & Deployment – Pipelines, Docker & Hosting
Once the app was functional, the next step was ensuring it stayed reliable as features scaled. For both JavaScript and PHP stacks, I built automated testing and deployment pipelines. This stage isn’t just about DevOps—it’s about developer peace of mind and production safety.
Testing Strategy
Node.js (Mocha + Chai + Supertest)
In the Node build, I used:
MochaandChaifor unit and integration testsSupertestfor HTTP endpoint testingSinonfor mocking services (e.g., Stripe, KYC APIs)
Example test:
describe('POST /transactions', () => {
  it('should create a new transaction', async () => {
    const res = await request(app)
      .post('/transactions')
      .set('Authorization', `Bearer ${token}`)
      .send({ toAccountId, amount: 100 });
    expect(res.status).to.equal(201);
  });
});
Laravel (PHPUnit + Pest + Laravel Dusk)
Laravel came with powerful testing built-in:
PHPUnitfor logic/unit testsPestfor expressive syntax (I used this for fun)Duskfor browser-based UI testing
Example test:
public function test_user_can_create_transaction() {
  $user = User::factory()->create();
  $this->actingAs($user, 'sanctum');

  $response = $this->postJson('/api/transactions', [
    'to_account_id' => 2,
    'amount' => 50
  ]);

  $response->assertStatus(201);
}
I also wrote feature tests around:
- KYC verification flow
- Wallet top-up
- Admin approval workflows
- API rate limiting & error handling
CI/CD Pipelines
GitHub Actions ran all tests on each push and triggered deployment on main.
Node.js Deployment Workflow:
- Lint → Test → Build (React)
- Docker image build + push to container registry
- SSH deploy to DigitalOcean with
pm2 restart
Laravel Deployment Workflow:
- Composer install + test
- Assets compiled via Laravel Mix
- Rsync to production via GitHub Action
- Run
php artisan migrate+php artisan config:cache
Dockerization
Both projects were fully containerized for local dev and production:
- Node.js used multi-stage Docker builds for Express API and React frontend
- Laravel had Docker services for PHP-FPM, Nginx, and MySQL
Sample docker-compose.yml for Laravel:
services:
  app:
    build: .
    volumes:
      - .:/var/www
    depends_on:
      - mysql
  mysql:
    image: mysql:5.7
    environment:
      MYSQL_ROOT_PASSWORD: root
      MYSQL_DATABASE: neobank
This setup made onboarding for new devs super fast—just docker-compose up and they were running locally in minutes.
Hosting & Monitoring
Node.js:
- Hosted API on DigitalOcean Droplets
- Used PM2 as the process manager (with auto-restart on crash)
- Logs routed to Loggly, and uptime checks via Better Uptime
Laravel:
- Hosted on Laravel Forge + Linode
- Used Apache for serving +
.htaccessfor routing - Logs streamed via Papertrail
- Laravel Horizon for queue monitoring
Both stacks used Cloudflare for DNS + DDoS protection and SSL certificates for HTTPS.
I also set up backups for the databases and weekly cron jobs for cleanup tasks (like purging failed KYC attempts or expired tokens).
Testing and deployment are where a lot of projects fall apart. But here, it was streamlined, automated, and stable from day one.
Read More : Is Developing a Neobank App Expensive? A Deep Dive Into Development Costs
Pro Tips – Scale, Speed & Mobile UX Warnings
After building and launching multiple iterations of the Neobank clone—across stacks, devices, and use cases—I’ve picked up a few key lessons. These are the things I wish I knew earlier. If you’re planning to build or scale a Neobank app, these are your warning signs and power moves.
1. Don’t Trust the Balance Field
Never trust the balance column blindly. Always calculate it based on actual transaction history—or at least validate it regularly in the background.
In Node.js, I scheduled a nightly job to reconcile transactions.sum() with the stored balance and flagged inconsistencies. In Laravel, I added a balance_verified_at field and used queues to verify stale balances silently.
2. Use Redis for Everything You Can
Whether it’s session storage, API rate limiting, wallet balance caching, or even temporarily storing uploaded KYC files—Redis is your secret performance weapon.
I used it to store:
- Temporary 2FA codes
- JWT token blacklists on logout
- Transaction preview summaries
- Live currency exchange values (TTL of 10 minutes)
3. Avoid Overcomplicating Mobile Layouts
In React, I initially tried to reuse too many desktop components with media queries. That made the mobile experience clunky. Eventually, I broke down components and rebuilt mobile-first UI patterns using Tailwind’s responsive utility classes.
In Blade, I created dedicated mobile and desktop partials (_account_card_mobile.blade.php vs _account_card_desktop.blade.php) for better rendering.
Keep tap targets large, input fields spaced, and actions grouped by intent. Nothing breaks user trust faster than a misclick on a money app.
4. Webhook Idempotency is Non-Negotiable
If you’re integrating with payment gateways, assume webhooks will come in multiple times—or not at all.
Each webhook I handled had a unique_reference_id that was checked against logs before acting on it. This ensured no double credits or transaction loops.
5. Log Everything—but Don’t Log PII
Use structured logs with request IDs, user IDs, and context—but redact or exclude anything personally identifiable. This helps with debugging without violating compliance rules (especially in regions like Europe under GDPR).
I set up log parsers in both stacks to flag anomalies: failed logins, high-volume transfers, repeated API errors, etc.
6. Avoid Long-Running API Requests
KYC verification, currency rate fetching, and payment confirmations often take longer than a client can wait. Instead of waiting synchronously, push them to queues and let users poll the status (or notify via websocket/push).
In Node, I used Bull for job queues; in Laravel, I used the built-in Queue::push() and workers managed by Horizon.
7. Prepare for Audits from Day One
Whether you’re building for a startup or an enterprise partner, fintech apps often get audited. Store logs, backups, admin actions, and every KYC action with timestamps. I used a log_events table with polymorphic relations to tag anything important.
8. Avoid Fake Security
Don’t just use SSL and assume you’re done. Rate-limit your endpoints, sanitize inputs even on internal tools, and auto-logout idle users. I implemented password expiration and device tracking as additional layers later on.
These tips saved me time, reduced bugs, and made the app production-worthy. If you’re serious about building a Neobank clone—or any finance app—treat every feature like it’ll be reviewed by a security auditor, a UX expert, and an impatient customer.
Read More : Business Model of Neobank : Revenue, Costs, and Growth
Final Thoughts – What I Learned Building It Twice
Building the Neobank clone twice—once in Node.js with React, and once in Laravel with Blade—wasn’t just a technical experiment. It was a deep dive into how different stacks shape the developer experience, product velocity, and long-term maintainability.
Here’s what stood out to me.
JavaScript Stack: High Control, More Setup
Node.js + React gave me complete control over both backend and frontend. I loved the flexibility, real-time capability (using websockets), and the unified language experience. But that freedom came with responsibility—setting up auth flows, rate limiting, and even proper form handling took more boilerplate.
It’s the right stack if:
- You’re building something complex or modular (think microservices)
- You need real-time sync (wallets, chat, live forex)
- You want to scale horizontally early
But be ready to build some things from scratch—like logging and queue systems—unless you use mature frameworks or add-ons.
PHP Stack: Less Code, More Structure
Laravel surprised me with how productive it was. The framework comes packed with batteries: migrations, job queues, form validation, API auth, admin UI, caching, logging—all done with expressive syntax and stable community packages.
It’s ideal if:
- You want a fast MVP or enterprise-grade app quickly
- You need predictable structure and built-in tooling
- Your team has strong PHP/Laravel familiarity
The trade-off? It’s not built for event-driven scale like Node.js—but for most fintech apps, Laravel can carry the load with smart architecture.
When to Go Custom vs Ready-Made
Honestly, if I were building from scratch for a startup with investor deadlines, I wouldn’t start from zero again. The amount of effort needed to secure every edge case, handle KYC, build dashboards, and polish UX is significant.
That’s why using a ready-made Neobank clone solution like the one we built at Miracuves makes total sense.
- You get full control over code and UI
- It’s already battle-tested for core flows (wallets, KYC, payments)
- You can still choose your stack: Laravel or Node.js
I now advise founders to start with a solid base and then customize on top. Reinventing the wheel in fintech is often a waste of time and budget.
Want to launch fast with flexibility? Check out the Neobank Clone by Miracuves and avoid the 6-month rewrite cycle.
FAQs – Real Questions From Founders
1. Can I use this Neobank clone to build a crypto wallet or hybrid banking app?
Yes. The architecture supports multiple account types (e.g., fiat, crypto, rewards). You can easily add new wallet types, integrate with crypto APIs like Coinbase or Binance, and manage them in the same dashboard. Just ensure your KYC and compliance flows are adapted for your region’s regulations.
2. Is it better to go with Laravel or Node.js if I have a small dev team?
Laravel is generally better for smaller teams or solo devs. It comes with a lot of tooling out of the box—queues, validation, email, API auth, and admin panels—so you can move fast without stitching together too many libraries. Node.js is powerful, but it often needs more setup and custom configurations.
3. How do I handle compliance and security if I’m using a clone script?
Start by working with a legal expert to understand what’s required in your country (PCI DSS, GDPR, etc.). On the technical side, make sure the script supports secure data handling, encrypted storage (for PII), audit logs, and rate-limiting. At Miracuves, we designed the Neobank clone with modular compliance layers—so you can toggle or extend KYC, 2FA, and encryption based on needs.
4. Can the Neobank clone integrate with local payment gateways?
Yes. Both the Node.js and Laravel versions are modular, meaning you can plug in any payment gateway with an API—Razorpay, Flutterwave, Paystack, etc. The system is built to support dynamic payment providers through abstract service classes, so you don’t need to rewrite business logic for every new integration.
5. How long does it take to launch a production-ready version using the Miracuves Neobank Clone?
With branding, API keys, and regulatory content ready, you could launch in 2–3 weeks. The base platform covers core flows—KYC, wallets, transactions, admin—and is designed for fast customization. Compare that to a 4–6 month full-stack build from scratch, and the time savings are substantial.


