


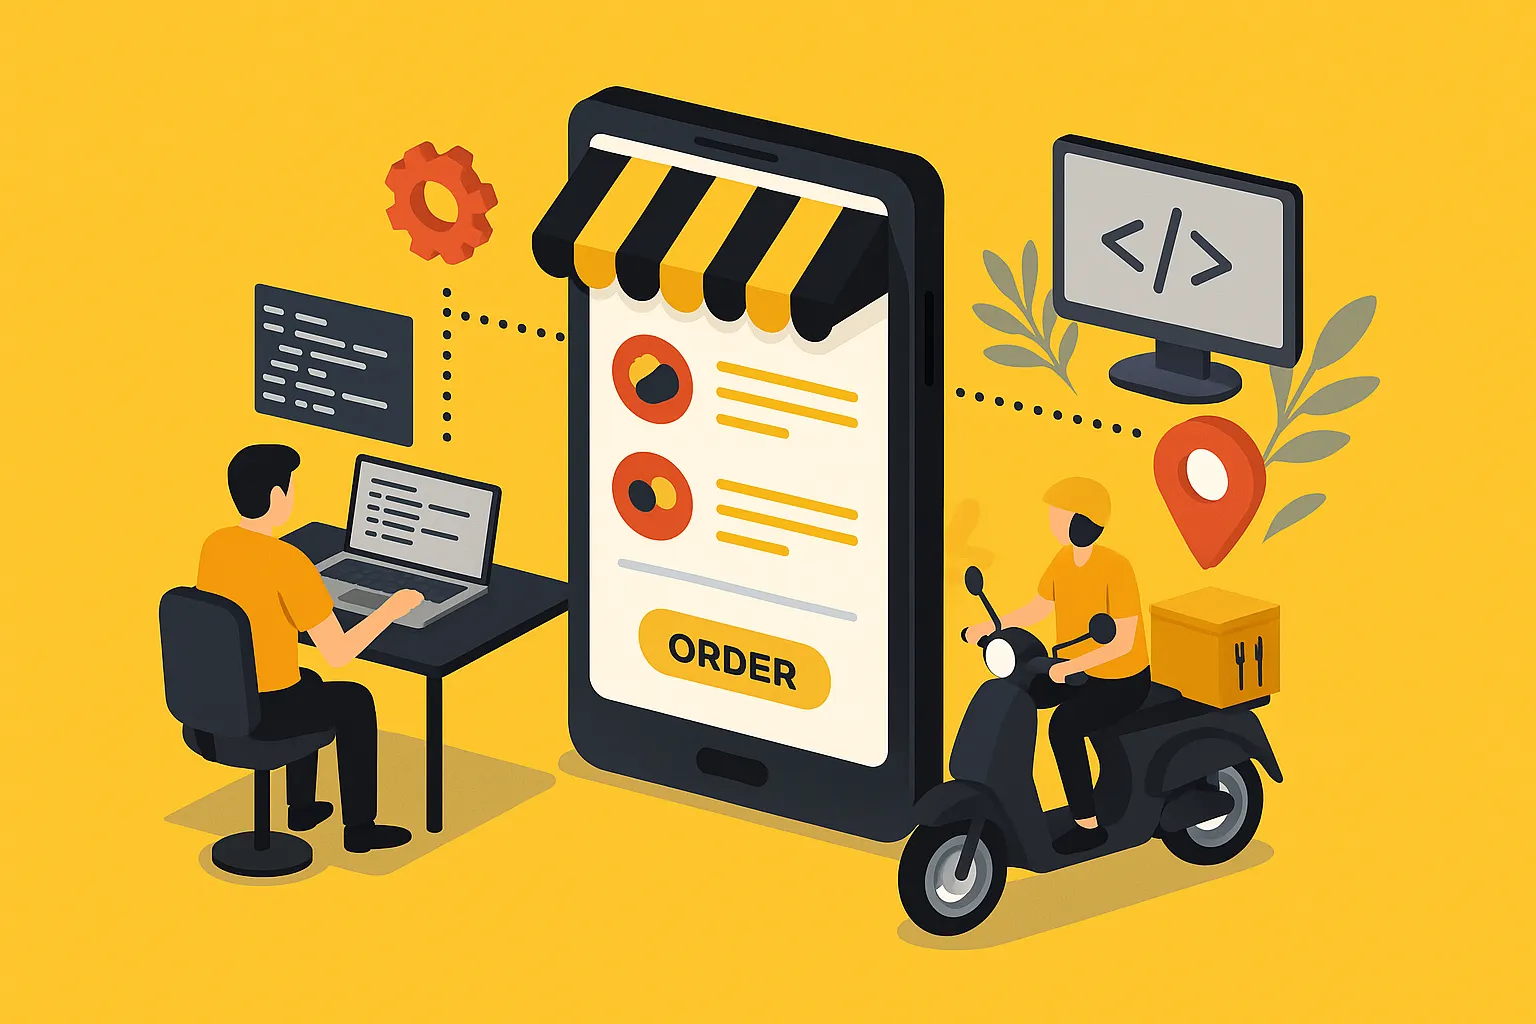
If you’re thinking about building an app like HungerStation, you’re on the right track. As someone who’s built a full-featured HungerStation clone from the ground up, I can say with confidence: it’s a challenging yet incredibly rewarding project — especially if you’re aiming for scalability, sleek UX, and multi-stack flexibility.
HungerStation isn’t just another food delivery app. It’s a powerhouse in the MENA region — a platform that connects users with restaurants, grocery stores, and pharmacies in real-time. Think of it as the UberEats of Saudi Arabia, but with a local twist that integrates delivery logistics, hyper-local vendor selection, and diverse payment flows.
For entrepreneurs and agencies, building a HungerStation clone can unlock massive opportunities in emerging markets. The playbook combines mobile-first design, high-performance APIs, and operational dashboards to streamline logistics and maximize vendor-customer satisfaction.
In this post, I’ll walk you through how I approached building a HungerStation-like app using both JavaScript (Node.js + React) and PHP (Laravel). I’ll break down my dev choices, challenges, key modules, and real-world tips from a builder’s lens — so you walk away ready to build or evaluate your own version.
Tech Stack: Choosing Between JavaScript (Node + React) and PHP (Laravel/CI)
When I first scoped out the architecture for the HungerStation clone, the first major decision was: Which stack gives us speed, flexibility, and long-term maintainability? The answer isn’t one-size-fits-all — it depends on your team’s expertise, the kind of third-party integrations you’re planning, and whether you’re building for web, mobile, or both.
JavaScript Stack: Node.js + React
This stack was my go-to for rapid real-time communication and dynamic UI. On the backend, Node.js (paired with Express.js) gave me the ability to handle asynchronous operations — which is a game changer for real-time order tracking, delivery updates, and socket-based restaurant dashboards. I used MongoDB here, which worked beautifully with Node’s non-relational structure for nested data like menu items, categories, and live order states. On the frontend, React.js gave me component-based control to quickly reuse UI elements like product cards, restaurant listings, and user filters. Combined with Redux for state management and TailwindCSS for styling, I could scale up without bloating the codebase.
Where Node.js + React shines: if you’re building a real-time, modern, highly interactive app and your team is already comfortable with JavaScript end-to-end, this stack will fly.
PHP Stack: Laravel or CodeIgniter
On the other hand, PHP is still a great choice for teams looking for robust backend control with powerful built-in tools. I used Laravel for the PHP version, because its MVC structure, eloquent ORM, and built-in Auth scaffolding made it super fast to roll out restaurant onboarding, customer login, and admin panel operations. Laravel’s Blade templates are efficient for server-side rendering, and its queue system helped me manage delayed jobs like order confirmations and SMS triggers. For simpler or smaller setups, CodeIgniter can still handle the job — especially when you want a lightweight framework for quick delivery MVPs.
Where Laravel wins: if your team is PHP-savvy, or you’re building for markets where server-rendered pages, MySQL databases, and Apache/Nginx hosting dominate — Laravel will get you to MVP fast and keep your backend rock solid.
In both cases, I built REST APIs to decouple backend and frontend logic — enabling smooth frontend switching, future mobile apps, and better testing environments.
Designing the database for a HungerStation-like app means one thing: flexibility. You’re dealing with restaurants, users, delivery agents, orders, menu items, and nested modifiers — so the schema needs to adapt, not just scale.
Read More : Best HungerStation Clone Scripts in 2025: Features & Pricing Compared
Database Design – Structure, Schema, and Scalability
JavaScript Stack – MongoDB Design
With Node.js, I went with MongoDB. Its schema-less nature made it ideal for nested structures — think restaurant > menus > categories > items > addons. Here’s a simplified structure I used:
{
  "restaurant_id": "abc123",
  "name": "Shawarma King",
  "menus": [
    {
      "category": "Wraps",
      "items": [
        {
          "name": "Chicken Shawarma",
          "price": 15,
          "addons": [
            { "name": "Extra Garlic Sauce", "price": 2 },
            { "name": "Cheese", "price": 3 }
          ]
        }
      ]
    }
  ]
}
This setup made querying fast for a single restaurant’s complete menu, and the nested structure helped in building atomic UI components on the frontend. I used indexing on location coordinates for fast geolocation queries via MongoDB’s geospatial indexing.
For order history, I normalized the user and restaurant IDs to keep historical data immutable while allowing joins (via aggregation) when needed.
PHP Stack – MySQL Schema with Laravel
With Laravel, I went traditional MySQL. I normalized the schema using separate tables: users, restaurants, menus, items, addons, and pivot tables for relationships. Here’s a rough schema idea:
restaurants(id, name, location, is_active)menus(id, restaurant_id, title)items(id, menu_id, name, price)addons(id, item_id, name, price)orders(id, user_id, restaurant_id, status)order_items(id, order_id, item_id, quantity, price)
This model works great with Laravel’s Eloquent ORM and makes backend validation, admin reporting, and filtering super clean. The downside? You need to build multiple joins when fetching data for one restaurant — but caching helps mitigate that.
Scaling Considerations
Both stacks support scaling well — MongoDB can shard collections and handle distributed writes; MySQL with Laravel can scale vertically or via read replicas. I added Redis in both cases for caching restaurant lists, menu lookups, and cart states. For delivery zones, I stored polygon-based geofences (especially for vendor coverage) and queried against the user’s lat-long.
Key Modules/Features – From Search Filters to Admin Dashboards
Building a HungerStation clone means thinking in modules, not just screens. Each module has its own backend logic, API endpoints, and UI flow. Here’s how I approached the major ones — with comparisons of how I built them in both JavaScript and PHP stacks.
1. Restaurant & Vendor Management
Node.js: I built vendor onboarding using a RESTful API layer (/api/vendors/register) and used Multer for image uploads (logos, banners). The vendor dashboard used React with context for authentication and simple socket updates for order pings.
Laravel: Here, I leaned on Laravel Nova for the admin dashboard, where vendors could be managed, approved, or suspended. File uploads were handled via Laravel’s Storage system, and policies/gates controlled access.
2. User Search & Filters
Search is one of the most-used flows.
Node.js: I indexed MongoDB’s geolocation fields and used $geoNear queries to find nearby restaurants. Filters like “Open Now”, “Cuisine Type”, and “Offers” were applied on the query level using dynamic parameters.
Laravel: I used MySQL’s spatial extensions to store vendor locations and queried with Haversine formulas. The frontend passed filter parameters via GET requests (/restaurants?cuisine=italian&open_now=true) and Eloquent handled scoped queries.
3. Cart & Checkout System
React + Node: I used Redux to manage cart state client-side and synced it with the backend for authenticated users. A /cart/sync endpoint ensured that cart sessions survived logins and persisted across devices.
Laravel + Blade: I stored cart data in session for guests, and in DB for logged-in users. Laravel’s session handling made it easy, and I built a middleware to auto-merge carts on login.
4. Order Lifecycle & Real-Time Updates
Node.js: This was a strong point. I used Socket.io to manage real-time order status updates between the restaurant dashboard and user app. Whenever a vendor marked an order as “Out for Delivery”, a socket event pushed the update to the user instantly.
Laravel: Real-time updates required Laravel Echo with Pusher for similar functionality. I also queued order status emails using Laravel Jobs.
5. Admin Panel
Node.js: I built a custom admin panel using Next.js for speed and SSR. Admins could view all orders, verify vendors, issue refunds, and manage promo codes.
Laravel: Laravel Nova or Voyager helped speed things up. I customized dashboards for super-admins, support staff, and area managers using Laravel’s policy system.
6. Delivery Agent App/Module
Node.js: I created a lightweight API consumed by a mobile app built with React Native. Orders were auto-assigned based on proximity and availability using a cron job running every 15 seconds.
Laravel: Used scheduled jobs (via php artisan schedule:run) to simulate assignment logic. Delivery agents had their own login panel and could update statuses via a dedicated endpoint /agent/order/update.
Each feature was isolated in its own controller/service module for better reusability and testing across both stacks.
Read More : Complete HungerStation App Feature Guide
Data Handling – APIs vs Manual Listings via Admin Panel
A platform like HungerStation needs to stay flexible with its data sources. Depending on the region or business model, you might want to pull live data from external APIs (like restaurant listings or menu updates) or allow vendors to manually manage their own listings through a dashboard. I designed the system to support both approaches, and here’s how I handled it in JavaScript and PHP stacks.
Third-Party API Integrations
For global expansion or automated updates, integrating with APIs like Zomato, FourSquare, or Google Places can be extremely useful.
In Node.js, I used Axios to connect with external APIs and stored normalized data in MongoDB. I created middleware to sanitize incoming restaurant/menu data and a background service that fetched updates every 24 hours. Sample logic for ingestion looked like this:
// Node.js: Pseudo-code to fetch and insert data
const response = await axios.get('https://api.example.com/restaurants');
response.data.forEach(async (restaurant) => {
  await RestaurantModel.updateOne(
    { externalId: restaurant.id },
    { $set: normalizeRestaurantData(restaurant) },
    { upsert: true }
  );
});
In Laravel, I used Laravel’s HTTP client (built on Guzzle) for API calls and queued the ingestion in jobs. I added a toggle in the admin panel to mark restaurants as “API-controlled”, so they couldn’t be manually edited. Here’s a simplified version:
$response = Http::get('https://api.example.com/restaurants');
foreach ($response->json() as $restaurant) {
    Restaurant::updateOrCreate(
        ['external_id' => $restaurant['id']],
        normalizeRestaurant($restaurant)
    );
}
This approach let us bulk-import thousands of vendors, keep menus synced, and reduce vendor onboarding friction.
Manual Listings via Admin Panel
Sometimes automation isn’t enough. Many smaller vendors need to upload their own content, and local admins want to control categories, availability, and offers manually.
In React + Node.js, I built a React-based vendor panel where restaurants could:
- Create and manage menu items
- Set working hours
- Upload photos and banners
- Track orders and view stats
On the backend, I created REST APIs like:
POST /vendor/menuPUT /vendor/item/:idPATCH /vendor/status
These hit an Express controller with proper role-based validation and JWT auth guards.
In Laravel, I used Blade views for the vendor panel with clean form submissions. Each vendor had CRUD control over their data via resource controllers (MenuController, ItemController). Laravel’s form validation and flash messaging made error handling smooth.
I also implemented a moderation queue, where newly added restaurants or changes required admin approval. This ensured data consistency and quality on both stacks.
API Integration – Sample Endpoints & Data Flow in JavaScript and PHP
Building robust APIs is core to making your HungerStation clone modular, scalable, and mobile-ready. Whether you’re feeding data to a web frontend, a mobile app, or even a partner dashboard, your API layer needs to be clean, versioned, and secure.
Here’s how I structured API development across both JavaScript (Node.js) and PHP (Laravel) stacks—with real endpoint examples and architectural insights.
JavaScript (Node.js + Express) API Structure
I organized the Node.js backend using Express routers, with modular controllers and services. Each feature (like orders, users, restaurants) had its own sub-route.
Example folder structure:
/routes
  /api
    restaurants.js
    orders.js
    users.js
/controllers
/services
/models
Sample endpoint: Fetch nearby restaurants
// routes/api/restaurants.js
router.get('/nearby', authenticateUser, getNearbyRestaurants);

// controller
exports.getNearbyRestaurants = async (req, res) => {
  const { lat, lng } = req.query;
  const restaurants = await Restaurant.find({
    location: {
      $near: {
        $geometry: { type: 'Point', coordinates: [lng, lat] },
        $maxDistance: 5000
      }
    }
  });
  res.json(restaurants);
};
Other endpoints:
POST /auth/loginGET /orders/historyPOST /cart/checkoutPATCH /vendor/status
For error handling, I used custom middleware and structured responses ({ success, data, error }) for consistency across frontend calls.
PHP (Laravel) API Structure
Laravel made it easy to set up versioned REST APIs using route groups and controllers. I placed all API routes under routes/api.php and grouped them like this:
Route::prefix('v1')->group(function () {
    Route::middleware('auth:sanctum')->group(function () {
        Route::get('/restaurants/nearby', [RestaurantController::class, 'nearby']);
        Route::post('/cart/checkout', [CartController::class, 'checkout']);
    });
});
Sample endpoint: Fetch nearby restaurants (Laravel)
public function nearby(Request $request)
{
    $lat = $request->query('lat');
    $lng = $request->query('lng');
    $restaurants = Restaurant::selectRaw("*, (6371 * acos(cos(radians(?)) * cos(radians(lat)) * cos(radians(lng) - radians(?)) + sin(radians(?)) * sin(radians(lat)))) AS distance", [$lat, $lng, $lat])
        ->having("distance", "<", 5)
        ->orderBy("distance")
        ->get();
    return response()->json($restaurants);
}
Other endpoints:
POST /v1/auth/loginGET /v1/user/ordersPOST /v1/vendor/menuPOST /v1/payment/webhook
I also created a global API response formatter using Laravel’s macro system to keep structure uniform and easy to debug.
API Security & Versioning
In both stacks:
- Authentication used JWTs for mobile clients and session tokens for web
- Rate limiting was applied to public endpoints using middleware (Express-rate-limit for Node.js, Laravel’s
ThrottleRequests) - Role-based access control ensured that only vendors could access menu APIs, and only admins could hit sensitive endpoints
Versioning (/v1/) helped future-proof the app for new client versions without breaking old ones. It’s a must if you plan to evolve the platform.
Frontend + UI Structure – Layout, Responsiveness & UX Choices in React and Blade
A strong frontend can make or break an app like HungerStation. You’re dealing with impatient users, high-frequency actions (search, cart, checkouts), and mobile-first behavior. So my goal while building both the React and Laravel Blade frontends was simple: fast, intuitive, and touch-optimized interfaces with modular reusability.
React Frontend (JavaScript Stack)
I structured the React frontend with a clear separation between components, pages, and hooks. For styling, I used TailwindCSS—it kept things rapid, clean, and responsive out of the box.
Key Layout Principles:
- Sticky headers and bottom navbars for quick access on mobile
- Card-based listing for restaurants and items
- Skeleton loaders for async content (especially on slow networks)
- Modal overlays for cart, filter settings, and login
Example UI Modules:
<RestaurantCard />reused across homepage, search, and offers<CartDrawer />as a slide-in panel to manage cart without navigating away<AddressSelector />with autocomplete and map integration
I used React Router for client-side routing and React Query to handle API state cleanly without over-relying on Redux. For authenticated areas (like vendor dashboard), I used JWT-based token guards and PrivateRoute wrappers.
Mobile optimization: I applied touch-friendly spacing, ensured fast TTI (<2s), and lazy-loaded components to reduce initial bundle size. Also added PWA support, so users could “install” the app without needing App Store approval.
Laravel Blade Frontend (PHP Stack)
Blade was perfect for quick SSR views and SEO-friendly rendering. I used Laravel Breeze as the starter template and customized views for vendors, customers, and admins.
Key Blade Techniques:
@componentand@includefor reusable parts like navbars and footers@authand@guestfor role-aware UI visibility- Built-in validation error directives for inline form feedback
Layout Features:
- Responsive grid layouts with Bootstrap or Tailwind (optional)
- Form handling using Laravel’s
old()helpers for smooth UX - Integrated AJAX via Axios for cart updates, filters, and login popups
The Blade version of the UI leaned heavily on server-rendered performance, which is great for users on older phones or slower networks. I added Livewire for dynamic interactions like real-time order status without full page reloads.
UI Flow Highlights:
- Homepage with category filters, promo sliders, and nearest vendors
- Menu page with collapsible sections and addon modifiers
- Cart experience that always keeps cost, ETA, and item edit visible
- Checkout flow with step-by-step progress bar (Address > Payment > Confirm)
Whether React or Blade, I kept the UX consistent: fast-loading pages, intuitive navigation, touch-friendly buttons, and strong contrast for readability.
Read More : Reasons startup choose our HungerStation clone over custom development
Authentication & Payments – JWT/Auth Guards & Stripe or Razorpay Integration
For an app like HungerStation, secure and seamless authentication paired with flexible payment integration is non-negotiable. I architected both with scalability and user experience in mind—ensuring that login flows were snappy, sessions were secure, and payment gateways could scale across multiple regions.
Authentication in Node.js (JavaScript Stack)
I implemented JWT (JSON Web Tokens) for stateless auth. The login endpoint issued access and refresh tokens—stored in HTTP-only cookies for security.
Auth Flow:
- User logs in via
/auth/login→ Server validates → JWT issued - React frontend stores token in cookie or memory (depending on platform)
- Protected routes like
/ordersor/cart/checkoutare guarded by middleware
// Express middleware
const authenticate = (req, res, next) => {
  const token = req.cookies.accessToken;
  if (!token) return res.status(401).send('Unauthorized');
  try {
    const user = jwt.verify(token, process.env.JWT_SECRET);
    req.user = user;
    next();
  } catch (err) {
    res.status(403).send('Token invalid');
  }
};
For vendor and admin roles, I used claims in the JWT payload and applied RBAC (Role-Based Access Control) at the route level.
Authentication in Laravel (PHP Stack)
Laravel’s Sanctum gave me a smooth token-based auth system that worked great for both session-based web access and API tokens for mobile clients.
Auth Guards & Middleware:
webguard for session-driven login (Blade)sanctumguard for API requests from mobile or React frontend- Policies restricted actions like editing menus or processing refunds
Vendor and user logins were separated using different guards (vendor, customer), and password resets were managed using Laravel’s built-in scaffolding.
Payments with Stripe & Razorpay
I supported both Stripe and Razorpay depending on the market. The payment flow needed to work for COD (Cash on Delivery), prepaid, wallet balance, and saved cards.
Node.js (Stripe Integration):
I created an endpoint /payment/intent to generate a payment intent and return the client secret to the frontend.
const paymentIntent = await stripe.paymentIntents.create({
  amount: orderTotal * 100,
  currency: 'sar',
  metadata: { orderId: order._id }
});
The React frontend handled the Stripe Elements UI, and on success, called /payment/confirm.
Razorpay was integrated via their checkout.js widget for markets like India. I verified signatures server-side and updated the order status accordingly.
Laravel (Stripe & Razorpay Integration):
Laravel Cashier made Stripe integration easier, but for full control I used direct Stripe API calls.
For Razorpay:
- I created a signature verification endpoint at
/payment/verify - Used Razorpay’s PHP SDK to validate
razorpay_payment_idandorder_id
I also added webhook routes to handle asynchronous status updates from both Stripe and Razorpay (like payment success, failure, refund initiated).
Security Measures:
- CSRF protection on Blade forms
- HTTPS-only cookies
- Rate limiting on login endpoints
- OTP fallback (using Twilio API) for phone number-based login in both stacks
The result was a flexible, secure payment and auth system that supported guest checkouts, multiple roles, and future scalability to digital wallets and BNPL options.
Testing & Deployment – CI/CD Pipelines, Docker, PM2, Apache Configs
Once your HungerStation clone is feature-complete, it’s time to shift focus to stability and continuous delivery. I implemented CI/CD pipelines, containerized deployments, and process managers to ensure uptime, rapid bug fixes, and reliable version rollouts. Whether you’re deploying a Node.js or PHP-based clone, here’s how I approached testing and deployment in production-ready environments.
JavaScript Stack – Node.js + React Deployment
For the Node.js backend, I containerized the API using Docker. This allowed for environment consistency, especially across dev, staging, and production.
Docker Setup:
- Each service (API, MongoDB, NGINX) had its own container
- Used a multi-stage Dockerfile for lean builds
.envfile controlled environment variables (secret keys, DB URIs)
FROM node:18-alpine
WORKDIR /app
COPY package*.json ./
RUN npm install
COPY . .
EXPOSE 3000
CMD ["node", "index.js"]
Process Manager:
- I used PM2 to run the Node server in production
- Configured ecosystem.config.js for cluster mode with auto-restart on failure
module.exports = {
  apps: [{
    name: "hungerstation-api",
    script: "index.js",
    instances: "max",
    exec_mode: "cluster"
  }]
};
CI/CD Pipeline:
- GitHub Actions handled build/test/deploy
- On
mainbranch push: run lint → unit tests → Docker build → push to server - Deployment handled via SSH script or Docker Swarm/Kubernetes for scale
PHP Stack – Laravel Deployment
For Laravel, I used Apache and Supervisord for queue management.
Laravel Setup:
- Hosted on Ubuntu with Apache2 + PHP-FPM
.envfile managed sensitive config- Deployed via Git, then ran:
composer installphp artisan migratephp artisan config:cachephp artisan queue:restart
Queue Management:
- Laravel Jobs powered background tasks (emails, order confirmations, SMS)
- Used Supervisor to keep queues alive:
[program:laravel-worker]
process_name=%(program_name)s_%(process_num)02d
command=php /var/www/html/artisan queue:work --sleep=3 --tries=3
autostart=true
autorestart=true
numprocs=3
CI/CD Pipeline:
- Bitbucket Pipelines or GitHub Actions ran PHPUnit tests, code sniffers, and triggered deployment scripts
- Used Deployer PHP for zero-downtime Laravel rollouts
Testing Strategy
I wrote unit tests, integration tests, and end-to-end tests in both stacks:
Node.js:
- Jest for unit testing services and routes
- Supertest for API testing
- Postman/Newman for smoke testing post-deployment
Laravel:
- PHPUnit for logic and controller tests
- Laravel Dusk for browser automation and UI flow testing
- Mockery for faking API responses or payment flows
Before every deployment, I ran a test suite on staging and ensured database backups were ready. I also monitored with UptimeRobot and LogRocket to catch frontend crashes or backend anomalies post-deploy.
Read More : HungerStation’s Strategy to Rule Food Delivery
Pro Tips – Real-World Challenges, Speed Hacks & Mobile UX Advice
Building a HungerStation clone from scratch taught me a lot—especially when it came to scale, edge cases, and real-world user behavior. Here are some pro tips and technical hacks that saved me time, boosted performance, and improved mobile UX drastically.
1. Think Local: Timezones, Currencies, and Languages
One of the earliest challenges was handling timezone-specific vendor hours. I had to store everything in UTC and dynamically convert based on the vendor’s region using libraries like moment-timezone (JS) and Carbon (Laravel).
Same goes for currency localization. I built a dynamic pricing module that supported SAR, AED, INR, and showed the currency symbol based on user geolocation or profile.
2. Caching is King
API response times were great in dev, but once I hit 5K+ restaurants in staging, things slowed down. I used:
- Redis in both stacks to cache frequent queries like home listings, menu pages, and geofiltered searches
- In Laravel, used
Cache::remember()for DB-heavy views - In Node, used Redis with
express-redis-cachemiddleware
For cart operations and user session handling, Redis drastically cut down DB reads and improved concurrency.
3. Avoid Overfetching on Mobile
On mobile networks, every API call matters. I optimized my frontend apps to:
- Batch API calls where possible
- Use infinite scrolling for restaurant lists instead of paginated reloads
- Cache categories and filters locally with stale-while-revalidate logic
- Debounce search inputs to reduce query spam
4. Use Lazy Loading for UX Wins
I implemented lazy loading for images using Intersection Observer in React, and loading="lazy" in Blade. This made the homepage and menu screens load visibly faster on mobile.
I also chunked React bundles with code splitting and lazy imports. Pages like the checkout flow loaded only when needed, keeping the initial load time <1.5s.
5. Cart Syncing Across Devices
A common pain point is cart data loss during device switching or login. I added logic in both stacks to:
- Detect local cart state
- Merge it with server-side cart if a user logs in mid-session
- Prompt user if there are conflicts (e.g., item availability changed)
This improved order completion rate noticeably.
6. Handle Spikes with Grace
During promo launches, order traffic could spike 10x in minutes. To survive it:
- I rate-limited coupon APIs and checkout validation endpoints
- Queued SMS/notification dispatch using workers
- Monitored performance with tools like New Relic (Node) and Laravel Telescope
- Added fallback delivery fee rules if the geofencing service went down
7. Make Mobile Tap Areas Generous
On smaller screens, user error is high. I made sure:
- All buttons were at least 44×44 px
- Checkboxes and radio groups were touch-friendly
- Floating CTA bars were used for carts and checkout to reduce scroll fatigue
These tiny UX changes improved conversions and reduced support tickets.
8. Build for Extensibility
Lastly, I designed every module to be swappable. Payment providers, delivery logic, even the vendor dashboard could be switched out without rewriting the core app. That modularity helped in rapidly cloning the product for different regions and use cases.
Read More : Revenue Model of HungerStation: How Saudi Arabia’s Food Delivery Leader Drives Profit
Final Thoughts – Custom Builds vs Ready-Made & When to Go With Miracuves
After building the HungerStation clone end to end in both JavaScript and PHP stacks, I’ve learned one critical thing: it’s not just about coding an app—it’s about building a business platform. The tech is important, yes, but so are timelines, maintenance, scalability, and market readiness.
When Custom Builds Make Sense
If you’re building for a very specific niche—say, a logistics-heavy model with unique commission workflows or a hyper-localized food network with community features—a fully custom build gives you total control. You can fine-tune everything, experiment with architecture, and optimize for performance at a deep level.
But it comes at a cost: more development time, more QA, more team dependency, and a longer route to MVP.
When Ready-Made Clones Win
If speed-to-market is your priority, or you’re testing product-market fit in a new geography, starting with a ready-to-launch clone makes absolute sense. You get a proven foundation, tested flows, and you can still customize on top of a stable base.
I’ve seen founders spend 6 months building what they could’ve launched in 4 weeks using a pre-built system—only to realize the market had already moved.
Why I Recommend Miracuves
After working on both custom and clone-based deployments, Miracuves stands out for one simple reason: they offer flexibility with technical credibility. Whether you prefer Node.js + React or Laravel PHP, you can launch with either stack—and both support modular upgrades, API integration, and vendor/operator dashboards.
If I had to do this again, I’d start with Miracuves’ HungerStation Clone and customize from there. It would’ve saved me weeks of backend scaffolding, admin setup, and payment logic—all of which are already solved in their product.
Ready to launch faster without compromising on tech?
→ Explore the HungerStation Clone from Miracuves
FAQs – Founder-Focused HungerStation Clone Development Questions
1. Can I use this HungerStation clone for grocery or pharmacy delivery too?
Absolutely. The architecture I built supports multiple vendor types—restaurants, groceries, pharmacies—each with their own category, listing rules, and delivery windows. You just need to adjust the product schema slightly and update labels in the UI.
2. Which stack is better for long-term scaling: Node.js or Laravel?
Both can scale well, but here’s the real difference: if you expect lots of real-time updates, socket-based dashboards, and multiple microservices, Node.js is better suited. If you want rapid CRUD development, easier backend management, and strong out-of-the-box tools, Laravel is more efficient. Choose based on your team’s strength and future roadmap.
3. How fast can I go live with a working MVP?
If you’re building custom, expect 6–12 weeks minimum for a solid MVP. But using a solution like Miracuves’ HungerStation Clone, you can go live in under 3 weeks—with full admin control, multi-vendor support, and mobile-ready UI.
4. Does this clone support mobile apps too?
Yes. Both stacks are designed with a decoupled frontend, so you can build or plug in mobile apps using React Native or Flutter, consuming the same REST APIs used by the web client. Miracuves also offers mobile builds if you want native iOS/Android apps out of the box.
5. Can I integrate my own payment gateway or delivery service?
Definitely. Both Node and Laravel versions have modular architecture. You can plug in a custom payment gateway (via SDK or API), replace Stripe/Razorpay, or integrate with third-party delivery services via webhook logic.
Related Articles


