


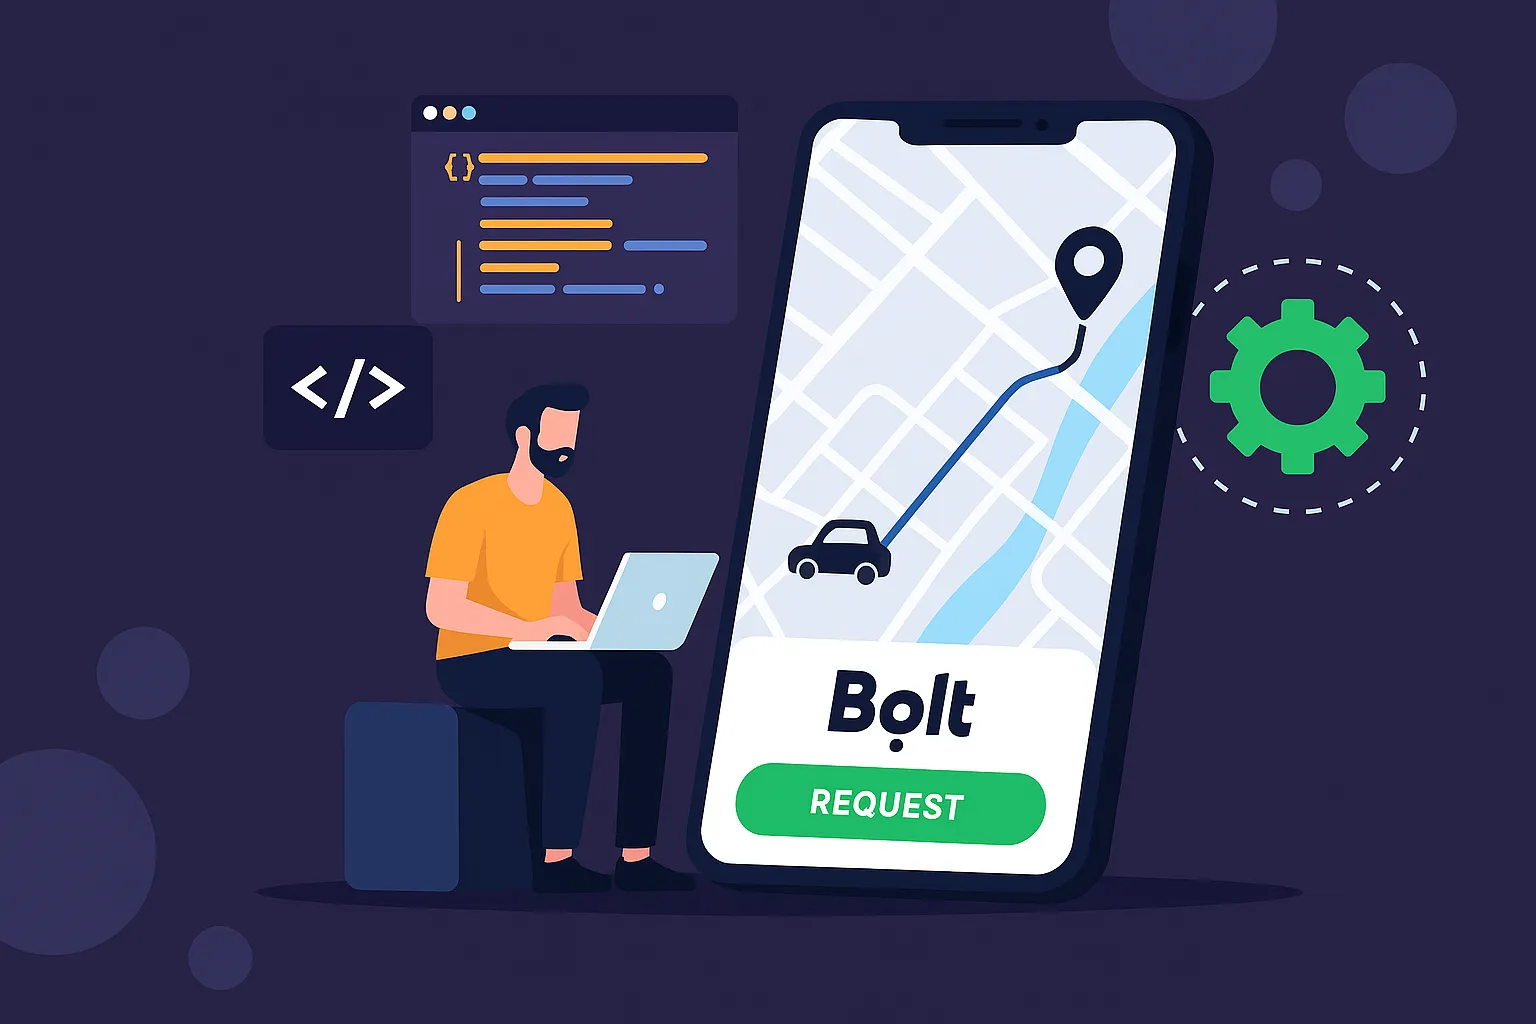
If you’ve ever booked a ride with an app like Bolt, you know how seamless the experience feels. As a full-stack developer, I built a Bolt-style app from the ground up, balancing technical choices with real-world user needs. This isn’t a generic clone script—it’s a breakdown of what worked, the trade-offs we faced, and how both JavaScript (Node.js + React) and PHP (Laravel/CodeIgniter) can power a scalable ride-hailing platform.
Bolt carved its niche across Europe and Africa by offering lower driver commissions, simpler onboarding, and expansion into food delivery and micro-mobility. For startups and agencies, a Bolt clone remains highly relevant: localized markets still need alternatives to Uber, multi-service potential is huge, and owning your platform gives custom control.
Our build focused on core flows—signup, ride request, real-time tracking, payments, and ratings—plus dispatching logic and modular scalability for future services. This approach ensures speed, flexibility, and growth readiness.
Choosing the Right Tech Stack: JavaScript (Node.js) vs PHP (Laravel/CI)
When it came to selecting the tech stack for our Bolt-like app, we didn’t take a one-size-fits-all approach. Instead, we evaluated the product scope, team expertise, scalability needs, and time-to-market goals. Both JavaScript (Node.js + React) and PHP (Laravel or CodeIgniter) turned out to be solid options—but they serve slightly different use cases and founder priorities.
JavaScript Stack: Node.js + React
We chose the Node.js + React stack when the priority was real-time capabilities, microservices, and a modern development experience. Node.js’s non-blocking architecture is a natural fit for geolocation-based apps where data streams constantly—from drivers updating their coordinates to users checking ETA in real time.Backend with Node.js/Express: We built RESTful APIs with Express and used WebSockets (via Socket.io) for real-time driver tracking and trip updates. JSON is native here, so data interchange with frontend or third-party services like Google Maps API was seamless.Frontend with React: The user and driver apps (web versions) were built using React with Redux for state management. We used TailwindCSS to move quickly with a clean UI and Material UI components for consistency. The web admin panel was also built in React.Deployment with PM2 and Nginx: For scaling and load balancing, PM2 managed multiple Node processes while Nginx handled reverse proxying and static file serving.
PHP Stack: Laravel or CodeIgniter
For clients who prioritized faster MVP builds, simpler hosting requirements, or budget constraints, we implemented the same platform in Laravel or CodeIgniter.PHP isn’t new, but frameworks like Laravel give it a modern spin—complete with routing, ORM, built-in auth scaffolding, and artisan commands that speed up development.Laravel Highlights: Laravel’s Eloquent ORM made complex data relationships easy to manage (especially trip logs, user-driver associations, etc.). With Blade templating, the admin panel came together quickly without a separate frontend stack.CodeIgniter Option: For extremely lean builds, CodeIgniter gave us a lightweight MVC structure and rapid load times with minimal server overhead—ideal for regions with slower internet speeds or for launching in bandwidth-constrained environments.Server Config: Apache or Nginx worked well with PHP. We typically deployed via shared or VPS hosting for budget-friendly deployments, or containerized via Docker if clients preferred cloud platforms like AWS or DigitalOcean.
Which One Should You Choose?
If you’re aiming for a long-term, scalable product with modern development workflows, go with Node.js + React. It’s great for real-time updates, mobile-first UX, and future expansion into native mobile apps using React Native.If your priority is to get to market quickly with a proven and developer-rich ecosystem, Laravel (or CodeIgniter) can get the job done—especially if your team is PHP-fluent or you’re targeting regions where PHP talent is easier to find.The best part? At Miracuves, we build and maintain both stacks, so you’re not locked into one technology path. Whether you’re scaling fast or bootstrapping smart, we’ve got options.
Read More : Best Bolt Clone Scripts in 2025: Features & Pricing Compared
Database Design: Structuring for Flexibility and Scale
When you’re building a ride-hailing app like Bolt, your database architecture isn’t just a place to store user data—it becomes the beating heart of the platform. It powers real-time tracking, pricing logic, user preferences, trip history, and even driver availability across different cities or countries. So we architected our schema to be modular, extensible, and efficient across both tech stacks—Node.js with MongoDB, and PHP (Laravel/CI) with MySQL.
JavaScript Stack: MongoDB with Mongoose
For our Node.js implementation, we used MongoDB. It’s document-based, which made it incredibly flexible when dealing with nested, dynamic data like location coordinates, vehicle metadata, or surge pricing rules.Using Mongoose, we defined models with schemas that ensured structure without losing Mongo’s flexibility. Here’s a simplified version of the Trip schema:
const TripSchema = new mongoose.Schema({
  riderId: { type: mongoose.Schema.Types.ObjectId, ref: 'User' },
  driverId: { type: mongoose.Schema.Types.ObjectId, ref: 'Driver' },
  pickupLocation: {
    lat: Number,
    lng: Number,
    address: String
  },
  dropoffLocation: {
    lat: Number,
    lng: Number,
    address: String
  },
  fare: Number,
  status: { type: String, enum: ['requested', 'accepted', 'ongoing', 'completed', 'cancelled'] },
  timestamps: true
})
This model was fast to query, scalable across city-based collections, and worked beautifully with our Socket-based live updates since data was structured around real-world entities.
PHP Stack: MySQL with Eloquent ORM
In Laravel and CodeIgniter, MySQL was the go-to. For structured, relational data with defined table relationships, it performed reliably even under stress. With Laravel’s Eloquent ORM, we created models that mirrored our Mongo schema—using relationships (hasMany, belongsTo) to manage dependencies like trips, payments, and vehicles.Here’s what a MySQL trips table looked like:
Schema::create('trips', function (Blueprint $table) {
  $table->id();
  $table->foreignId('rider_id')->constrained('users');
  $table->foreignId('driver_id')->constrained('drivers');
  $table->json('pickup_location');
  $table->json('dropoff_location');
  $table->decimal('fare', 8, 2);
  $table->enum('status', ['requested', 'accepted', 'ongoing', 'completed', 'cancelled']);
  $table->timestamps();
});
We stored geolocation data as JSON for flexibility, while foreign keys ensured referential integrity. Indexing driver location updates, trip statuses, and timestamps helped with analytics and faster queries on dashboards.
Core Tables/Collections We Created
- Users: Riders with auth details, wallet, referrals, preferences
- Drivers: Including documents, license, availability, reviews
- Trips: Core ride records, prices, distance, timing
- Vehicles: Types, assigned driver, capacity, fare rules
- Payments: Gateway responses, receipts, refund tracking
- Geo Zones: Service areas, city-specific pricing, driver limits
Scaling and Optimization Strategies
In MongoDB, we used sharded clusters when targeting multi-country setups. For MySQL, we separated reads/writes with replica sets and used Redis for caching driver availability and ETA calculations.In both cases, our schema design allowed us to plug in new modules—like food delivery or intercity rides—without rebuilding the data model from scratch.Ready for the good stuff?
Read More : Reasons startup choose our bolt clone over custom development
Key Modules and Features: Building the Core of a Bolt Clone
Once the foundation was set, we moved into the feature development phase—this is where the app starts to feel like a real product. A Bolt-like platform isn’t just about getting from point A to B. It’s about seamless coordination between users, drivers, real-time updates, and backend intelligence. Whether we built with Node.js or PHP, we maintained a modular approach, making each feature independently testable, upgradeable, and scalable. Let me break down the core modules and how we built them in both stacks.
1. User & Driver Onboarding
Node.js + React: We created two distinct flows—rider and driver. Backend handled form data via REST APIs, validating via Joi and saving to MongoDB. Drivers could upload documents (license, vehicle papers) via multipart requests, stored on AWS S3.Laravel/CI: With Laravel, the form was Blade-based and handled via controller logic. Laravel’s request validation handled inputs, and Intervention Image helped with resizing document uploads. We used Laravel’s file system abstraction for cloud storage.
2. Booking System (Live Matching)
Node.js (Socket.io + Redis): Riders’ requests were sent via REST but broadcast via WebSockets to nearby drivers (within a geo-radius). We cached driver location data in Redis (TTL-based) to avoid overloading MongoDB. Matching logic ranked drivers by proximity and rating.PHP (AJAX + Queued Jobs): In Laravel, we queued booking requests and pinged eligible drivers using Laravel Queues. While WebSockets are also possible in PHP (e.g., using Pusher or Laravel Echo), we leaned on polling-based updates in CI for MVPs. Distance calculations used Google Maps APIs on the server.
3. Real-Time Driver Tracking
JS Stack: Frontend used navigator.geolocation API (mobile apps used React Native’s geolocation module). Location updates were sent every 10 seconds via WebSocket. On the map, we used Google Maps JS API or Mapbox for real-time marker updates.PHP Stack: Here, location was updated via AJAX every few seconds (less elegant, but easier to implement). For real-time views in admin, we used Firebase or integrated Pusher Channels for live map updates.
4. Search Filters & Fare Estimator
We allowed users to filter ride options (Standard, XL, Premium) and view fare estimates before confirming the booking.Node.js: Fare logic was modular—fetched from MongoDB based on city + vehicle type + surge multipliers. Estimate endpoint returned distance (via Google Directions API) + calculated fare.Laravel: Fare rules were stored in MySQL. We built a helper class to encapsulate pricing logic and exposed it via controller routes. Cached base fares and surge values using Redis.
5. Admin Panel (Manage Everything)
React Admin + Node: Our admin panel was a separate React app with protected routes (JWT Auth). It allowed admins to manage users, view live trips, onboard drivers, and update fare zones. APIs were built in Node.js/Express.Laravel Blade: The Laravel version was faster to ship—using built-in authentication, roles middleware, and Blade templates. We used DataTables.js for sorting, filters, and pagination. Admin could manually assign trips, disable drivers, export CSV reports, and view map-based analytics.
6. Ratings, Reviews & Trip History
Both stacks included feedback modules—riders could rate drivers post-trip and leave comments. Ratings were averaged and stored against driver profiles. Trip history for users/drivers was paginated and filterable by date or city.Node.js: We used MongoDB aggregation pipelines to fetch summarized trip history efficiently.PHP: MySQL joins did the job here, and we used Laravel’s with() eager loading to reduce query count.
7. Promo Codes & Wallets
Promos were code-based, validated before ride confirmation. Wallets tracked refunds, bonuses, and prepaid balances.Node: Built with virtual wallet logic and Mongo-based balance tracking. Used Stripe webhooks to auto-recharge wallets.Laravel: Wallet logic lived in a dedicated table. Balance updates were transactional. Stripe/Razorpay webhooks updated user wallets after successful top-ups.
All these modules were built to scale independently, and we reused the same APIs across both web and mobile clients.
Want to Build a Bolt-Like Taxi App? Here’s How to Hire the Perfect Bolt Clone Developer and Launch Your Platform with Confidence
Data Handling: Third-Party APIs vs Manual Listings
In any Bolt-like app, data flow is everything. From geolocation inputs and fare matrices to dynamic vehicle availability and third-party services, your platform needs to juggle live data and structured records with minimal latency. One of the big decisions we made early on was supporting two types of data sourcing: automated via external APIs (like Amadeus or Skyscanner-style integrations) and manual listings through the admin panel. Here’s how we approached both in JavaScript and PHP stacks.
Third-Party APIs (Live Data)
If you’re expanding into multi-city or multi-modal services, external data providers can give you a serious head start. Think city-based vehicle availability, traffic data, even pricing rules. In our case, we integrated with platforms offering transport data (rides, taxis, bikes).
JavaScript (Node.js):
We used axios to make secure server-side calls to APIs like Amadeus (for location and traffic data) and HERE API (for map-based driver search). The flow was:
- User enters pickup/drop-off
- Node.js backend hits 3rd-party API for route/fare/live vehicle estimates
- Response enriched with our own logic (e.g., driver availability, wallet balance)
- Final response returned to frontend for confirmation
We scheduled background jobs (using node-cron) to sync third-party data daily or hourly and cached the results using Redis to minimize API quota usage.
PHP (Laravel/CI):
We built API service classes using Guzzle (Laravel’s HTTP client). The logic was similar—make external API calls, parse the data, and inject it into our internal fare calculation pipeline. Laravel’s job queues handled data sync without slowing down the user experience.
For real-time vehicle data APIs (like transport feeds or e-bike locations), we either stored results in a vehicle_feeds table or served them transiently (without persisting) to keep the DB lean.
Manual Listing via Admin Panel
Not every region has a data provider, and sometimes the best route is to let admins manually define vehicles, zones, and fares. We made that possible through a dedicated “Service Zone” section in the admin dashboard.
React + Node.js:
Admins could create cities, define vehicle categories, and set pricing per KM/minute. All this data lived in MongoDB and was instantly used in fare estimation logic. Zone maps were drawn using Leaflet.js and stored as polygon coordinates.
Laravel Blade:
Using Blade + Laravel’s Form components, admins entered fare configs via dropdowns and sliders. We built validations to prevent overlapping geo-zones. Fare logic was wrapped in a reusable service class that could be toggled between static and API-based modes.
In both stacks, we supported:
- City-wise fare management
- Promo-specific pricing overrides
- Peak-hour and weekend surcharges
- Vehicle restrictions (e.g., bikes allowed only in specific zones)
We also allowed hybrid modes—e.g., base data from APIs, but custom rules layered on top via admin input.
Final Thoughts on Data Sourcing
Our strategy was to never rely entirely on a third-party API. APIs can fail, get rate-limited, or change pricing. That’s why we built fallbacks and editable admin inputs throughout the system. This gave our clients the flexibility to scale to new regions without coding changes.
Now that data sources are sorted, the next big component is API integration itself—how we structured endpoints, authenticated them, and exposed real-time data to frontend clients. Ready to dive into the APIs?
Read More : Build a Ride Hailing Platform: Your Complete Bolt Clone Guide
API Integration: Structuring Endpoints in Node.js and PHP
At the heart of any Bolt-like app is a robust API layer. Every trip booked, every location updated, every driver matched—relies on seamless communication between frontend and backend services. We approached API integration with a few core principles: stateless architecture, modular endpoints, token-based security, and speed. Here’s how we built and managed RESTful APIs in both the JavaScript and PHP stacks.
API Structure: Clean and Predictable
We kept the endpoint structure intuitive and REST-compliant. Here’s a simplified map of key endpoints we implemented:
- POST /auth/register – Register a user or driver
- POST /auth/login – Log in and return token
- GET /vehicles – Fetch available vehicle types
- POST /trips/request – Create a new trip request
- POST /trips/:id/accept – Driver accepts trip
- POST /trips/:id/status – Update trip status (ongoing, completed, cancelled)
- GET /users/:id/trips – Get user trip history
- GET /drivers/nearby – List drivers near a point (geo query)
Each of these was versioned under /api/v1/ to allow future upgrades without breaking clients.
Node.js (Express + JWT + Swagger)
We used Express.js for its simplicity and ecosystem. Endpoints were organized by domain: authRoutes.js, tripRoutes.js, userRoutes.js, etc.Authentication was handled using JWT tokens. Each protected route used middleware like:
const authenticate = (req, res, next) => {
  const token = req.headers.authorization?.split(' ')[1]
  if (!token) return res.status(401).send('Access Denied')

  try {
    const verified = jwt.verify(token, process.env.JWT_SECRET)
    req.user = verified
    next()
  } catch (err) {
    res.status(400).send('Invalid Token')
  }
}
Swagger UI was added for testing and API documentation. It allowed developers and stakeholders to explore endpoints without touching Postman.
Example Endpoint: Create Trip
router.post('/trips/request', authenticate, async (req, res) => {
  const { pickup, dropoff, vehicleType } = req.body
  const trip = await Trip.create({ ...req.body, riderId: req.user.id, status: 'requested' })
  res.status(201).json(trip)
})
PHP (Laravel API Resources + Sanctum)
Laravel made API development smooth using API Resource classes, Sanctum for token auth, and Controller-Model separation. We leveraged Laravel’s route grouping for version control and middleware injection.
API Authentication: Laravel Sanctum handled API tokens with minimal setup. Users received a bearer token on login, which was then used in all secure calls.
Sample Route:
Route::middleware('auth:sanctum')->group(function () {
    Route::post('/trips/request', [TripController::class, 'request']);
});
Sample Controller Logic:
public function request(Request $request) {
    $trip = Trip::create([
        'rider_id' => $request->user()->id,
        'pickup_location' => json_encode($request->pickup),
        'dropoff_location' => json_encode($request->dropoff),
        'vehicle_type' => $request->vehicleType,
        'status' => 'requested',
    ]);
    return response()->json($trip, 201);
}
Real-Time APIs for Live Tracking
In the Node.js stack, we used Socket.io for live updates. When a driver moved, their client emitted a locationUpdate event, which updated MongoDB and broadcasted to the assigned rider’s socket room.
In PHP, since native WebSockets are not standard, we integrated Pusher (or Laravel Echo Server) to push location and trip updates. It’s slightly more setup, but gives solid real-time capabilities even in a PHP world.
Error Handling & Logging
In both stacks, we added global error handlers and logging with Winston (Node) and Monolog (Laravel). Errors were tracked with timestamps, IPs, and user-agent data for audit logs.
Security Considerations
- Rate limiting with
express-rate-limitand Laravel’sThrottleRequests - Payload validation using
Joiin Node and Laravel Form Requests - Input sanitization to prevent XSS and SQL injection
- HTTPS-only token transmission with secure cookies when needed
With APIs ready and communicating seamlessly, we moved on to building the UI/UX layer—ensuring the frontends were just as snappy and user-focused as the backend.
Bolt App Development Cost in 2025: Your Complete Pricing Guide to Budget, Build, and Launch with Confidence
Frontend and UI Structure: Seamless UX for Riders, Drivers, and Admins
Once our APIs were solid, we turned to the frontend layer—the place where your users actually live. For a Bolt-like app, UI/UX is everything. From fast-loading maps and animations to intuitive trip flows and responsive layouts, users expect a polished product that “just works.” We took two parallel frontend approaches—React (for JS stack) and Blade templating (for PHP stack)—each with its own strengths and trade-offs.
React Frontend (Node.js Stack)
When we built the app using React, we went full SPA (Single Page Application) mode for both the rider and driver panels. The web versions of the app were separate from the admin panel, but all consumed the same API backend.
UI Frameworks:
We used TailwindCSS for utility-first styling and Material UI for ready-made components like buttons, modals, and tabs. This combo allowed rapid development without compromising on aesthetics.
Page Structure:
- Home: Map, vehicle selector, address input
- Search Results: Estimated fare, driver ETA
- Trip Live View: Real-time driver tracking via Socket.io
- Trip Summary: Rating, payment, feedback
- Profile / Wallet / Support: Standard account views
Each of these pages was built as a functional component and wired with Redux for global state management—especially helpful for auth tokens, user info, and trip status.
Mobile Responsiveness:
React with Tailwind gave us fluid responsiveness across all devices. We also integrated React Native for mobile apps, reusing business logic through shared utility services. The mobile app was built with Expo for fast prototyping.
Admin Panel (React SPA):
Admins could access dashboards, manage users, view trip logs, and dispatch rides. Charts were powered by Recharts, and we used React Router for protected route management.
Blade UI (Laravel/CI Stack)
When going with Laravel or CodeIgniter, we often built the web app using server-rendered views via Blade. It was clean, fast, and good enough for MVPs or low-complexity UIs.
Structure:
- Blade layouts (
layouts/app.blade.php) controlled headers, footers, and sidebars @sectionblocks loaded view content@authand@guestdirectives managed visibility based on login state
UI Tools:
We integrated Bootstrap 5 and jQuery for dynamic behaviors—modals, toasts, and validation feedback. For maps, we used Leaflet.js or embedded Google Maps via iframe and JS SDK.
Driver UI:
We had a separate Blade template stack for driver dashboards. These included trip queues, status toggles (Online/Offline), and earnings summaries.
Admin Panel:
The admin interface used DataTables.js for tables, Bootstrap modals for CRUD actions, and dynamic forms powered by jQuery/AJAX. For charts and reporting, we integrated Chart.js.
UX Enhancements Across Both Stacks
- Progress Indicators: We used skeleton loaders and shimmer effects to minimize perceived wait time
- Address Auto-Complete: Integrated Google Places API for faster and more accurate address entry
- Live Map: Driver and rider locations updated every 5–10 seconds; markers animated using custom SVGs
- Push Notifications: Integrated Firebase Cloud Messaging (FCM) for ride alerts and reminders
Localization and Accessibility
Both versions supported multi-language support. Laravel used lang/en/messages.php style localization files, while React used react-i18next. We also built RTL support for Arabic-speaking markets and ensured proper tab indexing for screen reader compatibility.
In short, whether we were working with Blade or React, the goal remained the same: smooth transitions, minimal steps, and intuitive flows. Frontend isn’t just design—it’s the heartbeat of user trust.
Authentication and Payments: Securing Access and Processing Transactions
Authentication and payments are two of the most sensitive and business-critical parts of a ride-hailing app like Bolt. They don’t just affect security—they directly impact user trust, compliance, and revenue. So we implemented robust, scalable, and secure mechanisms across both JavaScript (Node.js) and PHP (Laravel/CI) stacks to handle login, authorization, and payment flows.
User & Driver Authentication
We needed two distinct flows: one for riders and another for drivers, each with role-based access and API separation. Both stacks followed the same core principles—token-based authentication, guarded routes, and proper session invalidation.
Node.js with JWT:
We used JWT (JSON Web Tokens) for all auth flows. On successful login or registration, the server signed a JWT using a secret key and returned it to the client. Frontend stored it in localStorage or HttpOnly cookies depending on security needs. Each request to protected routes carried a bearer token in the header.
Example login logic:
const token = jwt.sign({ id: user._id, role: user.role }, process.env.JWT_SECRET, { expiresIn: '7d' })
res.json({ token, user })
Token validation middleware ensured secure access to APIs and enforced user role checks.
Laravel Sanctum (or Passport):
In the PHP stack, Laravel Sanctum gave us API token management with CSRF protection. After login, the server issued a token using:
$token = $user->createToken('auth_token')->plainTextToken;Protected routes were grouped using auth:sanctum middleware. For deeper OAuth2 flows or mobile token rotation, Laravel Passport was a good upgrade path.
Session Management Features:
- Device-based login restrictions
- Token invalidation on logout or inactivity
- Middleware-level route guards to distinguish between riders, drivers, and admins
Payment Integration: Stripe and Razorpay
We had to support global and local payment gateways. So we designed the platform to support modular payment drivers that could be toggled via admin panel settings.
Stripe Integration (Global Markets):
Node.js Flow:
- Used Stripe SDK to create a
PaymentIntenton the server - Returned client secret to frontend
- Handled confirmation via Stripe.js on client side
- Server received webhook (
payment_intent.succeeded) and updated trip/payment status in MongoDB
const paymentIntent = await stripe.paymentIntents.create({
  amount: fareAmount * 100,
  currency: 'usd',
  metadata: { tripId: trip._id, userId: user._id }
})
Laravel Flow:
- Stripe PHP SDK used inside a
PaymentController - Blade frontend triggered JS SDK for card handling
- Webhooks handled via
StripeWebhookControllerand tied to Eloquent models
Razorpay Integration (India and MENA):
- Both stacks integrated Razorpay for UPI, card, and wallet payments
- We created orders from the server, passed order ID to client, and confirmed via frontend SDK
- After payment, webhook verified signature and recorded status in DB
Wallet Integration:
We maintained a virtual wallet per user/driver that could be funded via Stripe or Razorpay. Balance was debited on trip bookings and credited via promo codes or refunds.
Wallet table example (Laravel):
Schema::create('wallets', function (Blueprint $table) {
  $table->id();
  $table->foreignId('user_id')->constrained();
  $table->decimal('balance', 10, 2);
  $table->timestamps();
});
Fraud Prevention & Compliance
- Token validation with role-based permissions
- ReCaptcha (v3) on registration/login endpoints
- Stripe Radar rules for fraud monitoring
- Webhook signature verification (Stripe & Razorpay)
- PCI compliance checklists for card handling (using Stripe’s hosted fields)
Authentication and payments aren’t just about function—they’re about trust, safety, and conversion. Any glitches here, and users bounce. That’s why we built both flows with reliability and resilience in mind.
Testing and Deployment: CI/CD, Docker, and Performance in Production
Once the app was feature-complete, it was time to think about how to test it, deploy it, and keep it running at scale. A Bolt-like app deals with real-time data, financial transactions, and active users—so downtime and bugs simply aren’t an option. We invested heavily in CI/CD, containerization, and monitoring to ensure every build was safe to ship and ready to scale. Here’s how we handled it in both the Node.js and PHP stacks.
Testing Strategy: Unit, API, and E2E
Node.js Stack (Mocha + Chai + Postman/Newman):
We wrote unit tests for controllers and services using Mocha and Chai. For example, the trip-matching logic and fare calculators had strong coverage. Our API layer was tested via Postman collections, which we also ran in CI using Newman.
newman run tests/bolt-clone.postman_collection.json
We used supertest to simulate API calls and ensure auth middleware, role guards, and DB responses worked as expected.
Laravel/CI Stack (PHPUnit + Pest):
Laravel made testing easier with built-in PHPUnit support. We wrote unit tests for models and controller logic, and used Laravel’s HTTP tests for simulating authenticated requests. For example:
$this->actingAs($rider)->postJson('/api/v1/trips/request', [...])->assertStatus(201);
CI Tip: We used GitHub Actions to run tests on every pull request, check code style, and trigger deployment if all tests passed.
Dockerization: Easy Local Dev & Cloud Deployment
We Dockerized the project early to ensure consistent environments between local, staging, and production.
Node.js + MongoDB Docker Setup:
version: '3'
services:
  backend:
    build: .
    ports:
      - "5000:5000"
    depends_on:
      - mongo
  mongo:
    image: mongo
    volumes:
      - ./data:/data/db
Laravel + MySQL Docker Setup:
services:
  app:
    build:
      context: .
    volumes:
      - .:/var/www/html
    ports:
      - "8000:80"
    depends_on:
      - db
  db:
    image: mysql:5.7
    environment:
      MYSQL_DATABASE: bolt_clone
      MYSQL_ROOT_PASSWORD: secret
With Docker Compose, devs could spin up a full environment with a single command.
CI/CD Pipelines: From Code to Live
GitHub Actions for Node.js:
- Lint → Test → Build
- Docker Image Push to Registry
- SSH or FTP deploy to server (DigitalOcean / EC2 / Railway)
GitHub Actions for Laravel:
- Run PHPUnit tests
- Composer install
- Artisan migrations & cache clear
- Deployed to shared hosting or cloud VPS using Deployer or Forge
We stored sensitive credentials (DB, payment keys, API secrets) in .env files, which were injected securely via GitHub Secrets.
Runtime Environments and Scaling
Node.js Runtime with PM2:
We used PM2 to run clustered Node.js apps in production. It allowed auto-restarts, memory limits, log management, and zero-downtime reloads.
pm2 start server.js -i max --watchLaravel Runtime with Apache/Nginx:
For Laravel apps, we deployed via Apache with mod_rewrite or Nginx with PHP-FPM. We used Supervisor for Laravel Queues and scheduled tasks via cron.
Database Scaling Tips:
- MongoDB with Replica Sets (Node stack)
- MySQL read/write split using replicas (Laravel)
- Redis caching for driver availability and fare configs
- Indexing on trip status, city, timestamps
Monitoring and Logging
- Log Management: Winston in Node, Monolog in Laravel
- Uptime Monitoring: UptimeRobot or Cronitor for API/cron check
- Error Tracking: Sentry or Bugsnag for frontend and backend exceptions
- Performance: New Relic (Node) and Laravel Telescope for local profiling
Getting deployment and monitoring right wasn’t just a technical win—it let our clients focus on growth while we handled stability and uptime. And with containerized setups, we could spin up staging servers in minutes for QA, demos, or client validation.
Pro Tips from the Trenches: Speed, Scale, and Mobile Experience
After building and launching several Bolt-like platforms, we learned a lot the hard way. Some decisions saved us weeks of debugging. Others only became clear after seeing the app in real-world traffic. These pro tips will help you avoid common pitfalls and build a smoother, more resilient product—whether you’re going with Node.js or PHP.
1. Cache Like Your Life Depends on It
Don’t rely solely on the database for frequently accessed data—especially when it comes to fare configs, vehicle categories, geo-zones, and driver availability.
What we did:
- Cached static configs (e.g., fare rules) in Redis with fallback to DB
- Cached driver online status + location in Redis with a TTL of 1 minute
- Used Etag headers and conditional requests for mobile apps hitting the same APIs repeatedly
2. Plan for Poor Internet Zones
This is huge in developing markets. Riders and drivers won’t always have 4G. We optimized API responses to be light and tolerant of partial failures.
Tips:
- Keep frontend payloads under 100KB
- Debounce location updates from frontend (every 10–15 sec is enough)
- Gracefully fall back to last-known coordinates if live tracking lags
3. Don’t Overcomplicate First Release
It’s tempting to over-engineer from the start (microservices, background matching engines, multi-zone logic). But if you’re launching an MVP, start with manual dispatch + basic routing and upgrade later.
We started with:
- Manual trip assignment from admin panel for edge cases
- Flat-rate pricing per zone before dynamic pricing was stable
- Basic driver verification without full KYC workflow (added later)
4. Think Mobile-First From Day One
Over 80% of usage came from mobile devices. So we designed everything for mobile responsiveness and built a React Native app early. Even our Blade admin panels were optimized for phone view.
What helped:
- Google Maps in Lite Mode for older phones
- Responsive modals and forms with mobile-safe click targets
- Disable image-heavy backgrounds and animations in mobile views
5. Monitor Payment Failures Closely
Payment failures often go unnoticed until users start complaining. We set up alerts on Stripe webhooks and Razorpay order failures, with logs saved to DB for quick reconciliation.
Real-world hack: We added a “Retry Payment” button on trip summaries, so users could complete failed payments without customer support involvement.
6. Use Modular Design Patterns
Keep your feature logic loosely coupled. Whether it was trip logic, pricing, or promotions, we separated them into services or helper classes. This made it easier to swap out gateways or rules later.
Example:
FareService.jsorFareCalculator.phphandled all pricingPromoHandler.jswas injectable so we could run different logic per city or campaign
Bottom line: the more real-world usage your app gets, the more edge cases you’ll discover. These tips helped us preempt a lot of the pain and scale confidently with minimal downtime.
Final Thoughts: Build Smart, Scale Fast, or Go Custom
Building a Bolt-like app from scratch was one of the most rewarding—and challenging—development journeys I’ve been on. From database design to geo-routing, it pushed us to balance performance, UX, modularity, and time-to-market. Whether we were working in Node.js or PHP, every decision came down to what would give the best experience to riders and drivers while keeping things easy to scale and maintain.
When should you build custom?
If you’re building a hyper-local ride-sharing model, need complete backend control, or plan to layer on unique services (like car rentals, EV fleets, or logistics), going fully custom might be the right move. Just be ready for a multi-month effort and ongoing development costs.
When should you use a ready-made Bolt clone?
If your goal is to validate your market quickly, launch under your own brand, or have the flexibility to plug in new modules without reinventing the wheel, a Bolt clone script built by seasoned devs (like the one we offer at Miracuves) will save you serious time and money.
Our clone app isn’t just a template. It’s a fully customizable platform with:
- Node.js or PHP backend options
- React or Blade frontend
- Admin panel, wallet, payment gateway, live tracking, driver onboarding
- Support for manual and API-driven content
- Mobile-first responsive design and native app add-ons
Ready to Launch Your Own Ride-Hailing App?
If you’re looking to hit the ground running with your own Bolt alternative, we’ve got a flexible solution built by developers who’ve already walked the path.
👉 Check out our Bolt Clone Solution – built to scale, easy to customize, and packed with real-world functionality from day one.
You’ll save months of dev time and avoid costly reworks—while still keeping full control over features, branding, and business logic.
FAQs
1. Can I launch a Bolt-like app in multiple cities from day one?
Yes, both our Node.js and Laravel versions support multi-city configuration. Admins can define fare zones, vehicle types, and driver availability per city.
2. How do I handle real-time driver tracking if I’m using PHP?
You can use third-party services like Pusher or Firebase for real-time communication, or fall back on AJAX polling for simpler setups.
3. What payment gateways can I integrate?
We support Stripe, Razorpay, PayPal, and offline cash modes. Our system uses a modular gateway driver so you can plug in your local provider easily.
4. Is the system scalable if I get 10,000+ users?
Yes. In the Node.js version, we use PM2 clustering and MongoDB sharding. In the Laravel version, we scale with Redis caching, MySQL replication, and queue workers.
5. Can I use the same backend for both web and mobile apps?
Absolutely. All our APIs are RESTful and token-based, ready to be consumed by React, React Native, or any frontend of your choice.
Related Articles


