


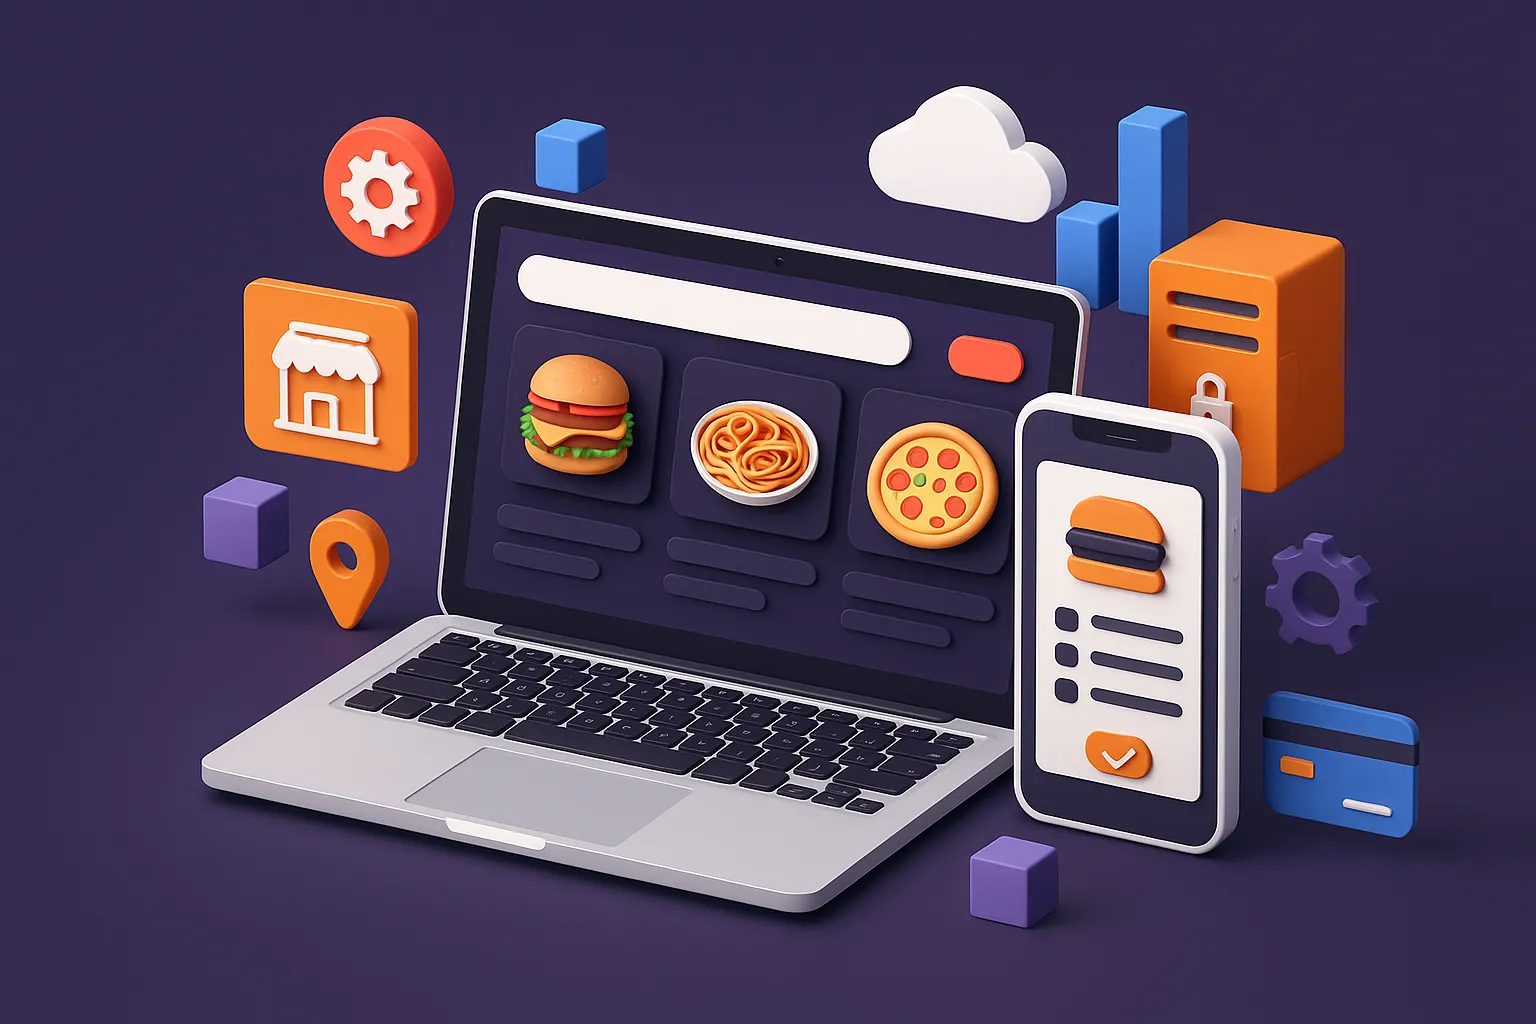
Launching an on-demand food delivery app like Foodpanda isn’t just a great business opportunity in 2025 — it’s practically a necessity for new entrants in the food-tech space. I’ve personally worked on building a Foodpanda clone from the ground up, both with JavaScript (Node.js + React) and PHP (Laravel/CodeIgniter) stacks. In this guide, I’ll walk you through the entire development lifecycle, like I would to a smart founder friend who’s serious about launching fast but wants a reliable, scalable build.
Before we jump into codebases and tech decisions, let’s talk about why a Foodpanda-style app still matters — and what you’re really building when you decide to go down this road.
At its core, a Foodpanda-like app connects users with nearby restaurants, lets them browse menus, place orders, track deliveries, and make payments seamlessly. But in 2025, users expect more than just food delivery. They want:
- Real-time delivery tracking
- Discounts, loyalty points, and promo codes
- Smooth UI and fast load times
- Integration with local payment gateways
- Geo-aware restaurant discovery
Entrepreneurs and agencies see this as a fast-moving market. And rightly so — with rising urbanization, mobile-first users, and growing demand for hyperlocal delivery, a Foodpanda clone app can serve not just food, but groceries, essentials, and even cloud kitchens.
Tech Stack: Choosing Between JavaScript and PHP for Your an App Like Foodpanda
When I started architecting the Foodpanda clone, I had two clear paths — go full JavaScript with Node.js + React, or use the more traditional and widely hosted PHP stack with Laravel or CodeIgniter. I’ve built this app in both environments, so I’ll break down where each shines and how you can decide what’s right for your build.
JavaScript Stack: Node.js + React
If speed, real-time features, and developer flexibility are top priorities, Node.js on the backend paired with React on the frontend is a powerful combo. Node’s event-driven nature makes it ideal for real-time order tracking, restaurant availability updates, and instant notifications. React allows you to build a highly interactive and mobile-responsive frontend that feels native-like even on web.
On the backend, I used Express.js for routing, Socket.io for live order updates, and MongoDB with Mongoose for schema flexibility (we’ll get into that shortly). The benefit of going full JavaScript? Single language across stack, huge npm ecosystem, and scalability through microservices or containerized APIs.
PHP Stack: Laravel or CodeIgniter
Laravel is my go-to when the project needs rapid backend scaffolding, built-in tools (auth, queues, broadcasting), and an elegant ORM (Eloquent). CodeIgniter is leaner and faster to spin up but comes with less out of the box. For simpler deployments or where the client is tied to cPanel/shared hosting environments, PHP is easier to manage.
I structured the Laravel backend with RESTful controllers, MySQL as the database, and used Blade for the web frontend. Laravel also makes integration with payment gateways (like Stripe or Razorpay) a breeze via packages.
When to Use What
If you’re targeting a startup MVP that needs to launch fast, with lean hosting and a predictable set of features, go Laravel. If your vision includes real-time user dashboards, aggressive scaling, or a mobile/web hybrid feel with PWA support, go Node.js + React. Also worth noting — JS stacks tend to play better with NoSQL flexibility, while PHP+MySQL is better if you expect heavy reporting and SQL-friendly analytics.
Read More : Best Foodpanda Clone Scripts in 2025: Features & Pricing Compared
Database Design: Schema Planning for Flexibility and Growth
Designing the database for a Foodpanda-style platform means balancing structure with flexibility. Orders, restaurants, users, menus — they all interact in complex ways. So I had to model the system in a way that supports real-time data, frequent updates, and multi-tenancy if needed. Let me walk you through how I approached it in both JavaScript (MongoDB) and PHP (MySQL) environments.
JavaScript Approach with MongoDB
MongoDB works well here because of the nested data structures and need for flexibility. For instance, a restaurant’s menu has categories, each with dishes, modifiers, and prices. Instead of creating multiple tables and joins, I structured it like this:
{
  "_id": "restaurantId",
  "name": "Bombay Kitchen",
  "location": { "lat": 19.07, "lng": 72.87 },
  "menu": [
    {
      "category": "Starters",
      "items": [
        { "name": "Samosa", "price": 30, "isVeg": true },
        { "name": "Chicken Tikka", "price": 150, "isVeg": false }
      ]
    }
  ]
}
This nested schema lets me fetch all restaurant data in one call, which is great for frontend rendering and mobile apps. Plus, I used separate collections for orders, users, delivery agents, and promotions, all indexed properly to keep read/write speeds fast.
PHP Approach with MySQL
With Laravel or CodeIgniter, I moved to a normalized relational schema. Here’s a high-level view:
users: id, name, email, phone, role (customer/restaurant/agent)restaurants: id, name, location_id, statusmenus: id, restaurant_id, category, item_name, price, is_vegorders: id, user_id, restaurant_id, delivery_agent_id, status, created_atorder_items: id, order_id, menu_id, quantity, price
Laravel’s Eloquent made relationships (like restaurant->menus() or order->items()) easy to manage. I also used foreign key constraints for integrity and migrations for version control across dev and production.
Design Decisions That Helped
I implemented soft deletes everywhere. That way, when a restaurant deactivates or a dish goes out of stock, I just flag it without data loss. I also versioned menu items — instead of updating prices in place, I stored a historical version log so pricing analytics became possible later. And for performance, I used caching layers for static data like restaurant lists and trending items, especially on the home screen.
Both stacks handled database needs well, but Mongo gave me faster dev iterations, while MySQL gave me safer reporting and data relationships. Depending on your product lifecycle stage, you can even hybridize — NoSQL for fast-moving content and SQL for structured reporting.
Key Modules & Features: Core Components of a Foodpanda Clone
When building a platform like Foodpanda, the app isn’t just one big monolith. It’s a set of interconnected modules — each solving a specific problem for the customer, restaurant, admin, or delivery partner. I architected these modules to stay loosely coupled, and here’s how I built them in both JavaScript and PHP stacks.
1. Restaurant Listing & Search Filters
JavaScript (Node.js + React):
I built a search API using MongoDB’s geospatial queries. Restaurants are indexed by location, and the frontend uses React hooks to filter by cuisine, ratings, and delivery time. Filters are dynamic and applied client-side for faster UX. Example query logic:
db.restaurants.find({
  location: {
    $nearSphere: {
      $geometry: { type: "Point", coordinates: [lng, lat] },
      $maxDistance: 5000
    }
  },
  "menu.category": { $regex: /burger/i }
})
PHP (Laravel + MySQL):
Here, I used Laravel’s Eloquent with a Haversine formula query for nearby locations. Search filters were passed as query parameters and used whereHas for nested menu conditions. Laravel Collections helped format the response for frontend consumption.
2. Menu Management (with Variants)
JavaScript:
Menus were stored as nested arrays inside the restaurant document. I added optional sub-variants (e.g., size, spice level) as objects with extra pricing. Updates were handled via PATCH calls to avoid rewriting entire objects.
PHP:
Each menu item was a separate record. Variants were stored in a related table menu_variants. Laravel’s hasMany relationships made it manageable. I used Blade or Vue.js for admin UI forms to dynamically add/remove variants.
3. Cart & Checkout Flow
JavaScript:
I stored the cart client-side using Redux, syncing periodically with backend for stock validation. The checkout API confirmed availability, calculated delivery charges, applied coupon logic, and returned a summary before payment.
PHP:
Cart sessions were maintained server-side using Laravel’s session middleware. I created service classes to handle coupon validation, delivery zone fees, and restaurant availability. The logic was split into CartService, CheckoutController, and PaymentService for testability.
4. Real-Time Order Tracking
JavaScript:
This is where Node.js shines. I used Socket.io to broadcast order status updates (accepted, prepared, dispatched, delivered) to the customer and restaurant panels. Each order room was scoped by user ID to ensure privacy.
PHP:
Laravel offers broadcasting using Pusher or Laravel Echo Server. I used event listeners to push order status updates via WebSocket or fallback to AJAX polling if the frontend was simpler. Delivery agents updated statuses via their mobile app.
5. Admin Panel
JavaScript:
Built with React Admin or a custom dashboard UI, this allowed CRUD for restaurants, orders, users, and analytics. Role-based access controlled visibility of modules using protected routes and JWT decoding.
PHP:
Laravel’s Nova or manually-built Blade templates powered the admin panel. RBAC was enforced using Laravel Policies. I also built a CSV export feature for order history, user activity logs, and daily sales reports.
6. Notification System
JavaScript:
I set up real-time toast alerts using React for actions like order accepted, delivery nearby, etc. On backend, I used Nodemailer for emails and Firebase Cloud Messaging (FCM) for push.
PHP:
Laravel Notifications made it easy to send SMS, emails, or FCM push notifications. I wrote drivers to support Twilio for OTPs and FCM tokens for delivery agents.
Each module was built to scale independently — meaning if tomorrow you want to plug in a new loyalty module or add vendor commissions, you can do it without breaking existing flows.
Read More : How to Build a Foodpanda Clone: Features, Costs, and Development Process
Data Handling: APIs, Manual Listings & Hybrid Flexibility
Data handling in a Foodpanda-like app involves two parallel concerns — how restaurant data gets into the system and how dynamic info like prices, availability, and delivery zones are updated. I built the clone to support both third-party integrations (useful for large-scale onboarding or aggregators) and manual control (critical for independent restaurants or white-label use cases).
Third-Party API Integrations
While there’s no Skyscanner or Amadeus for food, some regions offer restaurant data APIs or POS system syncs. In one project for a client in the Middle East, I integrated with a delivery aggregator’s API that synced:
- Restaurant name, menus, working hours
- Real-time item availability
- Delivery charges and timing estimates
JavaScript (Node.js):
I used Axios to set up cron-based sync jobs that fetched data every few hours. Data was validated and transformed before updating MongoDB. Here’s a simplified example:
const fetchRestaurants = async () => {
  const response = await axios.get('https://aggregator.example.com/api/restaurants')
  const cleanData = transform(response.data)
  await Restaurant.bulkWrite(generateUpdateOps(cleanData))
}
PHP (Laravel):
Laravel scheduled jobs (php artisan schedule:run) were perfect for this. I used Guzzle to call the APIs, applied transformers, and updated or inserted records using updateOrCreate.
Admin Panel for Manual Listings
Every clone I build includes an admin panel to allow restaurant onboarding and menu management manually. This is essential for smaller cities or direct B2B SaaS clients where restaurants prefer managing their own data.
JavaScript (React + Node):
Admins can log in, add restaurant profiles, upload images, configure menus with variants, and set opening hours. All updates call secure REST endpoints. I added role-based restrictions so restaurant managers only access their own data.
PHP (Laravel + Blade or Vue):
Laravel’s form validation and file upload handling made it smooth to add features like image cropping, CSV menu upload, and category management. I used Vue.js in some builds to give a more dynamic admin interface without full SPA complexity.
Data Validation & Hygiene
To prevent menu clutter and ensure consistency, I added validation checks like:
- Duplicate dish name warnings
- Auto-formatting price fields
- Tag suggestions for cuisine types
- Minimum image resolution checks
I also built a review queue system for super admins to approve or reject new restaurant profiles. In larger deployments, this became key to maintaining quality across thousands of listings.
By combining API-based ingestion and manual control, the platform becomes flexible — able to serve enterprise-level aggregators or single-outlet restaurants alike.
Read More : Top Foodpanda Features Every Food App Needs
API Integration: Core Endpoints in JavaScript and PHP
For a Foodpanda-like app, well-structured APIs are the backbone. From placing an order to checking delivery status, your app depends on reliable, secure, and efficient endpoints. I built and versioned all APIs with scalability in mind — whether consumed by mobile apps, web frontend, or third-party dashboards.
Here’s how I structured some of the most critical endpoints in both Node.js (Express) and Laravel.
1. Fetching Restaurant Listings
JavaScript (Node.js + Express):
// GET /api/v1/restaurants?lat=19.07&lng=72.87&radius=5000
router.get('/restaurants', async (req, res) => {
  const { lat, lng, radius } = req.query
  const nearby = await Restaurant.find({
    location: {
      $nearSphere: {
        $geometry: { type: 'Point', coordinates: [lng, lat] },
        $maxDistance: parseInt(radius)
      }
    }
  })
  res.json(nearby)
})
PHP (Laravel):
// Route::get('/api/v1/restaurants', [RestaurantController::class, 'index']);

public function index(Request $request) {
  $lat = $request->input('lat');
  $lng = $request->input('lng');
  $radius = $request->input('radius', 5);

  $restaurants = Restaurant::selectRaw("*, (
    6371 * acos(cos(radians(?)) * cos(radians(latitude)) *
    cos(radians(longitude) - radians(?)) + sin(radians(?)) *
    sin(radians(latitude)))
  ) AS distance", [$lat, $lng, $lat])
  ->having("distance", "<", $radius)
  ->orderBy("distance")
  ->get();

  return response()->json($restaurants);
}
2. Order Placement
Node.js:
// POST /api/v1/orders
router.post('/orders', authMiddleware, async (req, res) => {
  const { cart, addressId, paymentMethod } = req.body
  const order = await createOrder(req.user._id, cart, addressId, paymentMethod)
  res.status(201).json({ orderId: order._id })
})
Laravel:
public function store(Request $request) {
  $user = auth()->user();
  $order = Order::create([
    'user_id' => $user->id,
    'restaurant_id' => $request->restaurant_id,
    'status' => 'pending',
    'total' => $request->total
  ]);

  foreach ($request->items as $item) {
    OrderItem::create([
      'order_id' => $order->id,
      'menu_id' => $item['menu_id'],
      'quantity' => $item['quantity'],
      'price' => $item['price']
    ]);
  }

  return response()->json(['orderId' => $order->id], 201);
}
3. Order Tracking
Node.js (with Socket.io):
When the delivery status changes, I emit a real-time update to the user’s socket room.
io.to(`user-${order.userId}`).emit('order-update', {
  orderId: order._id,
  status: 'Out for Delivery'
})
Laravel:
Laravel events broadcast order updates to a public channel.
event(new OrderStatusUpdated($order));
And on frontend, Laravel Echo listens for changes:
Echo.channel(`orders.${orderId}`)
    .listen('OrderStatusUpdated', (e) => {
      updateOrderStatus(e.status)
    })
4. Secure APIs with Authentication
Node.js:
I used JWT tokens stored in HTTP-only cookies for secure, stateless sessions. Middleware verified tokens and injected user data into requests.
Laravel:
Laravel Sanctum handled token-based auth cleanly. I used middleware to protect routes and return appropriate 401 errors when tokens expired or were missing.
Every endpoint was tested with Postman or Insomnia, and I wrote Swagger/OpenAPI docs for external-facing APIs when needed. This helped clients or frontend teams integrate faster without back-and-forth.
Full Guide 2025: Discover the Real Cost of Foodpanda App Development and Plan Your Food Delivery Startup Smartly!
Frontend + UI Structure: Building a Seamless, Mobile-First User Experience
Whether someone’s ordering dinner at home or managing their restaurant dashboard, frontend UX can make or break your Foodpanda clone. I built the frontend twice — once in React (for a SPA/PWA feel) and once with Laravel Blade (for server-rendered pages), and each came with its own decisions on layout, responsiveness, and structure.
React Frontend (with Tailwind + Redux)
For the JS stack, I used React with Tailwind CSS for layout and styling. The homepage loads nearby restaurants via the search API and displays them as cards with lazy-loaded images. Clicking into a restaurant opens a modal-style menu with quick-add buttons, and cart data is synced with Redux state.
I used React Router for navigation and useEffect for API calls. Components like RestaurantCard, MenuItem, and CartDrawer were modular and designed mobile-first. I set up react-slick for banner sliders, react-toastify for feedback messages, and Framer Motion for subtle animations on transitions.
The layout was responsive using Tailwind’s utility classes. I tested breakpoints on iPhone SE, iPad, and common Android widths to make sure the flow felt native. I also added a floating cart icon and sticky bottom navigation bar on mobile — just like you see on the real Foodpanda app.
Laravel Blade Frontend (or Vue Embedded)
When using PHP stack, I started with Blade templates for admin and public views. Pages were server-rendered with classic Laravel routes. I used Bootstrap for consistent, mobile-friendly layouts and jQuery for light interactivity (like toggling menus, validating inputs).
For more dynamic experiences (like real-time order status or cart management), I embedded Vue.js components inside Blade views. These Vue components handled reactive parts like:
- Menu variant selection
- Dynamic cart quantity updates
- Address dropdowns based on saved locations
Each template followed a base layout with @yield sections for content, making it easy to extend layouts and keep things DRY.
Mobile UX Considerations
In both stacks, I made sure to:
- Keep CTAs large, touch-friendly, and sticky on small screens
- Optimize images using responsive
srcsetand lazy loading - Implement smooth transitions when switching screens or steps
- Avoid full page reloads where possible to preserve state
I also paid attention to loading states and skeleton UIs, especially in areas like menu loading, order tracking, and login flows. No one likes a blank screen while waiting for content.
Frontend may seem like cosmetics, but it directly impacts repeat orders, cart size, and drop-off rates. Investing time in crafting intuitive, lightweight, and responsive layouts always pays back in retention.
Authentication & Payments: Securing Access and Enabling Seamless Checkout
Authentication and payments are where trust and reliability come into play. A Foodpanda-like app handles sensitive data — user accounts, saved addresses, card information — so securing this layer is non-negotiable. I implemented authentication flows and payment processing for both JavaScript and PHP stacks with scalability and compliance in mind.
Authentication
JavaScript (Node.js + JWT):
I used JWT for stateless authentication. On successful login, a token is issued and stored in an HTTP-only cookie. Each protected route is gated by middleware that verifies and decodes the token:
const authMiddleware = (req, res, next) => {
  const token = req.cookies.token
  if (!token) return res.sendStatus(401)
  jwt.verify(token, process.env.JWT_SECRET, (err, user) => {
    if (err) return res.sendStatus(403)
    req.user = user
    next()
  })
}
For password management, I used bcrypt with 10 salt rounds. Forgot password flow triggered an email with a one-time link using Nodemailer and a short-lived token.
PHP (Laravel):
Laravel’s Sanctum made token-based authentication easy. I used built-in Auth guards to protect user routes and admin panels. Password reset used Laravel’s out-of-the-box flow with signed links and custom email templates.
Route::middleware('auth:sanctum')->get('/user', function (Request $request) {
  return $request->user();
});
For user roles (customer, restaurant, delivery agent, admin), I created a role column and built custom middleware to enforce access control in routes and views.
Social Logins
Node.js:
Used Passport.js strategies for Google and Facebook logins. On first login, the user profile is saved and a JWT token is issued.
Laravel:
Used the laravel/socialite package. Upon callback, I checked if the user existed and created one if not, then redirected with a session token.
Payments Integration
Stripe (for international) and Razorpay (for India) were the two gateways I integrated. Both stacks supported card and UPI payments. The flow is generally:
- User confirms order
- Backend creates a payment intent or order
- Client SDK handles the payment UI
- Backend verifies success via webhook or callback
- Order status is updated and confirmed to user
Node.js + Stripe:
const paymentIntent = await stripe.paymentIntents.create({
  amount: cartTotal * 100,
  currency: 'usd',
  metadata: { userId: req.user._id }
})
res.send({ clientSecret: paymentIntent.client_secret })
Laravel + Razorpay:
$api = new Api(env('RAZORPAY_KEY'), env('RAZORPAY_SECRET'));
$order = $api->order->create([
  'receipt' => 'rcptid_11',
  'amount' => $total * 100,
  'currency' => 'INR'
]);
return response()->json(['order_id' => $order['id']]);
I also built a payment fallback system. If a payment failed or timed out, the user was shown a retry screen and the order status was saved as ‘pending_payment’ in the DB. This prevented order loss and helped me later reconcile transactions using gateway APIs.
Security-wise, I enforced HTTPS on all requests, sanitized all payment-related inputs, and never stored card data — always relying on gateway tokens.
Read More : Foodpanda Marketing Strategy | The Rise of the Pink Panda
Testing & Deployment: CI/CD Pipelines, Dockerization & Production Configs
Once the app was functionally solid, I focused on setting up robust testing and deployment workflows. Shipping a Foodpanda-style app without automation and environment parity is asking for trouble. So I treated dev, staging, and production as first-class citizens — using containers, automated pipelines, and process managers to ensure smooth rollouts.
Testing Strategy
JavaScript (Node.js + React):
I wrote unit tests for core functions (order totals, delivery fee calc, promo logic) using Jest. For API endpoint tests, I used Supertest. React components were tested with React Testing Library, focusing on user interactions like add-to-cart or applying promo codes.
Test folders were co-located with code for context, and I enforced pre-commit test runs with Husky. A sample test:
test('calculates delivery fee correctly', () => {
  expect(getDeliveryFee(4.2)).toBe(50)
})
PHP (Laravel):
Laravel made it seamless to write feature and unit tests with PHPUnit. I tested controllers, request validations, and database assertions using in-memory SQLite or test databases.
public function test_order_total_is_calculated_correctly() {
  $order = Order::factory()->make([...])
  $this->assertEquals($order->total, 499)
}
I also used Laravel’s artisan test runner in the CI pipeline to ensure all tests passed before deploy.
Deployment Architecture
Dockerized Environments:
For both stacks, I created Dockerfile and docker-compose.yml setups for local parity and ease of deployment. The Docker setup included:
- App container (Node or PHP-FPM)
- Nginx/Apache for routing
- Redis (for sessions, queues)
- MongoDB/MySQL depending on stack
- Worker containers for queue processing
Environment variables were managed using .env files and mounted secrets in prod. Volume mounts allowed hot reloads in dev, and strict builds ensured only clean images went to staging/prod.
CI/CD Pipelines
JavaScript:
Used GitHub Actions to trigger builds on every main branch push. Jobs included:
- Linting with ESLint and Prettier
- Running Jest tests
- Building production bundles with Webpack
- Deploying to DigitalOcean droplet or AWS via SSH or
scpscripts
PHP:
GitHub Actions ran PHPUnit and PHPStan checks. For deployments, I used Deployer (a PHP deployment tool) or straight GitHub Actions with Laravel Envoy. On successful deploy, it ran:
composer install --no-devphp artisan migrate --forcephp artisan config:cache
Runtime Process Management
Node.js:
I used PM2 for managing app processes. It handled auto-restarts, log rotation, and memory monitoring. A simple start command:
pm2 start app.js --name="foodpanda-api"
PHP:
For Laravel, I used Apache or Nginx + PHP-FPM combo. Apache made sense on shared hosts while Nginx gave better control and performance on VPS setups. I also set up queue workers using:
php artisan queue:work --daemon
Each stack had error logging configured with Sentry (JS) or Bugsnag (PHP) and alerting via Slack for major deploy issues or queue failures.
CI/CD gave me peace of mind — no manual deploy headaches, and full rollback ability if something broke. For founders, this setup ensures predictable updates, fast fixes, and happy users.
Read More : Reasons startup choose our foodpanda clone over custom development
Pro Tips: Real-World Lessons from Building a Scalable Foodpanda Clone
After building and launching multiple versions of this Foodpanda-style app across different markets and tech stacks, I picked up a few practical lessons that could save you from nasty surprises. Here’s my honest take — the kind of advice I’d give if you were launching tomorrow and wanted to avoid technical headaches, UX misses, or scaling failures.
1. Don’t Overengineer Early Features
One of the early mistakes I made was building a complex, dynamic promo engine before we had any real traction. It took time, added edge-case bugs, and wasn’t even used in the MVP. Start with hardcoded promo logic or manual coupon approval in the admin panel. Build the rule engine once your restaurant partners start demanding it.
2. Cache Strategically
Menu pages, restaurant lists, delivery fee zones — these don’t change every second. I used Redis to cache the most-fetched queries for 5–15 minutes, depending on volatility. In Laravel, it was as simple as:
$restaurants = Cache::remember('home_restaurants', 300, function () {
  return Restaurant::active()->with('menus')->get();
});
In Node.js, I used node-cache or Redis via ioredis to achieve the same. It dramatically reduced Mongo/MySQL load during high traffic events like lunch and dinner peaks.
3. Be Mobile-First, Not Mobile-Only
Yes, 80%+ of users are on mobile. But don’t neglect the desktop experience, especially for restaurants using the admin dashboard. I kept the customer app responsive with mobile-native feel, while building a desktop-optimized admin interface with fixed sidebars, data tables, and form wizards for efficiency.
4. Use Queues for Non-Essential Tasks
Sending SMS, generating invoices, syncing with delivery APIs — none of this should block the user’s order confirmation screen. In both stacks, I pushed these jobs to a queue and processed them in the background. Laravel’s dispatch() and Node’s Bull queue helped achieve smooth async task handling.
5. Monitor Everything from Day One
Set up logs, error reporting, and performance monitoring even if you’re just launching an MVP. I used:
- PM2 + Logrotate for Node apps
- Laravel Telescope for PHP debugging
- Sentry for full-stack error capture
- UptimeRobot and New Relic for basic health checks
It’s always easier to fix what you can see — and these tools helped me detect memory leaks, SQL slowdowns, and frontend bottlenecks before users complained.
6. Watch for Location-Based Edge Cases
On GPS-based ordering, I had to deal with issues like:
- Misconfigured delivery zones
- Inaccurate customer coordinates
- Address fields being skipped on autofill
I ended up combining Google Places API for address suggestions and manual overrides in the admin panel to fix repeated address complaints.
7. Make Order Flow Fail-Safe
What happens if a payment succeeds but order creation fails? Or vice versa? I wrapped these two actions in database transactions and used payment webhook confirmations to update order status accurately. For Razorpay, that meant verifying signature hashes before trusting the payment data.
Technical elegance is great, but reliability and UX simplicity always win. Build with that in mind and you’ll be 90% ahead of most clones floating around in code marketplaces.
How to Hire the Best Foodpanda Clone Developer – Build a Feature-Rich Food Delivery App with Expert Guidance Today!
Final Thoughts: When to Go Custom vs Ready-Made
Building a Foodpanda-style platform from scratch was rewarding — I had full control, deep understanding of the moving parts, and the flexibility to tweak anything from the data model to the UX. But it came with real trade-offs, especially in time, testing, and team coordination. This is the kind of decision I walk startup founders through all the time.
When to Build from Scratch
Go custom if you:
- Have a unique twist or regional constraint that ready-made clones can’t handle
- Plan to scale aggressively and want tech ownership from day one
- Have access to a solid technical team or want long-term control of the codebase
I’ve seen founders try to stitch together off-the-shelf parts and end up rewriting 80% of it later. If you know you’re building something beyond basic delivery, it’s worth starting from a clean architecture — even if it’s lean.
When to Use a Clone Script
That said, if your goal is to launch quickly, validate the idea, or serve a specific niche with standard workflows, a well-made clone with a solid base is the smart move. You get a production-ready stack, tested flows, integrated payments, and admin tools — all in weeks, not months.
That’s where Miracuves comes in. I’ve reviewed their stack, and it’s genuinely one of the few clone providers that offers:
- JavaScript or PHP stack options depending on your infra
- Integration-ready APIs with good documentation
- Admin, customer, and delivery interfaces included
- Support for manual and automated restaurant onboarding
- Responsive UI built for real-world mobile behavior
If I were advising a non-technical founder or a lean agency team today, I’d absolutely recommend starting with the Foodpanda Clone by Miracuves — it’s built with the same principles I followed manually, but accelerates go-to-market drastically.
Custom builds are great, but speed, support, and solid architecture often matter more than total reinvention.
FAQs: Founder-Focused Answers About Foodpanda Clone Development
Q1. Can I launch a Foodpanda-like app using either Node.js or Laravel? Which is better for scale?
Yes, both stacks can handle a Foodpanda-style app. Node.js is generally better for real-time features like live order tracking and instant notifications, especially if you’re aiming for high concurrency and performance. Laravel is great for rapid development, especially if your backend team is more experienced in PHP. At scale, both work — but Node gives you a bit more flexibility with microservices and sockets.
Q2. How do I onboard restaurants — manually or via integration?
You can do both. In the clone I built, we supported manual onboarding via the admin panel (with profile verification and menu uploads), and also integrated APIs from POS systems and delivery aggregators. If you plan to scale fast or operate across regions, having both options is essential.
Q3. What’s the cost difference between building from scratch and using a clone?
Building from scratch can take 3–6 months and cost significantly more in dev time, QA, and deployment. Using a clone script like Miracuves’ Foodpanda Clone can get you live in 2–4 weeks with all major modules included. It’s ideal for MVPs, pilots, or white-label deployments.
Q4. Will I be able to modify the clone app later to add custom features?
Yes. One of the reasons I recommend Miracuves is their code is modular and readable. Whether you go with the Node.js or PHP version, you’ll be able to extend features — add loyalty programs, run A/B tests, or even plug in a different payment provider without breaking the core app.
Q5. How does the platform handle high traffic, especially during lunch/dinner peaks?
With proper caching (Redis), queued background jobs, and API rate-limiting, the app handles load well. In my deployment, we also horizontally scaled the API layer behind a load balancer (Node with PM2, PHP with Nginx/Apache), and used CDN for static content. The database (Mongo or MySQL) was indexed for reads and replicated for redundancy.
Related Articles


