


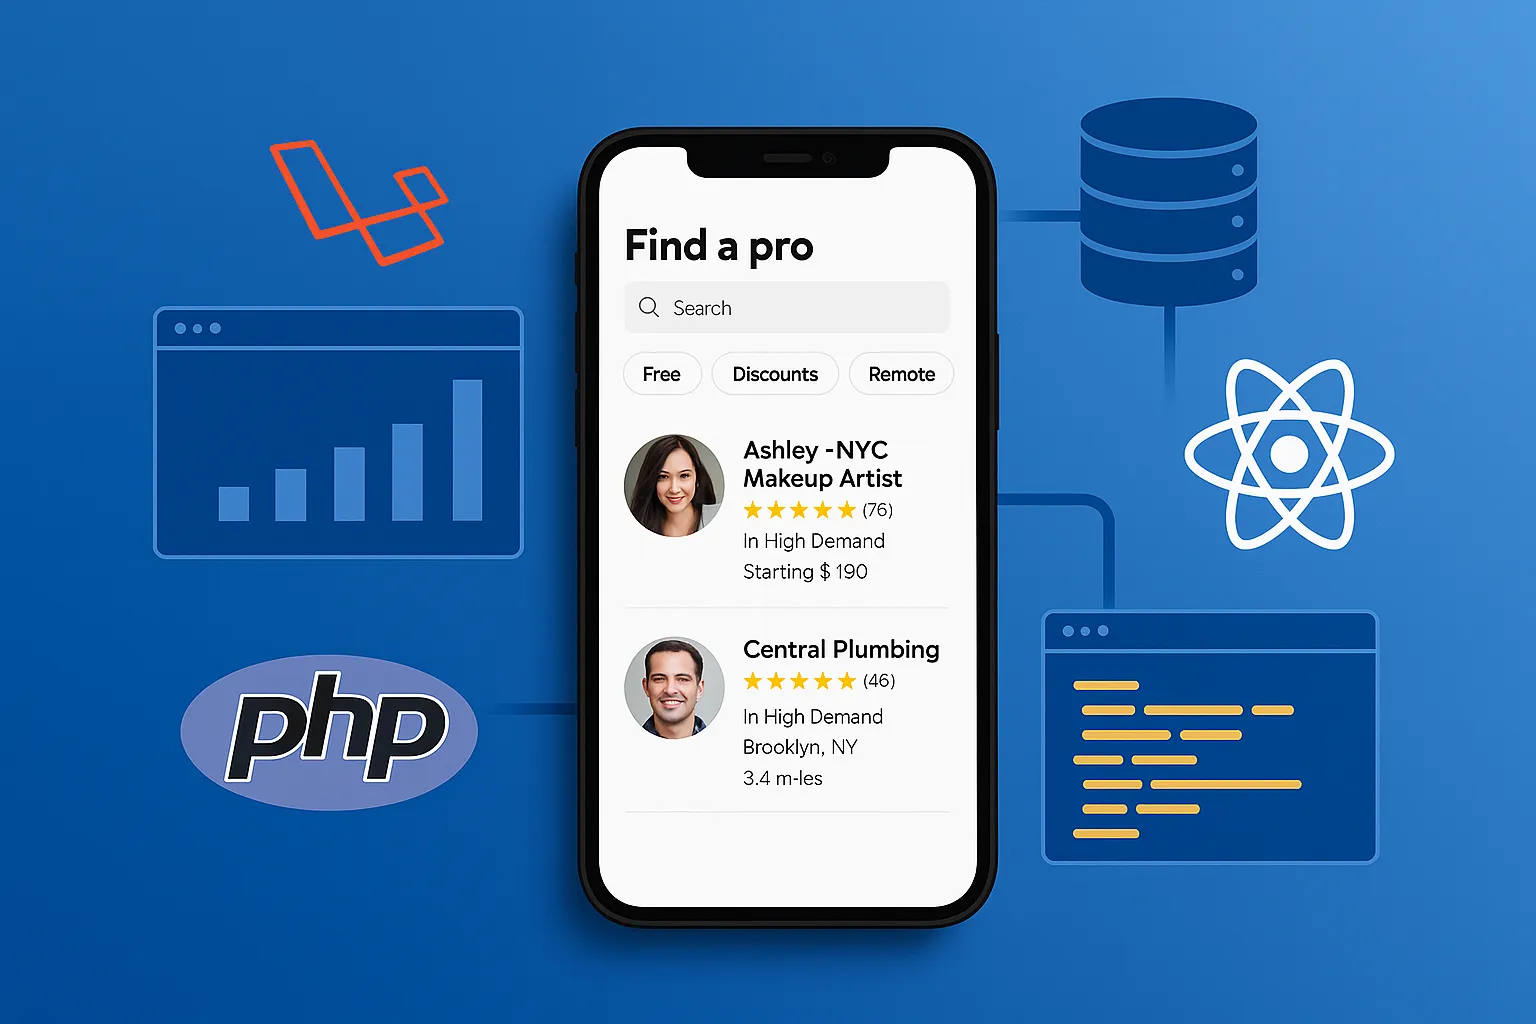
If you’re thinking about building a service marketplace app like Thumbtack, you’re not alone — and you’re definitely not off-track. As a full-stack developer who’s built one from scratch, I’m here to walk you through what it takes — technically and strategically — to get an MVP (and beyond) off the ground.
In this guide, I’ll break down the full lifecycle of developing a Thumbtack clone — from choosing the right tech stack to integrating payments and scaling the app. I’ll cover both the JavaScript approach (Node.js + React) and the PHP approach (Laravel or CodeIgniter), so you can decide what’s best for your team or project.
Thumbtack is a local services marketplace — a platform where users can find and hire professionals for jobs like home cleaning, plumbing, photography, tutoring, and more. It bridges the gap between service providers and customers, simplifying the discovery, communication, and hiring processes.
With the rise in gig economy platforms and hyper-local demand for services, building an app like Thumbtack today means tapping into a multi-billion-dollar market that’s still ripe with opportunity. Whether you’re targeting a niche category or replicating a general-purpose marketplace, the model is proven — and there’s room for innovation, especially in underserved regions or verticals.
Choosing the Right Tech Stack for an App Like Thumbtack
When I first scoped out the architecture for a Thumbtack-style app, I knew flexibility, scalability, and speed were non-negotiable. But I also had to be mindful of the client’s existing team capabilities — some were stronger with JavaScript, others with PHP. So, I designed the app to support both environments. Here’s how each stack shaped up.
JavaScript Stack (Node.js + React)
For teams that want full-stack JavaScript, I recommend going with Node.js for the backend and React.js for the frontend. This setup gives you non-blocking I/O (great for real-time updates like new job posts or message notifications), a vast npm ecosystem, and a modern frontend experience.I used Express.js as the framework on top of Node — clean routing, middleware control, and super lightweight. For the frontend, React’s component-driven architecture made it easy to build reusable modules like service cards, filter dropdowns, and chat windows. For mobile, React Native let me reuse about 60–70% of frontend logic.
PHP Stack (Laravel or CodeIgniter)
When the project required quicker development for teams with PHP experience, I pivoted to Laravel — though CodeIgniter is also an option for lightweight builds. Laravel shines with built-in features: Eloquent ORM, authentication scaffolding, and routing. It reduced boilerplate and let me focus on actual business logic.Blade templating helped create clean UI layouts fast, and Laravel Mix handled the asset pipeline well enough for most startup-grade UIs. If budget or hosting environments lean towards LAMP, Laravel’s a natural fit.
When to Use What
Use the JavaScript stack if:
- You want a single language across frontend/backend
- Real-time features like chat or live bidding are key
- You plan to scale rapidly or use microservices later
Go with PHP (Laravel) if:
- Your dev team is already comfortable with PHP
- You want rapid development with built-in conventions
- You prefer shared hosting or traditional servers over containerized Node setups
Read More : Best Thumbtack Clone Scripts in 2025: Features & Pricing Compared
Database Design for a Scalable Thumbtack Clone
Designing the database for a service marketplace like Thumbtack is all about balancing flexibility with performance. You’re essentially creating a three-sided platform: customers, service providers, and administrators — all interacting through bookings, messages, reviews, and payments. I designed two schema models — one for the JavaScript stack using MongoDB (NoSQL), and another for the PHP stack using MySQL (relational).
JavaScript Stack: MongoDB (NoSQL)
MongoDB made sense here because of its flexibility. Service providers can offer varied services, each with different pricing, availability, and tags — and MongoDB’s nested documents made that easy to model. Here’s a basic structure for a provider document:
{
  "_id": ObjectId,
  "name": "Jane's Plumbing",
  "services": [
    {
      "category": "Plumbing",
      "price": 50,
      "duration": 60,
      "tags": ["pipe repair", "installation"]
    }
  ],
  "location": {
    "city": "Austin",
    "lat": 30.2672,
    "lng": -97.7431
  },
  "ratings": [5, 4, 4]
}
This schema gave us the ability to search by nested service tags, geolocation, and rating average — all through MongoDB’s aggregation pipeline.
PHP Stack: MySQL (Relational)
With Laravel or CodeIgniter, I stuck to MySQL — which works perfectly when you’ve got defined relationships and transactional integrity. Here’s how I structured the core tables:
users(id, name, email, role [customer/provider])services(id, user_id, category_id, price, duration, description)bookings(id, customer_id, provider_id, service_id, status, scheduled_at)reviews(id, booking_id, rating, comment)categories(id, name)
I used Laravel Eloquent relationships to manage these associations. For example, a User model had:
public function services() {
  return $this->hasMany(Service::class);
}
This gave me clean access to $user->services and reduced query complexity. I added proper indexes on location, category_id, and status fields to keep things fast at scale.
Both schemas supported scalability — but the NoSQL approach gave more flexibility, especially when service attributes varied wildly. Meanwhile, MySQL gave stronger data integrity, which mattered for transactions and admin reporting.
Read More : Reasons startup choose our Thumbtack clone over custom development
Key Features & Modules in the Thumbtack Clone
When you’re building an app like Thumbtack, it’s not just about connecting users with professionals — it’s about creating a smooth, trustworthy experience on both ends. From job posting to payments, every step has to feel intuitive and reliable. I broke the app into modular components and implemented each using both JavaScript (Node.js + React) and PHP (Laravel) stacks. Here’s how I approached the core features.
1. Service Posting & Discovery
Frontend
In both stacks, users start by selecting a service category, entering location details, and describing the job. In React, I used controlled form components with category dropdowns and conditional inputs that changed based on service type. In Blade (Laravel), the same was handled using dynamic sections and some Vue.js sprinkles for interactivity.
Backend (Node.js)
I created a /services POST endpoint in Express that validates the request and inserts a new job post. Tags and metadata were normalized for later filtering.
app.post('/services', authenticate, async (req, res) => {
  const service = await ServiceModel.create({ ...req.body, userId: req.user.id });
  res.status(201).json(service);
});
Backend (Laravel)
In Laravel, this logic was wrapped inside a controller method:
public function store(Request $request) {
  $validated = $request->validate([...]);
  $service = Auth::user()->services()->create($validated);
  return response()->json($service, 201);
}
2. Search & Filters
This module is crucial for user experience. I built a multi-filter search with location, category, price range, and rating.
In MongoDB, I used full-text search and $geoWithin queries for geolocation:
Service.find({
  category: req.query.category,
  location: {
    $nearSphere: {
      $geometry: { type: "Point", coordinates: [lng, lat] },
      $maxDistance: 10000
    }
  }
})
In MySQL, I used Eloquent’s query builder:
$services = Service::where('category_id', $request->category_id)
  ->whereBetween('price', [$min, $max])
  ->with('user')
  ->get();
3. Booking System
Users select a service provider and submit a booking request. Providers get notified and can accept or decline.
Node.js backend
Booking logic lives under a /bookings POST endpoint. I used Mongoose transactions to prevent race conditions.
Laravel backend
I implemented booking requests with status flags (pending, accepted, declined). Laravel events triggered notifications to providers after submission.
4. Messaging System
Real-time chat between customer and provider was built using Socket.io on Node.js and Pusher for Laravel.
- Node.js: WebSocket server using
socket.io, with Redis pub/sub for scaling - Laravel: Event broadcasting with
laravel-echoand Pusher
Messages were stored in a separate messages table/collection and indexed by conversation_id.
5. Admin Panel
Admins could manage categories, services, users, and disputes.
React Admin Panel: Used Material UI, React Router, and protected routes
Blade Admin Panel: Used Laravel Breeze for scaffolding, DataTables for listing entries, and custom middleware for route protection
In both stacks, I exposed RESTful APIs (/admin/users, /admin/bookings, etc.) with role-based access controls to manage permissions securely.
Read More : Try the Future of Local Services Free: Build with Our Thumbtack Clone
Data Handling: APIs vs Manual Listings
When you’re building a platform like Thumbtack, you have two main ways to populate your service listings: pull them in from external APIs or allow providers to manually list their services. I made sure our Thumbtack clone could handle both — giving clients flexibility based on region, business model, and provider base.
Option 1: Third-Party API Integration
In some verticals (like travel, automotive, or niche marketplaces), you may want to pull provider or service data from external sources. While Thumbtack itself doesn’t use third-party listings, I added the ability for our clone app to optionally fetch data from APIs like Amadeus (travel experiences), Skyscanner, or other relevant vendor APIs — depending on the niche the client wanted to target.
Node.js Example – Fetching External Listings
const axios = require('axios');
app.get('/external-services', async (req, res) => {
  const response = await axios.get('https://api.partner.com/services', { params: req.query });
  res.json(response.data);
});
Laravel Example – Same via Guzzle
public function fetchExternal(Request $request) {
  $client = new \GuzzleHttp\Client();
  $response = $client->get('https://api.partner.com/services', [
    'query' => $request->all()
  ]);
  return response()->json(json_decode($response->getBody()));
}
I used scheduled cron jobs (in Laravel via Task Scheduling or in Node via node-cron) to sync and cache this external data periodically, avoiding real-time API bottlenecks.
Option 2: Manual Listings via Admin Panel
This is the core of most Thumbtack-style apps: service providers signing up and creating listings via the app or web dashboard. I built this with a clean, guided UX to ensure even non-technical users could complete their profiles and post services easily.
React UI
- Multi-step form wizard for onboarding
- Image upload (with preview), category selector, availability calendar
Blade UI (Laravel)
- Used
@includefor modularizing form sections - Laravel MediaLibrary for image uploads
- Form validation with
FormRequestclasses
Backend Data Handling
In both stacks, I ensured validation, sanitization, and slug generation for SEO-friendly URLs:
- Node.js: Used
express-validator+slugify - Laravel: Used
Requestvalidation +Str::slug()
All listings were stored with normalized category relationships, searchable tags, and status flags for moderation.
Having both third-party API ingestion and manual listing flows allowed our clients to launch with some pre-filled content, while still enabling full organic growth through provider signups.
Read More : Business Model of Thumbtack : Revenue, and Key Features
API Structure and Integration for a Thumbtack Clone
A well-structured API is the backbone of any marketplace app. Since I needed to support both web and mobile clients, I designed the API to be RESTful, stateless, and secure. I followed consistent patterns across both Node.js (Express) and Laravel (PHP) stacks, using versioning, authentication middleware, and modular route definitions.
REST API Design Philosophy
I kept the API structure clean and predictable. Here’s how I organized it:
POST /auth/register– user sign-upPOST /auth/login– login and token generationGET /services– browse all servicesPOST /services– create a new service listing (provider only)GET /services/:id– get service detailPOST /bookings– book a serviceGET /messages/:conversationId– fetch messagesPOST /messages– send a message
Endpoints were protected using role-based middleware to separate customer and provider access logic.
JavaScript Stack (Node.js + Express)
For the Node.js backend, I modularized all route controllers under /routes and /controllers directories. Authentication was handled using JWT and middleware to protect routes.
Example: Booking API Endpoint
app.post('/bookings', authenticate, async (req, res) => {
  const booking = await BookingModel.create({
    customerId: req.user.id,
    providerId: req.body.providerId,
    serviceId: req.body.serviceId,
    scheduledAt: req.body.scheduledAt,
    status: 'pending'
  });
  res.status(201).json(booking);
});
Middleware – Auth Guard
function authenticate(req, res, next) {
  const token = req.headers.authorization?.split(' ')[1];
  if (!token) return res.status(401).send('Unauthorized');
  try {
    const decoded = jwt.verify(token, process.env.JWT_SECRET);
    req.user = decoded;
    next();
  } catch {
    res.status(401).send('Invalid token');
  }
}
PHP Stack (Laravel)
In Laravel, I used API routes (routes/api.php) and grouped them with middleware like auth:sanctum. The apiResource() method made it easy to generate RESTful endpoints fast.
Booking Controller Example
public function store(Request $request) {
  $data = $request->validate([
    'provider_id' => 'required|exists:users,id',
    'service_id' => 'required|exists:services,id',
    'scheduled_at' => 'required|date'
  ]);
  $data['customer_id'] = auth()->id();
  $data['status'] = 'pending';
  $booking = Booking::create($data);
  return response()->json($booking, 201);
}
Route Definition
Route::middleware('auth:sanctum')->group(function () {
  Route::post('/bookings', [BookingController::class, 'store']);
});
API Response Standardization
I made sure all API responses were normalized:
- Success:
{ success: true, data: {...} } - Error:
{ success: false, message: 'Error message' }
For validation errors, Laravel handled it out of the box. In Node, I used express-validator to throw structured 422 responses.
Having a unified API layer allowed us to plug in the same endpoints into both our React frontend and mobile apps without duplicating logic.
Hire Dedicated Thumbtack Clone Developers to Build, Customize, and Scale Your Service Marketplace Seamlessly
Frontend and UI Structure: Clean, Responsive, and Modular
Whether users are hiring a local service provider or offering their services, the UI needs to feel intuitive, fast, and frictionless. I designed the frontends in both React (for Node.js stack) and Blade (for Laravel stack) with a mobile-first mindset, ensuring responsiveness, modularity, and easy extensibility. Here’s how I structured the user interface and experience for both web and mobile views.
React Frontend (Node.js Stack)
I used React with React Router for navigation, Redux Toolkit for state management, and Tailwind CSS for rapid UI prototyping and consistent spacing/typography. The app was broken into logical layout zones:
- Header/Navbar: Sticky top nav with conditional rendering (login/register vs user dashboard)
- Main Area: Dynamic routes (
/services,/profile,/messages, etc.) - Footer: Minimal with links to policies and FAQs
Layout Components
I abstracted the UI into reusable components:
ServiceCard: shows provider name, rating, location, and CTABookingForm: modal-based form for scheduling a serviceChatWindow: live messaging between users with socket.ioSidebarMenu: for logged-in users to access dashboard sections
Responsiveness
I used Tailwind’s grid and flexbox utilities to stack or reflow components based on screen size. The mobile version used a drawer nav pattern with hamburger menu toggles.
Blade Templating (Laravel Stack)
For Laravel, I kept things clean with Blade templates and embedded Vue.js components where reactivity was needed (like filters or form steps). Blade layouts provided a base HTML structure with @yield and @section directives to manage views like:
layouts.app– for logged-in dashboardlayouts.public– for marketing pages like Home, Contact, FAQs
UI Flow Structure
home.blade.php: service categories and search formservices.blade.php: list of services by filterservice-detail.blade.php: detail page with booking formdashboard.blade.php: provider and customer dashboards
Responsiveness
Bootstrap 5 was used for quick layout building, but for pixel-perfect designs, I also included custom CSS and media queries. Vue.js powered the multi-step booking forms and chat system with real-time updates via Pusher.
Form UX Tips I Used
- Step-by-step onboarding with progress bar
- Real-time validation with helpful error messages
- Image preview before uploading (client-side)
UX Patterns That Worked Well
- Sticky filters on service listing pages
- Inline messaging without page reload
- Role-based navigation (customers see “Find Services”, providers see “My Bookings”)
- Dark/light theme toggle for modern feel (especially on mobile)
Both stacks delivered a smooth, mobile-friendly experience. React gave me more freedom and interactivity for highly dynamic pages, while Laravel Blade allowed rapid development with stable page flows and server-rendered SEO-friendly content.
Read More : Thumbtack App Marketing Strategy: How to Make Your Local Services App Stick
Authentication and Payment Integration
Security and trust are essential pillars of any two-sided marketplace. When I built the Thumbtack clone, I focused on strong authentication, clear access control, and reliable payment flows. I implemented both JWT-based auth in Node.js and Laravel Sanctum for PHP. For payments, I used Stripe and Razorpay — depending on the client’s region and preferred processor.
Authentication
Node.js Stack – JWT with Role Guards
I used JWT (JSON Web Tokens) for stateless authentication. Once a user signed up or logged in, they received a token to be used on all protected routes.
Login Endpoint:
app.post('/auth/login', async (req, res) => {
  const user = await User.findOne({ email: req.body.email });
  const isMatch = await bcrypt.compare(req.body.password, user.password);
  if (!isMatch) return res.status(401).json({ error: 'Invalid credentials' });

  const token = jwt.sign({ id: user._id, role: user.role }, process.env.JWT_SECRET);
  res.json({ token, user });
});
Middleware for Role-Based Access:
function authorizeRole(role) {
  return (req, res, next) => {
    if (req.user.role !== role) return res.status(403).send('Forbidden');
    next();
  };
}
This made it easy to restrict certain routes, like allowing only providers to list services or access booking requests.
Laravel Stack – Sanctum with Guards
Laravel made this part straightforward. I used Laravel Sanctum for API token management. After login, the user received a token which was stored and passed in headers.
Login Controller:
public function login(Request $request) {
  $credentials = $request->only('email', 'password');
  if (!Auth::attempt($credentials)) {
    return response()->json(['message' => 'Unauthorized'], 401);
  }
  $user = Auth::user();
  $token = $user->createToken('auth_token')->plainTextToken;
  return response()->json(['token' => $token, 'user' => $user]);
}
Role Middleware:
public function handle($request, Closure $next, $role) {
  if ($request->user()->role !== $role) {
    return response('Unauthorized', 403);
  }
  return $next($request);
}
Payment Gateway Integration
Stripe Integration
Node.js Implementation (Stripe Checkout Session):
app.post('/create-checkout-session', async (req, res) => {
  const session = await stripe.checkout.sessions.create({
    payment_method_types: ['card'],
    line_items: [{
      price_data: {
        currency: 'usd',
        product_data: { name: req.body.serviceName },
        unit_amount: req.body.amount * 100
      },
      quantity: 1
    }],
    mode: 'payment',
    success_url: `${process.env.FRONTEND_URL}/success`,
    cancel_url: `${process.env.FRONTEND_URL}/cancel`
  });
  res.json({ id: session.id });
});
Laravel Implementation (Stripe via Cashier):
I used Laravel Cashier, which wraps Stripe logic:
public function pay(Request $request) {
  $user = Auth::user();
  $paymentIntent = $user->createSetupIntent();
  return response()->json(['client_secret' => $paymentIntent->client_secret]);
}
Then in the frontend (React or Blade), I used Stripe.js to collect card details and confirm the payment.
Razorpay Integration (for India & Asia)
- I used the Razorpay Checkout SDK in both stacks.
- Orders were first created on the backend using Razorpay API.
- The frontend handled the popup and payment confirmation callback.
Key Security Note: I made sure to never expose secret keys in the frontend. Webhooks handled post-payment verification and booking status updates securely.
With these setups, the app supported both one-time payments and planned for future wallet/top-up functionality.
Discover How Much It Costs to Build a Thumbtack-Style Marketplace App — Get Your Custom Budget Estimate Now!
Testing and Deployment: Stability from Local to Production
Shipping fast is great. Shipping safe is better. To ensure the Thumbtack clone was production-ready, I invested early in testing, Dockerization, and CI/CD. Whether I was deploying the Node.js version or the Laravel version, the core goals were the same: zero-downtime updates, clear rollback paths, and performance monitoring post-launch.
Testing Strategy
Node.js Stack
I used Jest for unit and integration tests, along with Supertest for API endpoint verification.
Example: Booking Route Test
describe('POST /bookings', () => {
  it('should create a new booking', async () => {
    const res = await request(app)
      .post('/bookings')
      .set('Authorization', `Bearer ${token}`)
      .send({ providerId, serviceId, scheduledAt });
    expect(res.statusCode).toBe(201);
  });
});
For E2E testing, I used Cypress to simulate full user flows like sign-up → search → book → pay.
Laravel Stack
Laravel comes bundled with PHPUnit and test helpers like actingAs() to simulate authenticated users.
Example Test: Service Creation
public function testProviderCanCreateService() {
  $user = User::factory()->create(['role' => 'provider']);
  $this->actingAs($user)
       ->postJson('/api/services', [/* payload */])
       ->assertStatus(201);
}
For browser-based testing, I used Laravel Dusk to verify user flows with screenshots and browser sessions.
CI/CD Pipeline
I used GitHub Actions and GitLab CI depending on the client’s hosting choice. Here’s the typical pipeline structure:
- Linting & Unit Tests: Run on every PR
- Build & Docker Image: Tagged per environment
- Deploy to Staging: On merge to
develop - Deploy to Production: On tag push or manual approval
Node.js Example: GitHub Actions Snippet
jobs:
  build:
    runs-on: ubuntu-latest
    steps:
      - uses: actions/checkout@v2
      - name: Install deps
        run: npm install
      - name: Run tests
        run: npm test
Laravel Example: GitLab CI
stages:
  - test
  - deploy

test:
  script:
    - composer install
    - php artisan test
Dockerization
I containerized both stacks for portability and easier scaling.
Node.js Dockerfile
FROM node:18-alpine
WORKDIR /app
COPY . .
RUN npm install
CMD ["node", "server.js"]
Laravel Dockerfile
FROM php:8.1-fpm
WORKDIR /var/www
COPY . .
RUN apt-get update && docker-php-ext-install pdo pdo_mysql
CMD ["php-fpm"]
I used Docker Compose in local and staging environments to spin up:
- App container
- MongoDB/MySQL
- Redis
- Nginx/Apache as reverse proxy
Process Management & Server Configs
Node.js in Production
I used PM2 for cluster mode and auto-restart:
pm2 start server.js -i maxNginx handled SSL termination and forwarded requests to the app via Unix socket or port.
Laravel in Production
Laravel apps were deployed on Apache or Nginx with PHP-FPM. Supervisor was used to run queues and schedule tasks (e.g., booking reminders).
Monitoring
- Node.js: Integrated New Relic and PM2 logs
- Laravel: Used Laravel Telescope for dev and Sentry for production error tracking
This setup made our Thumbtack clone stable under traffic, easy to deploy, and resilient in case of bugs or bad pushes.
Read More : Thumbtack Features Breakdown for Startup Founders
Pro Tips from the Field: Performance, UX, and Scaling Hacks
After building and launching multiple clones of apps like Thumbtack, I’ve seen firsthand what works, what breaks under load, and what founders often overlook. These are the real-world lessons, shortcuts, and performance wins that saved us (and our clients) serious time and headaches.
1. Use Caching Wisely
APIs like GET /services, GET /categories, and GET /locations get hit constantly. Without caching, they’ll become bottlenecks as traffic grows.
- Node.js: I used Redis with
node-cacheorioredisto cache expensive queries.
const cached = await redis.get(cacheKey);
if (cached) return res.json(JSON.parse(cached));- Laravel: I used Laravel’s
Cache::remember()to wrap frequently accessed data.
$categories = Cache::remember('categories', 3600, fn() => Category::all());This alone brought TTFB down by ~40% on mobile networks.
2. Prefetch & Lazy Load on Frontend
Don’t load everything upfront. In React, I lazy-loaded service detail pages, chat components, and admin charts using React.lazy() and Suspense. On Blade templates, I loaded some data only when the tab was active or user hovered.
Also, prefetch categories and filters on the homepage or splash screen while the user’s deciding what to click — this creates an illusion of speed.
3. Optimize Image Uploads & CDN Delivery
Service providers often upload poor-quality, uncompressed images — and that hurts UX.
- Used image compression on client-side (React:
browser-image-compression) - Uploaded via S3 or DigitalOcean Spaces with CDN caching
- Stored thumbnails and used WebP format wherever possible
In Laravel, I used Spatie Media Library to auto-generate responsive versions.
4. Background Jobs for Heavy Tasks
Email confirmations, invoice generation, and rating recalculations were moved to the background using:
- Node.js:
Bull+ Redis for job queues - Laravel: Native Queues with
php artisan queue:work
This reduced API response times and made the app feel faster, especially on booking flows.
5. Mobile UX Design Hacks
- Large tap areas and floating “Book Now” CTAs
- Inline date/time pickers for scheduling — no popups
- Chat interface mirrored WhatsApp layout — familiar patterns reduce onboarding friction
- Used
react-device-detectand Blade@mobiledirectives to adjust layouts for small screens
6. SEO + SSR (Server-Side Rendering)
Especially for marketplaces that want organic traffic, I added SSR to the React version using Next.js, and pre-rendered public pages like /services/:slug and /categories.
In Laravel, SEO tags were handled using spatie/laravel-seo and Blade directives.
Final Thoughts: Custom vs Clone – What’s the Right Move?
If you’re a founder or agency weighing whether to build your own Thumbtack-like platform from scratch or license a ready-made clone, here’s my honest take as someone who’s done both.
When Custom Development Makes Sense
Go custom if:
- You’re solving a very specific niche use case (e.g., hiring only licensed contractors in regulated markets)
- You have the budget and time to build something deeply unique
- Your team is technical and committed to long-term feature iterations
Custom builds give you total control, but they come with longer dev cycles, higher costs, and more risk — especially during early product-market fit.
When a Clone Script is the Smarter Move
Use a Thumbtack clone base if:
- You want to launch fast and validate your idea
- Your core business isn’t the tech — it’s the network, marketing, or local operations
- You need a solid foundation that’s flexible and upgradeable
Honestly, in most early-stage cases, starting with a proven base and customizing on top of it is the best move. It cuts out 80% of the groundwork — auth, bookings, chat, admin, payments — and lets you focus on your differentiators.
That’s where Miracuves’ Thumbtack Clone comes in.
Whether you want it in Node.js + React or PHP + Laravel, Miracuves gives you a professionally developed, battle-tested starting point. It’s modular, API-first, mobile-ready, and supports everything we just covered.
FAQ: Thumbtack Clone Development — What Founders Ask Most
1. How much does it cost to build an app like Thumbtack?
If you’re starting from scratch, expect to invest anywhere from $25,000 to $100,000+, depending on features, team location, and timeline. But with a customizable clone script like Miracuves’ solution, you can launch a full-featured MVP for a fraction of that — often under $10K, with the ability to scale and customize later.
2. What’s the difference between your JavaScript and PHP versions?
Both offer the same core features — user onboarding, listings, bookings, payments, messaging, admin dashboard — but the stack choice depends on your team and roadmap:
Node.js + React: Better for real-time apps, modern UI, mobile-first workflows
Laravel (PHP): Easier for teams used to LAMP stack, faster to deploy on shared hosting, and great built-in tooling
Both are secure, scalable, and production-ready.
3. Can I integrate local payment gateways (like Paytm, Razorpay, or Flutterwave)?
Yes. Both stacks are built with modular payment integrations. You can add or replace gateways like Stripe, Razorpay, Flutterwave, or PayPal based on your region — and we already provide starter modules for most major APIs.
4. Is it possible to scale this to millions of users later?
Absolutely. The database design, caching, job queueing, and Dockerization strategy we’ve implemented makes scaling straightforward. You’ll need to switch to a horizontally scalable setup (e.g., load balancers, separate DB instances, CDN) — but the core app won’t need rewrites.
5. Can I customize the app for niche use cases like pet care, tutoring, or home repairs only?
Yes — the architecture is designed to support both general and niche marketplaces. You can easily restrict categories, customize onboarding flows, or rename modules (e.g., “Book a Tutor” instead of “Hire a Pro”) without breaking anything. We’ve done this for several clients already.
Related Articles
- How to Build an App Like Astrotalk: Developer’s Full-Stack Guide
- How to Build an App Like UrbanClap: A Developer’s Deep-Dive
- How to Build an App Like Uber for Massage: Developer’s Guide


