


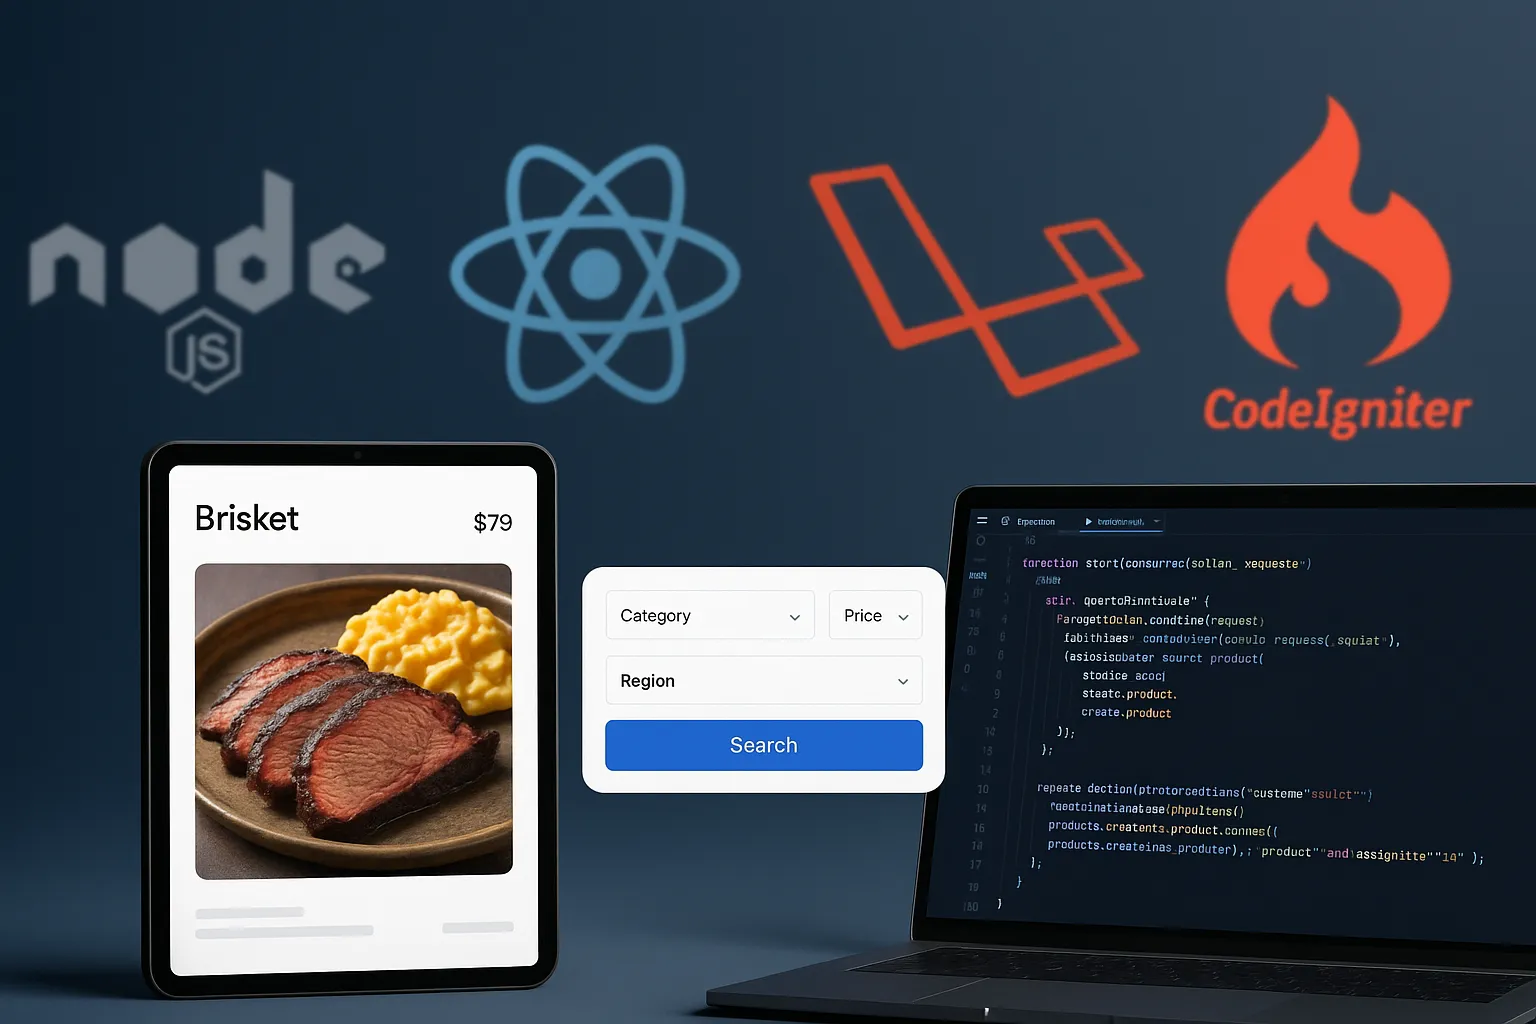
Launching a niche food delivery an App Like Goldbelly today is one of the most exciting ventures you can take on—especially if you’re catering to foodies who crave regional delicacies and artisan dishes delivered nationwide. Having built a Goldbelly clone app from scratch, I want to walk you through what it actually takes—from stack choices to database design to API logic and more.
This isn’t going to be a fluff piece. I’m going to take you through the real decisions, code structures, and frameworks I used—both in JavaScript (Node.js + React) and PHP (Laravel/CodeIgniter).
Goldbelly solved a brilliant problem—connecting customers with hard-to-find, iconic local foods from across the country. It’s not a basic food delivery app; it’s a curated gourmet food marketplace. Whether it’s a deep-dish pie from Chicago or a brisket from Austin, the appeal is emotional and geographic.
In a market where standard delivery apps are saturated, this type of niche, experience-based commerce is gaining momentum. If you’re a founder looking to tap into this high-value, long-tail segment—building a Goldbelly-style platform makes a ton of sense.
Choosing the Right Tech Stack: JavaScript vs PHP for an App Like Goldbelly
When I started architecting the app, the first decision was the stack. Should we go with modern JavaScript—Node.js for the backend, React for the frontend—or stick to PHP with Laravel or CodeIgniter for faster scaffolding and server-side rendering? I ended up building both prototypes so I could recommend the best fit to clients depending on their goals.
JavaScript Stack (Node.js + React)
Node.js shines when you want a highly interactive, API-driven platform. Since Goldbelly has dynamic search, live product updates, and complex cart workflows, the event-driven architecture in Node.js was a natural fit. Pairing it with React on the frontend allowed us to build a fast, mobile-first, responsive UI with components we could easily reuse across the platform. I used Express to define REST APIs, Mongoose with MongoDB for flexible schemas, and JWT for authentication. For payment flows, Stripe’s Node SDK handled customer subscriptions and one-time purchases easily. If your team is full-stack JavaScript, this stack is hard to beat.
PHP Stack (Laravel or CodeIgniter)
On the PHP side, Laravel is my go-to when working with structured content and CMS-style requirements. The beauty of Laravel is how quickly you can get up and running with artisan CLI, built-in auth scaffolding, Blade templating, and Eloquent ORM. For this version, I used Laravel with MySQL, integrating Stripe’s PHP SDK for payments and Laravel Passport for API authentication. I also built a second version using CodeIgniter for lightweight deployment in low-resource hosting environments. If your client needs rapid delivery, minimal DevOps, and familiar LAMP stack hosting—PHP is still a viable choice.
When to Choose What?
If you’re building for scale, planning mobile apps, or expecting high concurrency and interactive features (like live filters, user tracking, etc.)—JavaScript wins. If you’re working on a tight deadline, lower budget, or with agencies who prefer monolithic structures with easy hosting—PHP (Laravel) is extremely productive. Both stacks got the job done, but the decision really depends on the business context, team skills, and growth plans. Next, I’ll break down how I designed the database for both flexibility and speed.
Read More : Best Goldbelly Clone Scripts in 2025: Features & Pricing Compared
Database Design: Structuring for Flexibility and Growth
Designing the database for a Goldbelly-style marketplace isn’t just about storing products and users. You’re dealing with nested product variants, fulfillment options, vendor-specific delivery zones, and seasonal availability. The structure needs to be both scalable and flexible—especially if you plan to support third-party vendors uploading listings or syncing via APIs.
JavaScript Approach – MongoDB Schema with Mongoose
In the Node.js build, I used MongoDB with Mongoose for its dynamic schema capability. Here’s a simplified schema for the products collection:
const ProductSchema = new mongoose.Schema({
  name: String,
  slug: String,
  description: String,
  vendorId: mongoose.Schema.Types.ObjectId,
  categories: [String],
  variants: [{
    size: String,
    price: Number,
    availability: Boolean
  }],
  shippingZones: [String],
  media: [String],
  createdAt: { type: Date, default: Date.now }
});
The reason MongoDB worked well is because many listings have optional fields like delivery notes, custom packaging, or holiday-specific pricing. The nested variants array let us support multiple options (e.g. 2-pack, 4-pack) without needing separate tables.
PHP Approach – Relational with Laravel + MySQL
With Laravel, I went the normalized route using MySQL and Eloquent relationships. Here’s how the key tables looked:
products: base detailsproduct_variants: foreign key toproducts, stores size/pricevendors: merchant infoshipping_zones: pivot table linking vendors to delivery regionsmedia: polymorphic for images/videos
Here’s a quick example in Laravel migration syntax:
Schema::create('product_variants', function (Blueprint $table) {
  $table->id();
  $table->foreignId('product_id')->constrained();
  $table->string('size');
  $table->decimal('price', 8, 2);
  $table->boolean('availability')->default(true);
  $table->timestamps();
});
The benefit here is data integrity. Laravel’s migrations and foreign keys made it easy to enforce business rules, like “no orphaned variants” or “only active vendors can list products.” For admin-heavy platforms with tight control, MySQL with Laravel works great.
Notes on Scalability
Regardless of stack, I always indexed key fields like slug, vendorId, and categories for fast search. For the PHP version, I added caching on frequently queried listings using Laravel Cache. In MongoDB, I leaned on Redis for caching filtered product queries and homepage sections. The goal was simple—keep read times under 100ms for most views, even with thousands of listings.
Step-by-Step Guide: Hire the Best Goldbelly Clone Developer and Launch a Profitable Food Marketplace in 2025!
Key Modules and Features: Building the Core Experience
When cloning an app like Goldbelly, you’re not just creating an online store—you’re building a marketplace platform with complex modules for vendors, customers, operations, and admins. Let’s walk through the major modules I built and how they worked across both tech stacks.
1. Product Listing & Vendor Dashboard
JavaScript (Node.js + React): For the vendor interface, I used React with Formik and Yup for form handling and validation. Vendors could log in, create or edit product listings, upload media (using AWS S3 via signed URLs), and define shipping regions. On the backend, Express routes handled POST /products, PUT /products/:id, with JWT-based middleware to protect endpoints. Images were processed on the client and uploaded directly to S3 to reduce server load.
PHP (Laravel): In Laravel, the vendor dashboard was built using Blade templates with Livewire for real-time interactions. Laravel’s Request class made validation clean. File uploads went through Storage::disk('s3'), and I used Laravel MediaLibrary to associate media with product records. Auth was managed via guards (vendor vs admin), and routes were grouped with middleware accordingly.
2. Advanced Search & Filtering
Goldbelly thrives on discovery, so search had to be fast and flexible. Users filter by category, region, food type, occasion, and even delivery date.
JavaScript: I indexed common product fields in MongoDB and added ElasticSearch for fuzzy search and full-text matching. React’s frontend used useDebounce() to prevent excess API calls while typing. Search queries like /api/search?q=brisket®ion=texas&occasion=bbq hit a custom route that merged MongoDB and Elastic results.
PHP: In Laravel, I used Laravel Scout with Algolia for full-text search and Eloquent query scopes for filters. For example:
Product::search($term)->where('region', 'Texas')->whereHas('categories', function($q) {
  $q->where('name', 'BBQ');
});
Caching filtered results using Laravel’s remember method kept response times fast even on shared hosting.
3. Cart & Checkout Module
Both stacks needed logic for: add to cart, quantity updates, delivery window selection, and final checkout.
JavaScript: I stored cart items in localStorage and synced with backend sessions via /cart/save. Payment was done via Stripe Elements on the frontend, with POST /checkout triggering server-side Stripe sessions. For one-click reorders, I saved orderSnapshots in MongoDB.
PHP: Laravel used session-based cart management, with Eloquent models handling price calculations, stock checks, and taxes. I used Cashier for Stripe subscriptions and one-time charges, and added Razorpay support using custom drivers.
4. Admin Panel
Admins need control over vendors, listings, orders, users, and payouts.
JavaScript: I built an internal React app gated by JWT role-based access. Admins could approve vendors, feature products, manage delivery partners, and export reports. Backend routes had strict RBAC using middleware and ACL checks.
PHP: I used Laravel Nova for rapid admin interface creation. It let me manage relationships, analytics, and permissions with minimal custom code. Alternatively, when budget was tighter, I hand-rolled a Blade-based admin panel with pagination and role-specific views.
Summary of Key Modules
- Vendor Onboarding & Listing Management
- Search Filters & Location-Based Discovery
- Cart + Checkout (with multiple payment options)
- Admin Controls & Analytics
- Order Tracking and Fulfillment
- CMS for Content Pages (FAQs, Policies, etc.)
Every module was designed with scale, clarity, and separation of concerns in mind.
Read More : Reasons startup choose our Goldbelly clone over custom development
Data Handling: APIs vs Manual Listings
One of the biggest decisions in building a Goldbelly-style app is figuring out how you’ll populate the product catalog. Will you use third-party APIs (like Amadeus or Spoonacular for food data) or allow vendors and admins to manually upload content? I built support for both approaches so founders could choose based on their business model.
Third-Party API Integration
If you want to bootstrap with existing data—menus, food items, or even geo-tagged restaurants—you can pull from public APIs. While Goldbelly doesn’t use APIs like Skyscanner or Amadeus (those are more for travel), similar integrations can be imagined for food services. For demo purposes, I integrated Spoonacular (food database API) and Google Places API to pre-fill test listings.
JavaScript Example: Fetching External Food Data
const axios = require('axios');

async function fetchDishDetails(query) {
  const res = await axios.get(`https://api.spoonacular.com/recipes/complexSearch`, {
    params: {
      query,
      apiKey: process.env.SPOONACULAR_KEY
    }
  });
  return res.data.results;
}
PHP Example: External API with Guzzle
$client = new \GuzzleHttp\Client();
$response = $client->request('GET', 'https://api.spoonacular.com/recipes/complexSearch', [
  'query' => [
    'query' => $query,
    'apiKey' => env('SPOONACULAR_KEY')
  ]
]);
$data = json_decode($response->getBody()->getContents(), true);
These APIs were used during the seed phase of the platform to showcase listings and test user engagement before onboarding real vendors.
Manual Listing via Admin Panel
Once real vendors came on board, we moved to a fully manual system where listings were created via the vendor dashboard or admin backend.
JavaScript Flow: Vendors authenticated via JWT and used a React dashboard to create listings. On submission, product data was sent to POST /api/products and stored in MongoDB. Images were uploaded via S3 signed URLs to avoid server-side file processing.
PHP Flow: In Laravel, listings were created through form submissions validated via FormRequest classes. Admins could override product details, assign shipping regions, or feature products. All uploads were handled using Laravel Filesystem, and stored on S3 with fallbacks for local storage during development.
Hybrid Strategy
For many clients, we launched with 50–100 demo listings pulled via API, then gradually transitioned to vendor-driven listings through manual uploads. This allowed them to show a populated catalog from day one and onboard real sellers gradually. I also added CSV import/export features in both stacks to streamline bulk uploads for admins.
Your 2025 Goldbelly App Development Cost Guide – Full Breakdown of Features, Pricing, and Investment Insights!
API Integration: Endpoints, Logic, and Auth Across Stacks
A Goldbelly-style platform thrives on API interactions—everything from product searches to vendor dashboards to payment processing runs through endpoints. Whether you go JavaScript or PHP, designing secure, modular, and scalable APIs is crucial. I’ll walk you through how I approached this on both stacks.
JavaScript (Node.js + Express)
I followed a RESTful pattern using Express.js and JWT for authentication. All API routes were versioned (/api/v1/) to support future upgrades without breaking clients. Middleware handled role-based access (user, vendor, admin) and sanitized input.
Here are some key endpoints:
// Public routes
GET /api/v1/products
GET /api/v1/products/:slug
POST /api/v1/search

// Authenticated vendor routes
POST /api/v1/products
PUT /api/v1/products/:id
GET /api/v1/orders

// Admin-only
DELETE /api/v1/products/:id
POST /api/v1/vendors/approve

// Auth
POST /api/v1/auth/login
POST /api/v1/auth/register
POST /api/v1/auth/refresh-token
Middleware like verifyToken() wrapped protected routes and pulled role claims from the JWT. I also logged every request’s metadata (IP, user ID, user agent) to MongoDB for basic audit trails.
PHP (Laravel)
Laravel’s route definitions were organized by user roles and prefixed via groups. I used Laravel Passport for token-based API access and api.php for clean separation from web routes.
// routes/api.php
Route::prefix('v1')->group(function () {
  Route::get('products', [ProductController::class, 'index']);
  Route::get('products/{slug}', [ProductController::class, 'show']);

  Route::middleware(['auth:api', 'role:vendor'])->group(function () {
    Route::post('products', [ProductController::class, 'store']);
    Route::put('products/{id}', [ProductController::class, 'update']);
    Route::get('orders', [OrderController::class, 'vendorOrders']);
  });

  Route::middleware(['auth:api', 'role:admin'])->group(function () {
    Route::delete('products/{id}', [ProductController::class, 'destroy']);
    Route::post('vendors/approve', [VendorController::class, 'approve']);
  });
});
I also built a BaseAPIResponseTrait to standardize API outputs with consistent formatting (status, message, data). Laravel’s request validation made it easy to protect endpoints without cluttering controller logic.
Payment API Hooks
For both stacks, Stripe and Razorpay required webhook endpoints to confirm order status and trigger emails or inventory updates.
Node.js:
app.post('/api/v1/webhooks/stripe', express.raw({type: 'application/json'}), handleStripeWebhook);
Laravel:
Route::post('webhooks/stripe', [WebhookController::class, 'handleStripeWebhook']);
These hooks validated signatures using each provider’s secret, then looked up transactions in the database and updated order records.
Versioning & Error Handling
I wrapped all API logic with version prefixes to future-proof the app. Both stacks had centralized error handling—Node.js with custom errorHandler middleware, Laravel with Handler.php overrides to return JSON errors for all API routes.
Frontend & UI Structure: Designing for Experience and Speed
A platform like Goldbelly is heavily visual—users shop with their eyes first. That meant the UI had to load fast, be mobile-first, and support a wide range of layout needs like gift boxes, seasonal themes, and curated collections. I built frontends using both React (for JS stack) and Blade templates (for PHP stack) and optimized them for usability and conversion.
JavaScript Stack – React Frontend
For the Node.js version, I built the frontend with React, using React Router for navigation and Redux Toolkit for global state management (cart, auth, filters). Pages were structured as functional components, with Tailwind CSS used for styling. The layout used a persistent top nav, category filters, and infinite-scroll product grids.
- HomePage: Featured banner, curated categories, and bestsellers
- ProductPage: Image carousel, variant selection, delivery dates, and detailed description tabs
- SearchPage: Sidebar filters (occasion, cuisine, shipping zone), real-time updates with debounced input
- Cart & Checkout: Multi-step checkout with address validation, payment form, and summary
I heavily optimized images using Cloudinary for on-the-fly resizing and lazy-loaded product images using react-lazyload. Navigation was kept snappy with skeleton loaders and localStorage-backed cart sync.
PHP Stack – Blade Templates with Laravel
On the Laravel side, I built the frontend using Blade templates, keeping things component-driven using Laravel’s @component and @include directives. Tailwind CSS handled layout, and Alpine.js powered basic interactivity like tab toggles, modals, and dropdowns.
- Home.blade.php: Loaded featured sections via cached partials
- Product.blade.php: Included variant selector, shipping info, and trust badges
- Cart.blade.php: Session-based cart logic with CSRF-protected forms
- Checkout.blade.php: Stripe/Razorpay form integration and Laravel validation errors
Each page had mobile breakpoints carefully defined to ensure clean stacking of content. I avoided loading large JS libraries and kept Blade render times under 150ms by preloading essential data using with() in controllers and caching heavy queries using Laravel’s cache system.
UX Optimizations
Across both stacks, I added:
- Sticky add-to-cart buttons on mobile
- Quick-view modals for featured products
- Dynamic breadcrumbs based on category path
- Trust elements like vendor ratings, shipping badges, and delivery ETA labels
I also built custom 404 pages, skeleton loaders, and transition animations using Framer Motion (in React) or CSS animations (in Blade). The goal was to make the site feel fast and alive—even when loading data in the background.
Authentication & Payments: Security Meets Seamless Checkout
A smooth authentication system and a rock-solid payment flow are non-negotiables for any e-commerce app—especially one like a Goldbelly clone that handles high-value, perishable goods. I built both these layers with a focus on security, simplicity, and multi-role access, ensuring vendors, customers, and admins had tailored experiences.
Authentication in JavaScript (Node.js + JWT)
For the Node.js backend, I used JWT (JSON Web Tokens) for stateless authentication. On login, users received a token that was stored in HttpOnly cookies or localStorage (depending on the frontend strategy). Middleware like verifyToken() protected sensitive routes and decoded the user’s role (customer, vendor, admin) for RBAC.
- Login:
POST /api/v1/auth/loginwith email and password - Registration:
POST /api/v1/auth/registerfor customers,/register-vendorfor merchants - Token Refresh:
POST /api/v1/auth/refresh-tokenreturned new access tokens - Logout: Removed token from client and blacklisted server-side if needed
Password hashing was handled with bcrypt, and all login attempts were rate-limited via middleware to prevent brute-force attacks. Vendor accounts required admin approval before activation.
Authentication in PHP (Laravel + Passport)
In Laravel, I used Laravel Passport for full OAuth2-based API token authentication. For web routes, I used Laravel’s built-in session-based auth with guard separation (web for customers, vendor for merchants).
Auth::routes()handled customer login/registration- Custom routes and guards were created for vendor and admin portals
- Passwords were hashed using Laravel’s
Hash::make()and reset flows handled via default controllers
I also added must_approve checks in the login controller for vendors, ensuring only reviewed vendors could access the dashboard.
Payment Gateway Integration
Both builds supported Stripe and Razorpay, giving clients flexibility depending on region and fee structures. Payments included both one-time purchases and optional subscriptions (like gifting clubs).
Stripe with Node.js
Using the Stripe Node SDK, I built a custom checkout session like this:
const session = await stripe.checkout.sessions.create({
  payment_method_types: ['card'],
  line_items: cartItems.map(item => ({
    price_data: {
      currency: 'usd',
      product_data: {
        name: item.name
      },
      unit_amount: item.price * 100
    },
    quantity: item.quantity
  })),
  mode: 'payment',
  success_url: `${FRONTEND_URL}/success`,
  cancel_url: `${FRONTEND_URL}/cart`
});
The session ID was sent back to the frontend, which redirected the user to Stripe’s hosted checkout page. Webhooks were configured to listen for payment_intent.succeeded and update the order status accordingly.
Stripe with Laravel
In Laravel, I used Laravel Cashier for Stripe integration. Orders were created in the local DB first, and payment was processed via the Cashier controller, which wrapped Stripe logic behind Laravel-friendly methods. I also added custom webhook routes using Route::post('/webhooks/stripe', ...).
Razorpay for Indian Clients
For Razorpay, both versions used the respective SDKs. In Laravel, I added the Razorpay PHP SDK and verified payment signatures manually in the controller. In Node.js, I used the Razorpay Node SDK and validated x-razorpay-signature headers via middleware.
Checkout Flow UX
- Cart saved in local/session storage
- Delivery date picker with validation logic
- Address auto-fill using Google Places API
- Real-time total calculation including shipping
- Responsive, mobile-first design with focus states and error messages
In both builds, users were emailed invoices after checkout, and vendors received notifications for each order. Payments were linked to order records with clear status labels (paid, pending, refunded).
Read More :Goldbelly Marketing Strategy | Turning Cravings into Commerce
Testing & Deployment: From Local to Live the Right Way
Shipping a Goldbelly-style platform isn’t just about writing good code—it’s about making sure it runs reliably, scales smoothly, and survives edge cases. I implemented testing, CI/CD pipelines, and server setups to make deployment as predictable as development. Here’s how I handled it for both JavaScript and PHP builds.
JavaScript Stack (Node.js + React)
Testing:
I wrote backend tests using Jest and Supertest for API endpoint coverage. Core logic like cart calculations, product filtering, and auth flows were tested in isolation. For the React frontend, I used React Testing Library to test component interactions and loading states.
Example test for the product endpoint:
describe('GET /products', () => {
  it('should return product list', async () => {
    const res = await request(app).get('/api/v1/products');
    expect(res.statusCode).toBe(200);
    expect(res.body).toHaveProperty('data');
  });
});Deployment:
I used Docker to containerize both the backend and frontend. The Dockerfile defined Node app configs, and a multi-stage build was used to optimize the final image size. The entire app was deployed to DigitalOcean using PM2 for process management and Nginx as a reverse proxy.
The CI/CD pipeline was set up using GitHub Actions:
- On push to
main, tests ran automatically - If tests passed, a new Docker image was built and pushed
- SSH deploy scripts pulled the image and restarted PM2
Logs and health checks were monitored via PM2 Dashboard and alerts configured using Healthchecks.io.
PHP Stack (Laravel + Blade)
Testing:
For Laravel, I used PHPUnit for controller and model testing, focusing on:
- Product CRUD operations
- Cart logic
- Payment signature verification
- Auth route access per role
I also tested Blade components in isolation using Laravel Dusk to simulate real browser interactions for checkout, login, and vendor listing creation.
Example unit test:
public function test_product_can_be_created() {
  $response = $this->actingAs($vendor)->post('/products', [
    'name' => 'Test Dish',
    'price' => 100
  ]);
  $response->assertStatus(302);
  $this->assertDatabaseHas('products', ['name' => 'Test Dish']);
}Deployment:
Laravel was deployed on Apache/Nginx with Forge and Envoyer. I used:
- Supervisor for queue workers (emails, notifications)
- Nginx for SSL termination and caching static assets
- Laravel Horizon to monitor queues and jobs
- MySQL slow query log to fine-tune performance
Deployment was automated via GitHub hooks or manually triggered via Forge for staging/production environments. Cache and config were cleared with each deploy using php artisan optimize.
Environment Setup Tips
- Use
.env.staging,.env.production, and.env.localto isolate environments - Store secrets in Vault or encrypted
.envwith restricted access - Run database backups daily via cron jobs
- Set up auto-renewing SSL via Let’s Encrypt or Cloudflare
Both stacks were built with a “zero-downtime mindset,” ensuring blue-green deployments were possible when needed.
Read More : Goldbelly App Features You Should Know
Pro Tips: Lessons Learned, Hacks Applied, and What I’d Do Again
Every serious build teaches you something you didn’t expect. Whether you’re using JavaScript or PHP, launching a real-world Goldbelly clone brings out edge cases you only discover through users, vendors, or scale. Here are some of the most valuable takeaways I picked up along the way.
1. Speed First, Fancy Later
Don’t overengineer filters or search on day one. On the React build, I started with ElasticSearch but rolled back to indexed MongoDB queries for v1. Same with Laravel—Scout + Algolia was great, but Eloquent with smart indexing and caching was 80% as effective with zero cost.
2. Cache Everything You Can
In both stacks, I cached product listing pages, category filters, and home sections. On Node.js, I used Redis with expiry keys for each filter combination. On Laravel, I used the remember() cache method on queries and also cached full Blade partials. This reduced backend calls by 50% on peak traffic days.
3. Mobile-First is Non-Negotiable
Goldbelly shoppers are often browsing on phones. In React, I made heavy use of media queries with Tailwind and flex-wrap grids. In Laravel, I used Tailwind + Alpine to collapse menus, convert modals into full-screen mobile sheets, and optimize tap targets. Test everything on low-end Android devices too, not just iPhones.
4. Simplify Your Vendor Flows
Vendors aren’t coders. Avoid multi-step listing forms. I created a single-page listing interface with autosave drafts and live image preview. For Laravel, I used Livewire to give inline feedback without needing page reloads. For React, Formik + Yup did the trick, paired with autosave debounce logic.
5. Webhooks Will Fail—Plan for It
Stripe and Razorpay webhooks can fail or retry. In both stacks, I logged all incoming webhook payloads to a separate webhook_logs table or collection. This gave me a clean retry mechanism without relying on the provider’s retry logic alone.
6. Use Feature Flags for Fast Iteration
I implemented a basic feature flag system in both builds. In Laravel, it was a middleware reading a flags table. In Node.js, a middleware checked flags in Redis. This let me launch vendor uploads, cart logic changes, and payment method A/B tests without redeploying.
7. Clean URLs and Slugs Matter
I created slugs from product titles during creation using slugify() in Node or Str::slug() in Laravel. These slugs powered user-friendly URLs and also became SEO signals out of the box.
8. Don’t Ignore the Admin Experience
Your ops team will live in this dashboard. I spent extra time building filters, export options, and soft-delete logic into the admin tools. On Laravel, Nova sped this up. On React, I reused frontend UI kits to maintain parity.
Each of these tips came from something breaking, a user complaining, or an investor asking for a demo in 5 minutes. Take shortcuts where they’re safe—but invest in things that make people come back.
Final Thoughts: When to Build Custom vs Use a Ready-Made Clone
After building a Goldbelly-style platform from scratch in both Node.js and Laravel, I can say with confidence—it’s entirely doable. But should every founder go this route? Not always. Here’s how I think about the trade-offs.
Go Custom If…
- You have a technical co-founder or dev team ready to commit full-time
- Your marketplace needs very specific workflows (e.g., gift subscriptions, timed delivery slots, complex commissions)
- You plan to integrate deep logistics, loyalty, or vendor scoring algorithms
- Your UX needs to be hyper-unique or brand-first (especially for high-end food niches)
In this case, building from scratch gives you control and future-proofing—but expect to spend 3–6 months minimum before you’re launch-ready.
Go Clone-Based If…
- You want to validate the market with minimal upfront risk
- You need to launch within 4–8 weeks
- Your business model is close to Goldbelly’s and doesn’t need major customizations
- You’re focused more on sales, onboarding, and partnerships than backend engineering
This is where a ready-made clone from Miracuves shines. It already includes core features like vendor dashboards, product listings, checkout, payments, admin controls, and more—plus you get a flexible choice of stack (PHP or JavaScript) based on your long-term vision.
I’ve built both from scratch and adapted Miracuves’ clone scripts—and for most founders, starting with a clone and customizing incrementally is faster, smarter, and cheaper. It gets you to revenue without burning six figures on dev costs.
If you’re serious about launching a gourmet food marketplace like Goldbelly, check out the Goldbelly Clone by Miracuves. It gives you the engine so you can focus on driving growth.
FAQs: Goldbelly Clone Development Questions Answered
1. Can I start with a clone and still customize it heavily later?
Absolutely. A good clone script is modular and extensible. Miracuves’ Goldbelly clone, for example, gives you a solid foundation—React or Blade frontend, API-layered backend, role-based access—but you can still customize UI, workflows, or integrate new features (like gifting or subscriptions) down the road. I’ve done this with multiple startups who outgrew their MVP and scaled from the same codebase.
2. Which stack is better for long-term scalability—Node.js or Laravel?
If you expect high traffic, real-time data syncing, and eventual mobile apps—Node.js wins for event-driven scalability. If you want quick development cycles, a robust admin panel, and easier hosting options, Laravel is fantastic. Both can scale, but your team’s familiarity and infrastructure preferences should guide the choice.
3. How do I manage listings if I don’t have vendors yet?
Seed the platform with demo listings using public APIs or manual uploads. You can use CSV import tools, fake data generators, or even repurpose real products (with permission) to simulate the full experience. Then transition to vendor onboarding later using the built-in dashboard.
4. What are the must-have features I shouldn’t skip at launch?
Keep it lean but include:
Mobile-optimized product discovery
Secure cart and checkout flow
Admin approval for vendors
Basic order tracking and customer communication
Stripe or Razorpay integration
Search filters (region, food type, occasion)
These form the core loop that gets users from browse → buy → repeat.
5. How long does it take to launch using the Miracuves Goldbelly Clone?
If you use the clone as-is with minimal branding changes, you can go live in 2–3 weeks. Add 1–2 weeks more if you need custom features, integrations, or a native app layer. This is far faster than building from scratch, which often takes 3–6 months even with a full team.
Related Articles


